Device and brief description
The steamer (a well-established tracing paper from the English language) or steamer was invented back in the 40s of the last century. However, for a long time it was used mainly for highly specialized tasks before manufacturers saw the opportunity to use it in everyday life.
Steamer was invented back in the 40s of the last century.
Today this device has a fairly simple design, which ensures high reliability. A typical household steamer consists of:
- Water storage containers.
- Heating element.
- Evaporator for supplying steam: remote or rigidly built into the housing.
- Hose (for stationary devices).
- Attachments for various types of fabrics and ironing modes.
Typically, a steamer has several attachments for different types of fabrics.
Some types of devices can be equipped with a clothes hanger, a lint brush and a protective mitten.
Note! Recently, the opinion has spread that a device such as a clothes steamer can be made with your own hands, for example, from a plug-in steam generator with an iron. Nevertheless, such an imitation is still not a complete replacement for a steamer.
It is not always possible to replace a steamer with an iron.
Principle of operation
The operation of any steamer is based on the principle of heating water to a boiling state and supplying the resulting steam outside using small nozzles located on the plane of the evaporator. Steam can be supplied by gravity, as a result of the formation of excess pressure, or using a special pump. In the latter case, the device's performance increases dramatically.
The device operates on the principle of supplying steam using boiling water.
Straightening of clothes occurs due to physical processes similar to those that occur when ironing with a regular iron. However, the steam effect allows for more uniform heating of fabric fibers, especially in heavily wrinkled or hard-to-reach places. Therefore, with proper understanding of how to steam things, you can quickly tidy up even the most complexly cut clothes.
Thanks to the steam effect, you can straighten even hard-to-reach places.
How to steam clothes using a clothes steamer
You've probably heard about the benefits of steamers. They are convenient, effective, help save time and steam things to perfection. It’s unfair, but there is practically no information on the Internet about how to properly use this modern device, how to properly steam different types of fabric, and what tricks will help make a clothing steamer as effective as possible. All articles, reviews and useful tips are written about irons. We have been working with steamers for more than 10 years and are ready to share our experience. Preparing for work The first thing you need to do before turning on the device is to pour water into a special compartment or into the steamer boiler. We recommend using distilled or at least filtered water. This condition is especially important for regions with high water hardness. If you use hard tap water, we predict that the device will soon fail and you will have to take it to a service center. Next step: turn on the device and wait a while. The iron should warm up. As soon as steam begins to escape from the special holes, you can begin to work. How to prepare items for steaming
If you have a manual model, then before steaming the clothes can be placed on a regular hanger. If you are the owner of a floor-standing model, then use a special rack with a hanger. The hangers will comfortably accommodate outerwear and shirts, T-shirts and T-shirts, evening dresses and jackets. To secure trousers, jeans and skirts, floor-standing models usually have special clips that are fixed at different distances.
Steaming process Using a classic shirt as an example, let's look at how to steam a cotton product correctly and as efficiently as possible. Let's divide this process into 4 simple steps: Step 1 Place the shirt on a hanger. Step 2 Fill the special compartment with distilled (or filtered) water, then turn on the device. Step 3 Wait for steam to form and then start working. To get your shirt in order as quickly as possible, you need to lightly stretch the fabric and press the iron against it. Thus, the product is not only steamed, but also ironed with the heated sole of the iron.
Make the most of all the device's capabilities. When steaming a collar or cuffs, take a special board (it is usually included in the kit). As a rule, this accessory has a triangular cutout, thanks to which the collar is comfortably placed on a hard surface. The other side of the board is ideal for steaming pockets, cuffs and other small parts.
If the product has difficult areas (collar, pockets, cuffs, ruffles, fabric between buttons or decorative stones), then simply attach a board to this place on one side and run the iron over the fabric on the other side. This way you will achieve the perfect result.
Step 4 Turn off the steamer and let the shirt hang on the hanger for a couple more minutes. As you can see, there is nothing complicated in the steaming process. You need to know a few tricks that will help you quickly and efficiently put things in order. We recommend watching a useful video from a personal stylist. You will learn several life hacks and also receive professional tips on using this device.
Steaming completely different products will follow the same principle. The only difference will be in time (steaming rough or overdried fabric takes longer). We conducted an experiment: using the simplest model MIE Gianna V, we steamed several items from different types of fabric. We measured the time during which the item takes on a neat appearance. We also recorded how many minutes you need to steam your clothes to make them look perfect. We summarized all the results with notes and tips in a table:
| Product type | Steaming time | Adviсe |
| Cotton shirt | Neat look – 4 minutes. Ideal look – 6 minutes. It is worth noting that if you have already put on a shirt and just want to freshen it up, then you will only need 2-3 minutes. During this time, all odors will disappear, and the product will take on a fresh look. | When steaming a shirt, pull the fabric down and the sleeves slightly to the side. Press the iron against the fabric. Use accessories to carefully press cuffs, pockets, collar and button spacing. |
| Tweed coat | A neat look – 7 minutes. An ideal look – 10 minutes. You can steam outerwear even from the most delicate fabrics. During the warm season, winter clothes have time to absorb odors and take on the appearance of a stale product. This situation can be easily corrected with a steamer: the steam will rid the item of odors, refresh the color of the fabric and straighten its fibers. | While steaming, stretch the fabric and press the iron against the item. Use a special brush for outerwear. With its help you will remove dirt and dust from the fabric. |
| Jeans | Neat look – 4 minutes. Ideal look – 6 minutes. | This time was spent steaming overdried and heavily wrinkled jeans. The steamer took longer to smooth out dense fabric with strong creases. Regular jeans could be straightened in 3 minutes. As you already understood, stretch the fabric and iron it. Use a special board to thoroughly steam your pockets. Spend more time on places that are decorated with stones or rhinestones. |
| Silk evening dress | Neat look – 3 minutes. Ideal look – 5 minutes. | Secure sliding fabrics with special clamps. This will make the steaming process easier and improve the result. Continue to stretch the fabric, but keep the iron at a short distance. If you need to steam a delicate item (made of silk, wool, knitwear), then do not touch the sole of the iron to the surface of the fabric. To straighten the fibers of a lightweight material, exposure to one steam is sufficient. This steaming guarantees a professional result and eliminates the possibility of burning the dress. |
| Curtains | Neat look – 8 minutes. Ideal look – 10 minutes. | Steaming curtains is a great alternative to washing them. The steam will refresh the curtains, remove dust from the fabric and straighten the fabric. We steamed heavy shade curtains. So I had to spend 10 minutes on them. Steaming thin tulle took half as much time. The steamer is ideal for smoothing curtains. Firstly, there is no need to try to hang the curtains somewhere, since they are already conveniently located on the curtain. Secondly, the steam penetrates the fibers of the fabric, smoothes it and does not leave any creases or shine. Carefully study what material your curtains are made of and follow the recommendations for maintaining temperature conditions. We recommend that you start steaming very thin fabrics in an inconspicuous area. |
| Stuffed Toys | Neat look – 1 minute. Ideal look – 2 minutes. | Even if soft toys look good, we recommend steaming them once a week. This will remove dust and disinfect them. Just run the steam iron over the entire surface of the toy several times. |
Here is another very useful video. Stylist Lina Grata answers questions from her subscribers and tells how to steam different types of fabric.
There are people who buy a device and try to steam clothes with it, but do it incorrectly. As a result, the result turns out to be unsatisfactory, and the steamer is returned to the store. There are buyers who are satisfied with the device, but do not use it to the maximum. This article is written to make your home assistant as effective as possible. Steam with pleasure and effectively!
Types of household steamers
Despite the abundance of models sold and manufacturing companies, there are only two main types of household steamers:
Handheld or portable
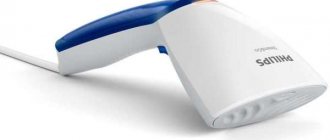
Its main advantage is the price. Usually these are small, compact, travel-size devices that allow you to quickly get your clothes in order. Due to their design features, they are unsuitable for long-term use, as they provide low steam intensity. Sometimes they are found in the “electric kettle” version, which really allows you to use the device exclusively for this purpose.
A handheld steamer is a small, compact device.
Stationary or vertical
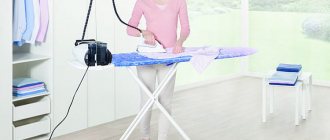
More powerful and more productive devices. They are distinguished by the presence of a steam supply hose, which makes them suitable for ironing a wide variety of products. Since a floor-mounted steamer can be used for up to half an hour, it is especially effective when ironing large items, such as curtains or suits. Also included in the package is a vertical rack with a hanger, designed for convenient placement of outerwear.
The stationary steamer kit includes a hose and a stand for ironing things.
Additional Information! In pursuit of customers, many manufacturers provide their devices with various specific functions.
Some steamers have additional functions.
For example, Philips is known for its ability to carry out antibacterial treatment, Tefal for its very good ergonomics and quick preparation for work, and devices from Domena allow adding water during operation.
Using Phillips you can carry out antibacterial treatment.
How to iron with a steamer correctly
Even those who don’t like ironing things at all will like the steam tool. Before ironing, be sure to wear an apron and gloves (fabric) for safety.
Do not direct steam towards yourself, children, pets or indoor flowers. If this is your first time picking up a steam cleaner, practice on old items first.
- Assemble the device, install the correct attachment that fits the product. Pour warm water into the reservoir and add a few drops of fabric conditioner. Shake the tank lightly.
- Then plug in the appliance and heat it up for 2-3 minutes (depending on the size of the tank). If the device is battery-powered, also turn it on and wait until the indicator lights up.
How to iron with a steamer correctly
- Then put on comfortable gloves before handling the device. Press the steam button and check the jet to see how intense it is. If steam comes out of all holes, the device is ready for use.
- Move the steamer handle from top to bottom over the product several times. The distance between the tool and the fabric should be at least 10 cm. If you have a powerful device, just swipe it a few times and the fabric will immediately smooth out. Pull the product by hand if it is very wrinkled.
After operation, turn off the device and drain the remaining water from the tank. Wipe the nozzles with a soft cloth, and also wipe the tank dry. If you clean it every time, plaque will not accumulate, and the equipment will serve you for a long time.
What can you “iron” with a steamer?
Despite all the features, benefits and understanding of how to properly steam things, these devices do not do an equally good job of ironing different types of fabrics. However, they can show good efficiency when ironing the following products:
- Delicate things. It is impossible to damage synthetic and thin natural fabrics.
- Clothes with decoration. Lace, frills, rhinestones and other additional elements are not an obstacle to steam, unlike an iron.
- Outerwear: fur coats, jackets, suits with thick lining, jackets.
- Curtains and drapes. You can iron directly on the hanger without removing it!
How to properly use a vertical steamer to iron clothes?
How to properly use a vertical steamer to iron clothes?
A vertical or floor-mounted steamer is usually used in the professional field: textile workshops, shops, tailoring salons, and so on. How to properly use a vertical steamer to iron clothes? This type of device requires preliminary assembly, unlike a manual device. Here's what you should do:
- Place the telescopic holder in place and secure it to the body.
- Pull the elbows of this holder to their full length and secure with clamps.
- Hang the working handle on a special hook.
- Connect the hose to the steam outlet on the housing.
Now follow these steps:
- Pour water into a special container.
- Connect the device to the mains or turn on the battery power.
- Then the light on the indicator should light up. If the device is ready for operation, the red indicator will light up.
- Check the device for readiness by turning on the steam supply. If testing is successful, then work can begin.
Vertical steamers usually have a steam cleaner function. With their help, you can clean the surface of facing tiles in the kitchen or bathroom, disinfect and remove dirt from pillows and mattresses, clean the room or remove dust from children's toys.
How to use a handheld clothing steamer
It should be understood that caring for things using such devices requires an understanding of the principle of operation, mastering certain techniques and differs from classic ironing. For example, when processing delicate items, you should not “crawl” the evaporator over the clothes - there should be a small gap between the fabric and the nozzles (1-2 cm, selected experimentally), while outerwear needs deep steaming and it is appropriate to apply it tightly here. evaporator.
Manual steaming has its own rules of use.
Preparation
Before turning on the device, you need to pour water into a special container, hang clothes on hangers or a hanger included in the kit, and turn on the device. After which you need to wait a little, since heating takes some time (usually 40-50 seconds). As soon as steam comes out of the nozzles, you can start ironing.
Preparing for steaming does not take much time.
Steaming
The steaming process itself is relatively simple - you need to install the evaporator over a wrinkled area of fabric and use gentle upward movements to smooth out the wrinkles. Since you need to steam things in a vertical position, in order to smooth out, for example, the bottom of a shirt, you should hold it by the edge with one hand and walk along the stretched surface several times.
Things need to be steamed in a vertical position.
Sometimes you have to support the product from the other side. To do this, you can use a special protective mitten, which is often included in the kit. Or use a regular oven mitt covered with aluminum foil. The sleeves and collar are smoothed using special heat-resistant supports. There is a clamp attachment to straighten the edges.
Sometimes something needs to be held from the back.
Final touches
Upon completion of the work, it is recommended not to touch the items for some time - they need to dry, since the steam, although slightly, still moisturizes the fabric. You can now turn off the device. In this case, you should also wait until the water from the nozzles evaporates and the heater cools down.
After completing the process, the item must be allowed to cool.
Important! Before using it for the first time, it makes sense to test the operation of the device on an old shirt or an unnecessary piece of fabric.
How to use
There are different steaming methods for different items and fabrics.
- Bed linen will be smoothed out better if you fold it in a pile and set the steamer to a more powerful setting.
- To iron the curtains, you need to spend up to 30 minutes without removing them from the curtain rod. Pulling the edge of the curtain from top to bottom, we run the device and smooth out creases, drapery and fabric.
- Thin fabrics - silk, guipure, organza are ironed in a gentle mode, reducing the steam supply on the steamer. The iron is kept at a short distance so as not to leave stains and streaks from the steam.
- Cotton shirts and T-shirts take longer to process. To properly iron the neckline, sleeves and cuffs, you need to place a board on the back side.
- It takes 15 minutes to process denim items. The steamer is kept close to the fabric and removes dry and problem areas. The device must be turned on to maximum mode.
- After steam treatment, you cannot immediately put things away in the wardrobe, as moisture may remain on the clothes.
- Pants with creases are hung upside down on a rack and secured with clips. In this case, the steam supply mode is set depending on the type of fabric.
How to use a steamer: safety rules
Like any household appliance, it is also necessary to adhere to established safety standards. In addition to the risk of electric shock, if used incorrectly, there is a risk of burns from hot steam. To avoid this, you must follow these simple rules:
- Do not use the appliance if it shows signs of damage to the electrical cord, evaporator or hose.
- When working, make sure that the steam jet is always directed away from you.
- Make sure that the power cable does not come into contact with hot surfaces of the steam generator.
- Do not point the vaporizer at pets!
When using a steamer, you must follow safety precautions.
How to properly use an iron to steam clothes?
How to properly use an iron to steam clothes?
Using a regular iron is quite a tedious task, especially if you need to iron a large amount of linen or clothing. Using a steamer makes this task easier and helps you deal with it quickly and easily. How to properly use an iron to steam clothes? Rules:
- Move the iron from top to bottom.
- Gently stretch the fabric so that all folds and creases are straightened out.
- It is enough to carry out one area 2-3 times. The surface will become even and smooth.
- If bubbling sounds appear, do not be alarmed - this is boiling water.
- Before starting the ironing process, place the item on special hangers.
- Select the mode that matches the type of material of the product. This function is available in both vertical and manual models.
Then proceed depending on the specifics of your wardrobe.
When does steaming not give the expected effect?
Despite the widely advertised effectiveness and ease of ironing, the result may not live up to expectations. Even if you fully follow the instructions and understand how to use a handheld clothing steamer. Unfortunately, this is the case unless you consider the following:
- Dense and heavy fabrics may give unsatisfactory results due to the properties of the material itself (you need to try it in each specific case).
- The steamer cannot remove stains.
- Not intended for disinfection.
- Not intended for flat work.
- A stationary device may have height restrictions on its working area.
- Even the most sophisticated steamer is not able to completely replace an iron.
In some cases, steaming may not give the expected effect.
Storage and care
Here you should adhere to the general rules regarding the operation of household appliances: be careful when working, perform operations strictly following the instructions and recommendations of the manufacturer, do not use the device for other purposes.
The device must be used in accordance with certain rules.
Before steaming things, you need to make sure that the water container does not leak, and that the water itself is free of impurities and does not contain mechanical particles. After use, it is recommended to dry the container every time, and also descale it once or twice a year (depending on the quality of the water). This is usually done with a solution of citric acid.
The device requires some care.
Iron vs steamer: main differences
Each of these devices has its own strengths and weaknesses. Even though each of them is designed to perform the same task, their applications still differ. The main advantages of the iron include:
- Ability to make arrows (the steamer can only point existing ones).
- Ability to work in a horizontal position.
- Due to the physical properties of some fabrics, the use of an iron is more effective, since the heating temperature of the sole is much higher.
Sometimes a steamer cannot completely replace an iron.
Thus, it becomes clear that an ordinary household steamer (albeit a multifunctional one) is an exclusively niche device designed to perform a specific number of tasks. This in no way reduces its effectiveness, since using a steamer is much easier than using an iron, especially when ironing items with a large surface.
A steamer has an advantage when you need to iron a product with a large surface.
However, you can expect maximum returns only if you use both devices correctly. Only under this condition can you really forget about the problem of ironing forever.
Five ways to steam
For steaming, manufacturers of household appliances offer special devices:
- iron with steamer,
- iron with steam generator,
- vertical steamer,
- Hand steamer,
- steam cleaner with clothes attachment.
An iron with a steamer is the simplest, classic option.
Fill the reservoir located in the iron body with water, set the appropriate mode, press the button - the steam starts. You can iron and steam at the same time.
An iron with a steam generator is a more advanced option. The set includes an iron and a stainless steel boiler, connected to each other by a heat-resistant silicone hose.
The heating element boils water inside the boiler, resulting in steam. When you press a button located on the handle of the iron, steam from the boiler is supplied through the hose to the ironing zone under pressure. In addition, there is a control panel on the steam generator. The functions of steam generators of different models and manufacturers may differ, so before you start ironing, read the instructions for the device.
How to iron with a steamer: video
Hand steamers come in two types: a steam brush and an electric kettle. As they say, it's better to see once:
Video test drive of the Steam Brush + how to use the steamer
Video presentation of the kettle steamer
A vertical steamer is designed exclusively for steaming items in a vertical position. It turns out that this method of steaming clothes was used back in the USSR.
Today the device is more advanced and multifunctional. Outwardly, it resembles a vacuum cleaner, and the principle of its operation is identical, only the steamer does not suck, but rather throws out its contents - steam.
Of all its counterparts, the vertical steamer is the most complex device. Therefore, let's take a closer look at how to iron with a vertical steamer.
The purpose of a steam cleaner is mainly to clean the house and clean a wide variety of surfaces.
The device also comes with a nozzle for steaming clothes. A steam cleaner with a special attachment can smooth out wrinkles, refresh clothes, and eliminate unpleasant odors.
Which is better – a steamer or an iron – is a controversial issue. In my search for an answer, I came across descriptions of battles, duels, and test drives of these devices. Here is one of them:

