Cable brands, power ratings and cross-sections
Modern washing machines consume a lot of power, but manufacturers are trying to reduce this figure as much as possible. The average consumption level reaches 2500 W.
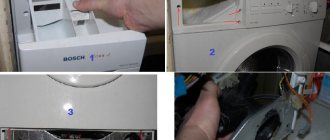
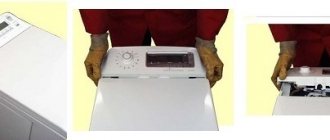
On the back of the device you can easily see what characteristics it has in this regard. The information is often contained in accompanying documents. To determine the cable cross-section, you should use a special table. They are located on specialized sites.
In practice, it is prohibited to use wires for which the following designations are used:
- PUNP.
- APUNP.
If the apartment is equipped only with old two-wire wiring, it is replaced with a three-wire analogue.
The copper three-wire type of wiring is most suitable for making connections. The use of protective additional devices is a mandatory requirement; such connection rules apply under any circumstances.
When a suitable section has been selected, you can safely go to the store to purchase a product with suitable characteristics. The main thing is to choose only manufacturers with a well-deserved reputation.
Connecting the washing machine to the sewer
The connection is made depending on the room in which the washing machine is located and how far the sewage system is located from it.
The general principle is this. A washing machine located in the kitchen is connected to the kitchen sink drain; if the machine is installed in the bathroom, then it is connected to either the bathtub drain or the sink drain. When placing the washing machine in other rooms, they usually look for the drain closest to the machine and connect it to it.
Sometimes, to simplify the work, the drain hose is not connected to the sewer at all, but is simply brought into the bathtub, toilet or sink while the washing machine is running.
This method is quite applicable, but in this case there is always the possibility of either tipping over such a hose, or forgetting to direct it to the drainage device altogether.
It’s safer to connect to the sewer. To do this, you will need to purchase a siphon (for example, a bottle type), which can be conveniently connected to the sewer outlet pipe through a tee. A drain hose is connected to the siphon.
Connect to an outlet
The socket must be waterproof if it is involved in the connection. Both the plug and the socket must meet modern requirements in this area. Connection diagrams are easy to find on specialized portals.
The main thing is that the degree of protection of the outlets is high enough. It is permissible to choose the same devices that are used when connecting pumps to the electrical network.
Connecting the washing machine to the mains
Washing machines are active consumers of electricity. The power consumption of such machines lies in the range of 1500-2200 W. It turns out that for normal operation of the machine from a 220 V network, a current of approximately 8-10 A will be required.
Accordingly, such a machine can be connected in an apartment only if the apartment has reliable wiring designed for a load of 16 A.
If the wiring is weak, then it is better to connect a separate power cable (cross-section from 2.5 mm or more, material - copper) to the washing machine directly from the access electrical panel - this is the simplest and fastest option, otherwise during washing the wiring ( for example, aluminum) will heat up, which may lead to a fire.
In the case of connecting a separate cable, you will need a separate outlet, which is usually located in the immediate vicinity of the washing machine in such a way that you can freely connect the machine’s power cable.
If old wiring is used, then you can either use a nearby outlet (if there is one) or equip a new one, especially for the washing machine - it all depends on the layout, load of outlets and convenience.
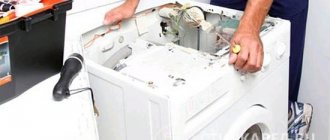
Carrying out electrical communications for washing machines
Let's consider existing high-quality solutions for this problem. The first thing to do is to run a separate cable with the appropriate cross-section directly from the distribution board. The circuit also includes a circuit breaker and grounding, an emergency shutdown device.
The option when they are connected to an outlet for an electric stove is quite acceptable. Its indicators should be sufficient to cope with the current loads. The three-core wire is removed from the outlet.
If wires made of different metals are used, they are connected with special terminals. Twisting is not permitted.
As the standard connection diagram says, then work proceeds with the following components:
- Machine.
- Emergency shutdown device.
- Ground wire.
The three cores of this wire should then converge inside one Euro socket. It would be good if it had a ceramic base. The main thing is that you can connect the ground wire yourself.
Wires should be hidden as much as possible inside special channels. The automatic switch and emergency shutdown device are placed in plastic and aluminum boxes.
Such solutions have their advantages:
- Attractive appearance.
- Less chance of wires coming into contact with moisture.
If you use the machine correctly, equipped with an emergency shutdown system, then the classic circuit can be simplified. But there are not very many really high-quality machines being produced on our market yet.
Particular attention is paid to the outlet to which the washing machine is directly connected. The main thing is to choose high-quality products that provide maximum protection. At the next stage there is a connection to the water supply and sewerage system.
Connecting the washing machine to the water supply
If you can still do without a permanent connection to the sewer, then a connection to the water supply is mandatory for an automatic machine. Always connect to a cold water pipeline.
The connection diagram is essentially the same everywhere, although it may vary slightly depending on the location of the washing machine.
Let's consider the most common option with the location of the washing machine in the bathroom and the connection in the toilet to the outlet of the cold water pipeline leading to the toilet flush cistern.
The very first thing we do is close the shut-off valve on the cold water pipeline coming from the riser. Next, unscrew the flexible plumbing hose from the pipe outlet that feeds the toilet flush tank, without touching the flush tank itself.
Next, install a ball valve with a 1/2-inch thread on the outlet (usually above the valve on the outlet, if present). The ball valve will be used to supply (start) water to the washing machine.
Ball valve
A plumbing hose leading to the toilet cistern is attached to the ball valve using a coupling. Now all that remains is to connect the hose leading to the washing machine to the ball valve.
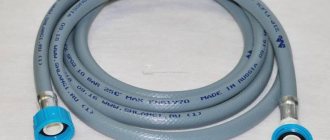
If the toilet and bathroom are shared, you just need to buy in the store a rubber hose with couplings for 1/2-inch threads, a length that provides a connection between the washing machine and the ball valve with a reserve.
A more complex option if the toilet and bathroom are separate rooms. In this case, you need to think about running the hose from the toilet to the bathroom.
The most common case is wiring directly through the wall between the toilet and the bathroom. First you need to make a hole in the wall (usually at a height of about 200-300 mm from the floor) with a diameter of approximately 30-35 mm.
Usually the partition between the bathroom and the toilet is not concrete, but one brick thick, so there will be no problems with punching a hole. All you need is a hammer drill set to hammer drilling mode and a drill.
After the hole is made, a metal or plastic tube should be inserted into it with a length slightly exceeding the width of the partition - 300-330 mm with 1/2 inch threads on both ends for connecting hose couplings to them.
It is advisable to cement the pipe so that it does not move or jump out of the passage in the partition.
Next, the store purchases two rubber hoses of a length that ensures free connection of one hose to the inlet pipe of the washing machine and the end of the pipe in the partition - for the bathroom, and the other - to the other end of the pipe in the partition and the ball valve - in the toilet.
We provide protection against failures
High-quality grounding is the first step towards forgetting about most problems. But only recently have people begun to think about proper grounding for sockets that are supplied with devices.
The actions are described as follows:
- We bring out a wire that is intended for grounding to the desired wall of the house. The end of the wire should reach the foundation.
- A piece of reinforcement is driven into the ground to a depth of approximately 2 meters. The tip should stick out on the surface, about 30 centimeters.
- The ends of the wire must be completely free of insulation. Protruding ends need to be removed from dirt and rust. The exposed part of the wire must be tightly wrapped around the fittings. The connection can be secured with a small amount of cold welding to make everything more secure.
- The connection between the fittings and the wires is carefully wrapped with electrical tape. A piece of rubber hose of the appropriate diameter is placed on top of the fittings.
- Preparation of proper grounding ends here. Now the wire and socket connect without problems.
Additional tips from experts
Connecting a washing machine to all communications is a problem with many solutions. But not all of them are correct. Some, on the contrary, only accelerate the process of natural wear and tear. Moreover, they negatively affect the health of the owners.
Therefore, it is worth considering the following nuances when carrying out work:
- Grounding contacts should never be connected to batteries or gas and water supply lines.
- You can use not only classic fumlenta, but also similar materials such as flax and paste. They cope with blocking leaks no less effectively.
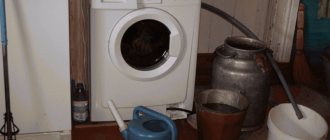
- Washing machines can be connected not only to the central water supply. The connection is also permissible with ordinary barrels filled with water. It is enough to position the tank so that it is at least 4 meters above the level of the equipment itself. A distance of 1 meter gives a pressure of 0.1 atmosphere. For the machine to function even without a pump, 0.4 atmospheres will be enough. This is a good option for private houses and summer cottages, where there is no running water at all, or it cannot boast of stability.
- The body of the device is set based on the use of a building level. The causes of vibration are the slightest distortions.
- You definitely shouldn’t put pieces of rubber or linoleum under the legs. Only unscrewing or twisting the legs themselves is used to correctly adjust the height. The vibration of equipment during centrifuge operation may be affected by the presence of substrates. Adjusting the feet helps even if the floor itself is the cause of the problem.
- You shouldn't throw away the transport bolts; they may still be useful later.
- It often happens that hoses fall out of the bathroom when a temporary drain is installed. It is better to purchase a new high-quality hose with suitable characteristics.