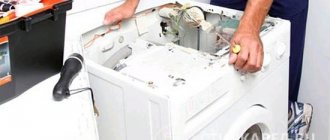
Situations often arise when owners have to urgently do something about the washing machine. For example, you need to find out what is broken, and without disassembling it it is almost impossible to do this. But many people disassemble the car incorrectly, and, consequently, subsequently reassemble it just as incorrectly, which may well cause more serious malfunctions.
Today we will find out how to disassemble washing machines of the German brand Bosch, which are of good quality (like other German equipment), but are very expensive.
Where to begin
Despite the fact that we want to get down to business as soon as possible, we must note that the best place to start is by preparing all those tools that may be required during the disassembly and subsequent assembly process. Their list is quite small.
During the work you may need the following tools:
- wrenches and wrenches of different sizes,
- a hammer or several hammers (small, medium and large, depending on the model of the machine and the nature of the breakdown),
- several screwdrivers with Phillips and straight slots (in the washing machine there may be parts screwed with screws of different threads and diameters),
- pliers
We start by removing the top panel
In general, all washing machines are designed approximately the same, so the disassembly sequence we are describing now can be useful for owners of most modern machines. However, the main hero of our material is the Bosch brand, or more precisely, the washing machines it produces.
We recommend starting disassembly by removing the top cover, because, firstly, this is one of the simplest operations, and secondly, the top cover gives access to many important parts of the washing machine hidden inside, for example, the control panel.
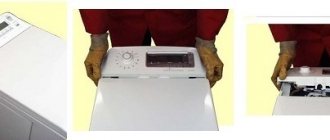
So, first the top panel is removed. To do this, simply unscrew a few screws that hold it and slide it, and then completely remove the cover.
We remove what we usually use to manage
Now things are back to normal again. At the third stage, we dismantle the control panel - the part where all the buttons, indicators and display are located. It is important to be careful not to yank the control panel too much from side to side: we don't just want to disassemble the washing machine and forget about it.
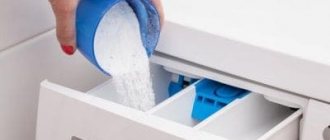
Our goal is to return the assistant of German origin to her ability to work. But before removing the control panel, you need to remove the detergent tray - in Bosch washing machines, the screw holding the panel is hidden behind it. Only after all the screws have been removed can you try to lift the control panel with a slight movement.
Again, everything must be done carefully so as not to damage the wires and contacts. If the panel gives in, then it is enough to hang it on a special hook built into the side of the washing machine for such cases and forget about it until assembly.
In general, you can also disconnect the control panel from all communications, but this is usually only required if the fault affects the control panel itself. There are plenty of detailed instructions on how to disable the control panel on the Internet.
Preparing to repair a Bosch car
Before you disassemble your Bosch washing machine, you need to properly prepare for this. You must imagine the CM diagram and the elements that will have to be removed.
The disassembly scheme is identical for different car models: Bosch Maxx 4, Bosch Maxx 5, Bosch Maxx 6.
What stages of disassembly do you have to go through:
- Remove the covers: top, back and front.
- Pull out the detergent tray.
- Remove the control panel.
- Remove the motor, intake valve, pressure sensor.
- Disconnect connectors and wiring.
- Disconnect the pipes and hoses.
- Unscrew the weights and supports.
- Remove the cuff clamp, take out the UBL.
- Remove and disassemble the tank.
What tools will you need:
- Screwdrivers: slotted, Phillips, hex.
- Hammer, chisel.
- Torx keys.
- Wire cutters.
- Pliers.
To disassemble the Bosch washing machine you will need enough space.
Disconnect the washing machine from the network and turn off the water supply. Then prepare a container, unscrew the inlet hose from the SMA body and drain the remaining water into it. Go around the car, open the hatch on the front panel from the bottom. Unscrew the filter and drain the water from it.
The preparatory stage is over, all that remains is to move the washing machine away so that it is convenient to move around.
Removing the front panel
After dismantling the control panel, it is the turn of the front panel to separate from the body in order to allow the owner or technician to repair the breakdown. In order to remove the panel itself, you first need to disconnect the cuff - the gray part directly behind the door, but in front of the tank.
Usually, in order to disconnect it, it is enough to find and loosen the spring holding it. In Bosch washing machines, this small part is most often hidden somewhere near the door lock. When the spring is found, the cuff can be removed and tucked inside the tank - this way it will not get lost in the bustle of work.
After this, you need to unscrew all the screws on the front panel in order to actually remove it. In addition, you also need to remove the door lock. Simply pry it with a screwdriver and pull it out, and then, if possible, disconnect it from the wires. Now the front panel can be safely removed.
Get to the pump
It is necessary to lay the washer on its left side, remove the bottom (if it has one) by unscrewing the screws.
We disassemble a Bosch washing machine:
- Using pliers, loosen the clamp of the drain pipe.
- Unplug it. Be careful, there may be water in it.
- Unclench the wires leading to the pump.
- Unscrew the bolts that secure the drain pump and remove it.
READ MORE: Mimax boiler: device, classification, advantages and disadvantages
Remove the last part of the case that needs to be removed - the back panel
Removing the back panel is just as easy as removing the top and bottom covers - you just need to unscrew a few screws and then actually remove the panel. Too simple compared to what needs to be done. The body of the washing machine has been dismantled, now you can begin the main part of disassembly - removing the insides.
Disconnect the control panel
Moving to the front, pull out the powder dispenser tray. Press the latch in the center, pull it towards you and remove it from the case.
Next, unscrew the bolts located behind the tray, as well as the bolts on the other side of the panel. Carefully release the plastic latches (you can pry them off with a flat screwdriver) and disconnect the panel. To completely remove it, you will need to disconnect the wire connectors - it is better to photograph them in advance. But it’s easier to hang the panel on the side, on the service hook.
READ MORE: 16 reviews of Mattress Dimax Optima Premium 3, 90x200 cm from OZON customers
Remove the bottom cover. It is located at the bottom of the front panel. To do this, simply release the latches. Set it aside.
We turn off the thermal electric heater - the most important “organ” of the machine
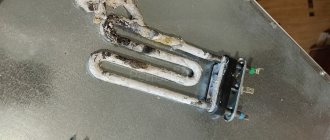
We gained access to the most important parts of the Bosch washing machine. The first one we turn off is the thermal electric heater (TEH), so as not to damage the wires: replacing the heating element will be very expensive, so nothing can be messed up or broken. To be sure, all the wires can be photographed.
The heater can be found somewhere in the tank area, since it is responsible for the temperature of the water in the washing machine tank. There will be no heating element - the washing machine will either refuse to wash at all, or will only wash with cold water. However, the heating element must be turned off during complete disassembly as we indicated: by sequentially disconnecting the wiring, having previously recorded the order.
Remove the tank
There is little time left before dismantling the tank. Disconnect the wires from the heating element. The heating element in Bosch cars is located in the front part, under the tank.
There is no need to pull out the heating element, otherwise you will tear the sealing rubber, which cannot be repaired.
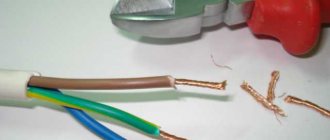
Sometimes wiring is attached to the walls of the tank, secured with bundles. Cut the harnesses with wire cutters and move the wires to the side. Now you need to remove the shock absorbers.
- Place a socket on the back of the shock absorber rod to press in the latch.
- Pull the rod towards you with pliers and pull it out of the hole.
READ MORE: Lamps for seedlings on the windowsill: how and which one to choose
Do the same with the second shock absorber. All that remains is to remove the tank from the springs. Lift it up by the edges of the hatch and pull it out through the front compartment.
Turn off the engine
After the heating element, you can begin to turn off another, perhaps the most important part of the washing machine - the engine. Without it, any car, including high-quality ones like Bosch, is just a big basin in a metal box.
Turning off the engine is carried out according to the same scheme as turning off the heater, so we will not describe it again - all this is already in the previous paragraph.
More: Ariston washing machine repair
We finish everything by removing the tank
If all the steps described above have been completed, you can complete the work by removing the tank. To do this, just unscrew the shock absorbers and counterweights, and then try to pull the tank out of the body. If it comes out safely, you can congratulate yourself: you have managed to disassemble the Bosch washing machine yourself!
So, we have described the process of disassembling a Bosch washing machine. Of course, it is not advisable to repair high-quality equipment yourself; it is preferable to entrust all the work to a specialist, but it is still worth knowing what to do in a pinch.
Remember that you perform all the actions described here only at your own peril and risk. No one is responsible for possible damage if you deviate from the instructions. We hope that our material was useful to you.
Preparatory stage
Before you start disassembling the Bosch washing machine, it is recommended to clarify its design and understand which main components will have to be dismantled in order to get the desired result. To completely disassemble a Bosch washing machine, you will have to dismantle the following components and parts:
- the back metal panel of the machine and the top cover, the front of the body;
- powder receiver;
- management panel;
- pump, electric motor and water heating element;
- pulley and drive belt;
- counterweight and shock absorbing devices;
- intake valve, pressure switch and pipes;
- pipes and garbage filter;
- UBL devices and loading hatch doors;
- tank and drum of the machine.
Before you start disassembling, prepare everything you need. To work, you will need hammers of different weights, a set of keys and wrenches with head sizes of 6 - 18 mm. In addition, prepare a screwdriver or a star-shaped screwdriver bit, flathead and Phillips screwdrivers. You will also need wire cutters, multi-colored markers for marking electrical wiring, pliers and an awl.
First of all, all panels that interfere with disassembly are removed from the Bosch machine. Using a Phillips screwdriver or an asterisk (depending on which machine you own - Bosch Max 5, Bosch Max 4 or Bosch Classic 5) unscrew a couple of small screws that secure the top cover of the washing machine. The panel moves slightly backwards relative to the body and is removed. Now there is an opportunity to unscrew the fasteners and remove the back panel.
