Household appliances have firmly entered the life of almost every person, constantly helping and performing a number of daily tasks instead of him. Today it is difficult to imagine a house in which cleaning would be carried out without the use of a vacuum cleaner. However, frequent use of this device leads to its rapid failure. Usually, problems that arise can be repaired independently, without contacting a service center. But for this you need to correctly diagnose and know the mechanism of the vacuum cleaner. Below are the main methods for repairing LG vacuum cleaners, one of the most common brands of home appliances.
Typical breakdowns
Among the main reasons for the failure of vacuum cleaners are the device being turned off or completely unable to turn on, the motor overheating or a decrease in suction capacity. As practice shows, the poor quality of the mechanism itself does not always lead to breakdowns. Most often, these are elementary violations of operating rules. Therefore, a timely cleaned garbage container and a changed filter will prevent the occurrence of malfunctions of the vacuum cleaner and will significantly extend the service life of the entire device.
What to do if the vacuum cleaner from LG does not turn on
Many factors can lead to a situation when the vacuum cleaner stops turning on, but the most common of them are:
- clogged dust collector or filters - leads to the mechanism operating in a state of constant overload, which causes engine overheating;
- contact interruptions - occur when the cord or socket is damaged;
- wear of parts and individual engine components.
When encountering such “behavior” of equipment, first of all you should carefully conduct a diagnosis. And after clarifying the cause of the breakdown, make a decision on further repairs.
Expert opinion
Nikolai Petrovich
Subpage for an expert
Before carrying out repairs, make sure that the power cord is not plugged into a power outlet.
Diagnostics
In order to understand why the vacuum cleaner does not turn on, it is recommended to use the elimination method. The main actions must be carried out in the following sequence:
- Check the working condition of the outlet.
- Inspect the power cord and plug.
- This is followed by checking the degree of filling of the dust container and cleaning the filters.
- Contamination of the motor or failure of a part or entire engine assembly.
Solution
Each diagnostic stage is accompanied by the following actions:
- To check the outlet, connect the vacuum cleaner to any other outlet in the house and turn it on. If the motor continues to be silent, you need to move on to the next step.
- When inspecting the cord and plug there should be no external damage. There is melting on the plug, and bends on the cable.
- The filters should be replaced with new ones, and the bag should be cleaned of debris and dust, rinsed under cold water if it is plastic and not rag. The dust collector can only be replaced after it has completely dried.
If none of the above actions gave the desired result (the vacuum cleaner still does not turn on), then the reason lies in a motor failure. This malfunction is quite serious and its solution requires certain skills.
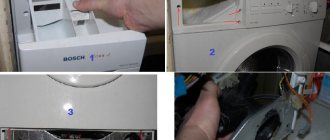
In order to get to the motor, you need to disassemble the vacuum cleaner itself. This procedure consists of several steps:
- Unscrew the lid of the dust collector using a screwdriver, and then remove the mesh for sealing and disconnect the electrical unit;
- take out the dust container and unscrew all visible screws of the compartment;
- The motor is disconnected from the power cable by unclamping the screw terminals.
First of all, after removing the motor, it is necessary to carry out a visual inspection:
- take out the brushes and change them if they are worn out;
- assess the condition of the armature collector;
- if the copper plates are heavily soiled, clean them with fine-grade sandpaper;
- inspection of bearings (the integrity of the cage is checked, the absence of cracks, lubrication is carried out);
Rotation of the bearings inside the socket during manual rotation of the armature indicates the need to disassemble the engine.
When disassembling a washing vacuum cleaner, you will also need to dismantle the water pump, which is done by disconnecting the water supply pipes.
Eliminate pollution
The commutator surface at the point of contact with the brushes must be clean. Coal or metal dust formed when the brushes rub against the rings or commutator can have a detrimental effect on the contact. Contamination of the latter causes sparking, from which carbon deposits are formed. Self-repair of a vacuum cleaner in this case involves routine cleaning. If the surface has traces of contamination, it is necessary to get rid of them using fine sandpaper, and then degrease it by wiping with alcohol or gasoline. You should also pay attention to the space between the contacts on the rotor. If they are clogged with dirt or graphite dust, they should also be cleaned and degreased.
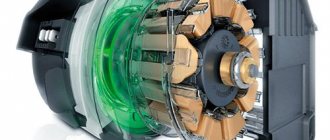
Disassembling the LG vacuum cleaner motor
The design of the electric motor of LG vacuum cleaners is practically no different from the motors of other household appliances. Only the dimensions and location of the mounting holes may vary.
- The disassembly process begins with removing the brushes from the brush holders. To do this, use a screwdriver to unscrew the screw terminals (or spring clamps).
- Next, using a screwdriver, pry up and remove the impeller casing (in some models, additional extension of the sides may be required).
- The impeller itself is fixed to the armature shaft using a nut with a reverse thread, which can most easily be unscrewed with a socket wrench (clockwise). After this, the impeller can be easily removed from the shaft by prying it off from opposite edges with a screwdriver.
- After the impeller, remove the air separator.
- Unscrew the coupling bolts on the housing and remove the armature with bearings and the top cover from the stator.
Engine repair
When starting to repair an electric motor, you need to pay attention to the following points:
- A common cause of engine failure is bearing failure. To diagnose them, visual inspection or scrolling is used. If replacement is necessary, a puller should be used. The procedure itself is simple; problems can only arise if the bearing is completely destroyed and devoid of balls. Then the inner race may stick to the shaft and one side will need to be ground off to loosen it. It must be taken into account that the actions must be as careful as possible, since the sharpening stone can damage the rotor shaft. You can also try heating and knocking it out.
- Also, the cause of motor failure may be the armature commutator, which will require cleaning. To do this, place the anchor on an emery cloth (abrasive grit 1000) and turn it easily without pressing. Next, grinding is performed, using sandpaper with 2000 abrasive.
After this, the electric motor is reassembled according to the same scheme, but in reverse order.
Step-by-step instructions for disassembling the engine
The next step in repairing a Samsung vacuum cleaner is to inspect and repair the device’s motor. To repair the motor of a Samsung vacuum cleaner, you first need to disassemble it. This is done as follows:
- Using a screwdriver, unscrew the two side bolts located at the top of the housing.
- Turn the body a little and look at the engine. If you try to remove it, you will find that the coil is preventing you from doing so. Carefully free the engine from its wires and disconnect all connectors.
- Carefully remove the coil wires so that the coil itself remains on the body, and remove the motor.
- After the engine is removed, you need to repeat the cleaning again.
- Now you need to remove the sealing rubber. To do this, you need to unscrew the two side bolts.
- Using a screwdriver, the two halves of the engine housing are separated.
- Next, the engine itself is removed from the plastic housing.
- Look at the top of the engine. You will see rolling. They need to be bent in the opposite direction. Then a screwdriver is stuck into any gap. Both halves are separated from each other. This way the turbine is freed from the housing.
- Using a 12mm socket, the bolt is unscrewed. What is important: the thread is left-handed, so when removing the bolt, it must be turned clockwise. In this case, you need to jam the engine stator with small wooden blocks. The entire structure must be supported.
- Now you can remove the turbine.
- Remove the washer and unscrew the two bolts.
- At the bottom you will find four more screws that need to be removed.
- Next you need to remove the brushes, after unscrewing all the bolts.
- We knock out the anchor. Insert the key into the hole and hit it with a hammer. The engine will jump out.
- Pay attention to the bearings. If they are in good condition, they can be coated with oil.
- Use tweezers to remove the boot. If the bearing spins with a rustling sound and remains dry, it needs to be cleaned and lubricated. You can use carburetor cleaner to clean it.
Reassemble the vacuum cleaner in reverse order.
Watch the video below on how to disassemble a vacuum cleaner:
Important. Before you repair your Samsung vacuum cleaner, especially the motor, be aware that its cost can be a large part of the total cost of the device. If in doubt, it is better not to undertake repair work on a Samsung vacuum cleaner yourself. Take it to the manufacturer's service center, or to a good workshop, where they will perform high-quality equipment maintenance.
If desired, you can even rewind the stator of the vacuum cleaner motor. See the video below for how to rewind the vacuum cleaner motor:
Why does the LG vacuum cleaner heat up and turn off?
Heating of the vacuum cleaner body during operation (with possible shutdowns before cooling) is an important indicator of a malfunction in the mechanism. Sooner or later, this behavior will inevitably lead to breakdown of the entire device. Therefore, engine heating cannot be ignored; diagnostics should be carried out as quickly as possible and a decision on further actions should be made.
Diagnostics
In order to identify the cause of the case heating, it is recommended to use the method of elimination:
- Turn on the vacuum cleaner with the hose disconnected - if the body stops heating, then the problem lies in the hose itself or its nozzle.
- If the device continues to heat up, then an external inspection of the inlet hole is carried out for the presence of foreign objects or large debris.
- Remove the dust container and turn on the vacuum cleaner. If the electric motor stops heating up, then the problem is that the bag is full.
- Clean or change filters.
On average, the HEPA filter requires replacement once every six months or after 50 hours of continuous operation of the vacuum cleaner.
If, after passing the diagnostics, the housing continues to heat up, the main reason must be sought in the operation of the motor itself. In this case, there are two options: with a certain skill, the user can independently fix the breakdown. However, most often this kind of malfunction requires service intervention.
Solution
After identifying the reasons for the engine heating during operation of the vacuum cleaner, it is necessary to begin eliminating them:
- Dirty filter. During operation of the vacuum cleaner, a large amount of debris and dust from the sucked air constantly accumulates on the surface of the filter. This kind of contamination reduces throughput and negatively affects the engine, increasing loads and leading to overheating. Therefore, the filtration system needs to be systematically replaced and cleaned. In this case, the possibility of having several filters in one device (at the air inlet and at the air outlet) should be taken into account.
- Overflowing garbage bin. A bag completely filled with debris and dust becomes a real obstacle to air flow. Some models are equipped with an automatic system to turn off the device if the dust container is full, however, even they do not always work. Therefore, each user must check the fill level independently from time to time. If a reusable bag is used, it should be washed periodically, since even after shaking out, a large amount of fine dust remains in the fabric. The dust collector can be reinstalled after washing only after it has completely dried.
- Failure of components or individual engine elements. In this case, it is recommended that only people who have already had experience in such work undertake repairing the engine. Since the cause can be a breakdown of any of the existing parts, and also taking into account the metal of the body (aluminum is most often used, which is easily deformed), attempts to repair the vacuum cleaner can lead to its final failure or even greater damage. Therefore, it is better to immediately contact the service center specialists.
The vacuum cleaner does not suck up dust, what should I do LG
In the event of a sharp decrease in the suction capacity of the vacuum cleaner, many users immediately add the LG vacuum cleaner to the list of low-quality household appliances. However, this is not true. Most often, this problem occurs due to improper operation of the device, and the breakdown itself is quite easy to fix on your own.
Diagnostics
If the vacuum cleaner begins to suck in dust poorly or does not suck up debris at all, the reason for this may be:
- an overfilled garbage bag;
- clogged filtration system;
- presence of mechanical damage;
- clogged hose or inlet;
- failure of the electric motor.
Solution
- Check the filling level of the bag. Many modern models are equipped with a full indicator on the case, which changes its color to red when the dust container needs to be cleaned. Typically, the suction power level decreases significantly when the bag is 2/3 full.
- Clear filters. It is regularly necessary to check the cleanliness of the filter both installed in front of the engine and at the air outlet of the device.
- Check the integrity of the hose and brush. Often the hose may have damage or cracks that allow air to pass through and thereby reduce suction power. As for the brushes, they can become clogged with collected debris. You also need to make sure that the brush roll rotates freely. To make sure there is no debris stuck in the hose, use a thin wire to clear it.
- Check the engine. If you have experience disassembling electric motors, you can try to fix the breakdown yourself. The most common reasons for a decrease in the suction capacity of a vacuum cleaner can be a blown fuse (replace with a new one), a broken contact in one of the wire connections (soldering), wear of the brushes (replace). But there are also breakdowns that cannot be repaired at home. One of them is a break in the winding on the coil.
Most of the problems that users encounter during the systematic use of a vacuum cleaner can be easily eliminated at home. Moreover, adhering to the operating rules, namely timely emptying the dust collector of debris and changing filters, will prevent further breakdowns. If the cause of the vacuum cleaner failure is a motor malfunction, you can try to disassemble the motor yourself and repair it. However, without proper experience, such actions can only aggravate the problem. In this case, it is recommended to contact after-sales service, where specialists will be able to carry out high-quality repairs.
You will find more interesting information on this topic in the “ Repair ” section of our portal.
Carrying out repair work
Let's look at the most common malfunctions of LG vacuum cleaners and how you can fix them yourself without contacting service.
The vacuum cleaner does not suck up dust, what should I do LG
In the event of a sharp decrease in the suction capacity of the vacuum cleaner, many users immediately add the LG vacuum cleaner to the list of low-quality household appliances. However, this is not true. Most often, this problem occurs due to improper operation of the device, and the breakdown itself is quite easy to fix on your own.
Diagnostics
If the vacuum cleaner begins to suck in dust poorly or does not suck up debris at all, the reason for this may be:
- an overfilled garbage bag;
- clogged filtration system;
- presence of mechanical damage;
- clogged hose or inlet;
- failure of the electric motor.
Solution
- Check the filling level of the bag. Many modern models are equipped with a full indicator on the case, which changes its color to red when the dust container needs to be cleaned. Typically, the suction power level decreases significantly when the bag is 2/3 full.
- Clear filters. It is regularly necessary to check the cleanliness of the filter both installed in front of the engine and at the air outlet of the device.
- Check the integrity of the hose and brush. Often the hose may have damage or cracks that allow air to pass through and thereby reduce suction power. As for the brushes, they can become clogged with collected debris. You also need to make sure that the brush roll rotates freely. To make sure there is no debris stuck in the hose, use a thin wire to clear it.
- Check the engine. If you have experience disassembling electric motors, you can try to fix the breakdown yourself. The most common reasons for a decrease in the suction capacity of a vacuum cleaner can be a blown fuse (replace with a new one), a broken contact in one of the wire connections (soldering), wear of the brushes (replace). But there are also breakdowns that cannot be repaired at home. One of them is a break in the winding on the coil.
Most of the problems that users encounter during the systematic use of a vacuum cleaner can be easily eliminated at home. Moreover, adhering to the operating rules, namely timely emptying the dust collector of debris and changing filters, will prevent further breakdowns. If the cause of the vacuum cleaner failure is a motor malfunction, you can try to disassemble the motor yourself and repair it. However, without proper experience, such actions can only aggravate the problem. In this case, it is recommended to contact after-sales service, where specialists will be able to carry out high-quality repairs.
Why does the LG vacuum cleaner heat up and turn off?
Heating of the vacuum cleaner body during operation (with possible shutdowns before cooling) is an important indicator of a malfunction in the mechanism. Sooner or later, this behavior will inevitably lead to breakdown of the entire device. Therefore, engine heating cannot be ignored; diagnostics should be carried out as quickly as possible and a decision on further actions should be made.