Most laptops already have a microphone. This is either a separate hardware device or a device built into the webcam. However, users often encounter situations where the system does not see the microphone due to its physical breakdown. In this case, you can use an external one. But they do this not only to fix hardware failures. Easily connect a wireless microphone to your laptop for karaoke. Or use a desktop model, which provides greater sensitivity and is conveniently located in front of the user. Connecting a microphone is done in different ways, depending on its model and the type of laptop port.
Interface 3.5 mm mini-jack
You can use a regular, wired microphone on a laptop only if there is a 3.5 minijack port. It's not difficult to find. Need to:
- inspect the ends of the laptop;
- find two port holes, indicated by green and red inserts;
- Make sure that the red port is intended specifically for a microphone by looking at the icon next to it.
On a note! This way you can connect a microphone to an Asus, Acer, HP laptop. These manufacturers install exactly a pair of 3.5 mm minijack ports on their devices for connecting speakers and a microphone.
At the same time, of course, based on the allowable expenditure of funds.
Standard option for connecting a microphone
First, let's look at a fairly common method that can definitely be handled by a person who does not have special skills and knowledge. So, below are the actions, and it is recommended to adhere to them:
- If we talk about standard connectors in a laptop, then it is worth remembering the figure of 3.5 millimeters. As for the output plug of the device itself, there are two holes. The first of them has a measurement of 6.5 mm, and the second - 3.5. Accordingly, we will use the last of them. Since to use a non-standard output it is necessary to purchase a special adapter. It can be purchased at audio equipment stores.
ATTENTION. Under no circumstances should you connect a regular plug to a non-standard input. Otherwise, there may be a risk of breakdown of all equipment.
- Thus, when everything is clear with the connectors, certain parts are in service, you can start connecting the elements. To do this, you should find the necessary recesses on the side panel of the laptop. The color of the connector, of course, directly depends on the manufacturer of the design, however, most often you can notice such inherent shades as orange or pink. Consequently, the next step is to insert the plug until it makes a characteristic click.
- After this, a connection notification should appear on the device’s screen, and an icon should appear on the taskbar. It is usually located close to the specified time.
REFERENCE. In order for the structure to function correctly, it is highly recommended to restart the computer.
- Next, when the monitor lights up again, you will need to reproduce the changes in some settings. To do this, click on the “start” button and go to the “control panel” section. There it is worth noting the line called “sounds and audio devices”. You will have access to the “audio” tab, where you can go to the “volume” window by first clicking on “record sound”. Where it says “microphone”, you can change parameters, for example, increase the volume and so on.
IMPORTANT. After carrying out all the above-described manipulations, be sure to click on “OK”. This way you will record the changed indicators.
Bluetooth connection
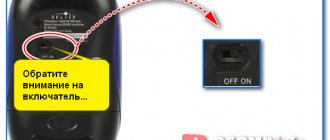
Thanks to modern technologies, you can increasingly find a kit that consists of a microphone with a built-in speaker. This is exactly the design that is installed using bluetooth. The process of activating the equipment is as simple as possible and involves the following actions:
- First of all, the unit turns on.
- Next, on the laptop you need to click on the Bluetooth icon. After that, a list will be displayed, in it you need to mark the desired name. Pairing will only take place after the speaker is selected as the main device for sound output.
Thus, as you can see, you do not have to connect the microphone itself.
- Finally, you should decide on the file and run it with the text. Receiving the voice will be done independently in the same way as receiving the signal and mixing the sound with the vocals. Due to the fact that there will be no additional transmission of voice to the speaker, the singing itself, of course, will not be delayed.
REFERENCE. If devices support any version of bluetooth, and not just one, then the one released earlier will take part.
As for the controls, there are specialized buttons located directly on the device body. Most often this is the most common mixer. With its help, you can adjust not only the volume of music and voice, but also the application of various effects. So it is possible to create an interesting addition to the performance, for example, echo or distortion.
IMPORTANT. Since the connection is wireless, and for karaoke microphones only a regular full-fledged “jack” is intended - for wired ones, you will need to purchase an adapter to a “mini-jack”. If the laptop is not at all equipped with the presented bluetooth function, then you need to buy a special external module. Thanks to it, the system immediately recognizes devices and installs the necessary resources.
Combo port
Some laptops use a combo port to connect headphones and receiving devices. It's easy to plug in a headset with one cable from the headphones to the voice recording point. However, if you take a regular dynamic microphone, you won’t be able to connect it directly to your laptop.
To use an external audio recording device, you will have to buy a branded one. It may be from the same brand as the laptop, or it may have compatibility information. However, such a device is quite expensive. It is much more attractive for the average user to buy an adapter.
This adapter looks very simple. At one end there is a plug for the hybrid port, at the other there are two taps, marked in green and red for clarity. It is the latter that allows you to connect an external microphone to your laptop.
Setting up a microphone connected to a computer
The microphone usually does not require any special settings. As a rule, it works great as is. But, in some situations you may need to change some settings. To access the settings, open the “Sound” window in the same way as described above. After that, select the microphone connected to the computer and click on the “Properties” button.
As a result, a window with . On the first tab, you can rename the microphone, change the microphone icon, go to the driver properties, or disable the use of the microphone.
On the next tab, called “Listen,” you can enable the “Listen from this device” feature. When you enable this feature, audio from the microphone will be output directly to your speakers (or headphones).
The next tab is called “Levels” and here are the most useful microphone settings. These are microphone volume and microphone gain. Using these two functions, you can select the microphone sensitivity you need.
The next tab is called “Enchancements” or “Improvements” and only one function is available here: “Disable all enhancements”.
The last tab is called "Advanced". Here you can select the bit depth and sampling frequency that the microphone connected to the computer will use. Also here are settings that relate to the exclusive mode of operation of the microphone.
After making changes, do not forget to click on the “Apply” button.
It seems like a simple question : how to connect a microphone to a computer
, but in reality it turns out that not everything is so problem-free. A microphone is needed to transmit voice in online games or when communicating in . The microphone can be either external,
Microphone check
carried out along the path: Start - All programs - Accessories - Sound recording,
the following utility window will appear:
in which click Start recording
, say something into the microphone, save, and then listen to the resulting file.
If something doesn’t work out, then you need to configure it.
Setting up a microphone connection in Windows XP
.
Start - Control Panel - Sounds and Audio Devices - go to the "Speech" tab. In the Voice recording
press the
Volume
:
In the next window, check the Select box and move the slider up: check the microphone as described above.
If it still doesn’t work, then we strengthen it in the following way: In the same window, click on the top “Options” menu and turn on the “Advanced options” item. Configure button should appear at the bottom of the Microphone
:
Click on it and in the next window check the box next to “Microphone Boost”:
Click the Close
and check the microphone again.
Setting up a microphone connection in Windows 7
. Right-click on the volume icon and select Recording Devices.
Where to connect a microphone, which microphone to choose, programs for working with sound. How to connect a microphone to a computer has been discussed more than once. Both on the Internet and in all kinds of specialized literature. But such questions continue to appear on our website. This means either there is not enough information or it is not reliable. Now the situation will change. We offer you instructions on how and where to connect the microphone.
If your microphone uses a different type of plug
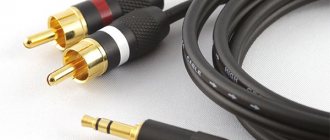
Today, connecting a microphone to a laptop can only be done using a 3.5 minijack interface. However, there are many models of audio recording devices on the market that may have a different plug. Meet:
- TS, monophonic sound, 2.5 mm;
- TRS, monaural, 3.5 mm;
- TRS, stereo, 3.5 mm;
- stereo and mono, 1/4 inch.
To connect an external microphone, it is recommended not to experiment with disassembling its connector and resoldering the contacts, but to buy an adapter . It's inexpensive. The product can be extremely compact, in a rigid case. Or it can offer a flexible cable outlet to the connection port, which is convenient for some users.
Microphone jacks on laptops
Among all the ports found on laptops, the following are suitable for connecting a microphone:
Jack 3.5 mm connectors - for transmitting an analog signal.
Structurally, they can be separate (top picture) or combined (bottom picture). Sound from a microphone connected to this connector is sent to the integrated sound card, where it is amplified and converted into digital code. Due to the “modest” parameters of the built-in audio interface, the signal is recorded or transmitted with a delay of over 30 ms. When simultaneously outputting “direct” and processed DAC/ADC sound to speakers, an effect similar to echo occurs.
Universal USB inputs for digital devices
Suitable for microphones and sound cards with the appropriate plug. The delay time depends on the peripheral device and does not exceed 10 - 15 ms.
IEEE 1394
They are rare and are designed for capturing audio and video from camcorders. The port is not suitable for directly connecting a microphone, but is used to transmit signals from external self-powered FireWire sound cards. The bandwidth of the IEEE 1394 port allows signal transmission with a delay of 2 - 4 ms.
How to set up headphones for high-quality sound reproduction
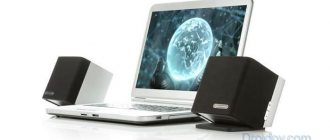
Using an external sound card
What happens if the audio recording device has a weak output signal? In this case, if you connect a microphone to a laptop, the voice will be very quiet, and it may not be possible to amplify it using software. To solve this problem, you will need a connected multimedia device.
An external sound card is a very small device the size of a regular flash drive. At one end there is a USB interface, at the other there are 3.5 minijack outputs, red and blue, needed for connecting a microphone. You just need to plug the sound card into the laptop port.
Important! Simple device drivers will be installed automatically. For more complex ones, you will need to download them from the Internet. Responsible manufacturers offer a disk with a set of software required for its operation, complete with a sound card.
Microphone jacks on laptops
Among all the ports found on laptops, the following are suitable for connecting a microphone:
Jack 3.5 mm connectors - for transmitting an analog signal.
Structurally, they can be separate (top picture) or combined (bottom picture). Sound from a microphone connected to this connector is sent to the integrated sound card, where it is amplified and converted into digital code. Due to the “modest” parameters of the built-in audio interface, the signal is recorded or transmitted with a delay of over 30 ms. When simultaneously outputting “direct” and processed DAC/ADC sound to speakers, an effect similar to echo occurs.
Universal USB inputs for digital devices
Suitable for microphones and sound cards with the appropriate plug. The delay time depends on the peripheral device and does not exceed 10 - 15 ms.
IEEE 1394
They are rare and are designed for capturing audio and video from camcorders. The port is not suitable for directly connecting a microphone, but is used to transmit signals from external self-powered FireWire sound cards. The bandwidth of the IEEE 1394 port allows signal transmission with a delay of 2 - 4 ms.
How to set up headphones for high-quality sound reproduction
Radio microphone
A radio microphone is an extremely popular device for karaoke. It consists of two functional modules. One of them, a decoder-transmitter, connects to a laptop. The second, the microphone itself, is equipped with a battery and a built-in transceiver module.
To connect a microphone to a laptop, you will need to follow the manufacturer's recommendations. Usually you need:
- connect the decoder-transmitter unit to the laptop using the USB port, 3.5 minijack, sometimes both at once;
- install microphone drivers;
- check the connection between the microphone and the data processing unit according to the manufacturer’s instructions;
- check the operation of the device.
Typically, a radio microphone has a fairly simple initialization technology. It is described in detail in its operating instructions.
Connecting a microphone to a computer
To connect the microphone to a computer, use a standard audio connector for Mini Jack 3.5 mm. This connector is located on the rear side of the system unit. Next to the microphone connector there are usually several more similar connectors. They are used to connect headphones and multi-channel speakers. In order not to confuse the connectors and connect the microphone where you need it, pay attention to the colors with which the connectors are highlighted. The microphone connector is always marked in pink. There may also be an image of a microphone next to it.
There is also a microphone connector on the front panel of the computer, next to the USB ports. This connector is also highlighted in pink.
To connect a microphone to your computer, just plug the microphone into one of these connectors. If drivers for a sound card are installed on your computer, the microphone will start working immediately after connection.
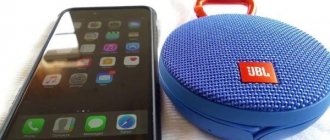
Bluetooth
Bluetooth devices are gaining immense popularity among consumers. Although the communication range of such a wireless microphone is short, up to 10 meters without obstacles, it is enough for comfortable work with a laptop. To connect your device via Bluetooth, you will need to do the following.
- Connect the receiver to the laptop. This could be a very small whistle, or it could be a module powered by USB and transmitting an audio signal via a 3.5 mm minijack.
- Install drivers for the new device and software offered by the manufacturer.
- Turn on the microphone and make sure it connects to the receiver. Usually, a small light bulb is installed for this purpose, the nature of the glow indicates the state of the communication channel.
The manufacturer offers detailed connection instructions for each Bluetooth microphone.
Important! There are models without a receiver. In this case, to use them, the laptop must have its own Bluetooth module. If the model is old and does not offer such luxury, to connect a wireless microphone you just need to buy and install one of the universal receivers.
How to connect a Bluetooth microphone to a computer?
Article for articles
If you have a wireless Bluetooth microphone, connect it in just a few steps. Turn on the microphone and if it doesn't do this automatically, set it to Pair Mode or Discovery Mode.
Many Bluetooth devices will do this automatically if they are not in close proximity to something they were paired with in the past. If this is not the case, please refer to the manual to find out how to run this mode, and then follow these steps on your PC:
- Open Windows Settings. Type " Settings " in the search bar on the Windows toolbar, or press Windows Key + I.
- Select Devices > Bluetooth & Other Devices > Add a Bluetooth Device or Add a New Device .
- You will need to enter your microphone's PIN code to connect it to your computer. The PIN code is usually simple: " 0000" or "1234", but your owner's manual should list it.
If you have multiple microphones connected and need to change the default one, go to Settings > System > Windows Sound or System Preferences > Sound > Mac Input . From any of these menus you will be able to select the microphone you want to use.
That's all there is to it! If you are having trouble setting up your microphone, try a different USB port or microphone and make sure your microphone is actually turned on. If this doesn't help, try restarting your computer with the microphone already connected - you may need to run the installer to get it working.
How to start using an external device
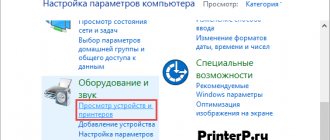
The microphone on a laptop, even if it is faulty, may prevent it from working with a connected external device . It needs to be activated and set to be used on the system by default. This is done as follows.
- The speaker icon is located in the tray, next to the clock. If it is hidden, in Windows 10 and Windows 7 you just need to press Win+B.
- You must right-click on the icon.
- From the menu that appears, select Recording Devices.
After these steps, a window will open in which all sound recording sources identified by the system are listed. You need to select the recently connected one by its model name.
If the device name is grayed out, it needs to be enabled. To do this, right-click on the name or icon next to it and select Enable. It is easy to understand that the device is working by the indicator located to the right of the name. When you start talking or just tapping on the microphone, you can see how the output level is displayed.
Advice! In order for the system to automatically use an external audio recording source, it should be set as the main one. To do this, right-click on the model name and select Use default communication device. After this, when you connect a wired microphone, the operating system will immediately begin working with it.
It is more difficult to start using wireless Bluetooth devices. If the radio microphone only requires manipulations with the receiver or manufacturer’s software, then the model’s Bluetooth must be paired before any settings are made. To do this you will need:
- find the Bluetooth icon in the form of a blue logo next to the clock;
- right-click on it and select Search for devices from the drop-down menu;
- find the name of the wireless model in the list of found ones;
- double-click on the name with the left button or select and click the Pair button.
You may be required to enter an authorization code during pairing. The required combination of numbers is always in the device's operating instructions. Once pairing has been established, the wireless model will automatically connect to the system.
How to connect an external microphone to a laptop
Such equipment can be:
- wired;
- wireless.
@i.ytimg.com
In each specific case you need to act differently. However, both of these options are the easiest to connect, because we are talking about a standard microphone for a laptop, which can be easily found in any online computer store. Let's take a closer look at all connection options.
Via USB port
Occurs in two cases:
- when a microphone with a mini jack plug (3.5 mm) is connected via an external sound card (USB);
- The device is initially designed to be connected via a USB port.
Here's how to connect via an external sound card:
- This “flash drive” is inserted into the port.
- Drivers are downloaded and installed automatically.
- All that remains is to connect and, if necessary, configure the microphone.
There will be no problems installing drivers if the laptop is running Windows 7, 8 or 10. But for Linux, user intervention may be required. Everything should work perfectly on a Macbook, provided that the sound card was originally designed for Apple technology.
Here's what they do with the equipment that is plugged into the USB port:
- Insert the plug into the connector.
- They wait while the drivers are installed, or install them themselves.
- Change parameters if necessary.
The standard setup option in Windows 10 is as follows. First they check whether everything is determined. For this:
- Open "Explorer".
- Go to “This Computer”.
- Right-click on the context menu.
- Select the “Properties” item.
The “System” window will open, in which click “Device Manager”. It is important to make sure that there are no alerts about unrecognized equipment.
- Call up the “Task Manager” by pressing Ctrl + Alt + Del.
- Select “File” and then “New Task”.
- Enter the following: “mmsys.cpl”.
@reedr.ru
In the “Sound” window that opens, select “Record”.
@reedr.ru
All you have to do is click “Listen”, check the “Listen from this device” checkbox and click “Apply”.
Your voice will now be heard, but this may not be enough for applications.
If hardware doesn't work in Windows 10, it's often because the system has blocked programs from accessing it. To solve the problem, press Win + I and perform the actions as in the picture below.
@reedr.ru
Then all you have to do is select the applications that will be allowed access to the microphone. All that remains is to check the device, for example, in the same Skype. Everything should work fine.
Wireless microphone
Connection is even easier. Due to the complexity of the equipment, the kit includes a very good driver that can ensure high quality joint operation of the transmitter and receiver.
To connect a wireless device, just:
- Insert the device plug into the USB port.
- Wait until the equipment detects itself.
- If this does not happen, install the drivers from the kit.
The likelihood of problems approaches zero. But initially the quality may be unsatisfactory.
The microphone often comes with software that allows you to adjust the device for specific purposes.
If the equipment has two plugs and one connector
Many people prefer to use an external microphone. If it is not a USB device, it may have one plug (headset) or two. However, sometimes it happens that to save space on a laptop there is only one connector or all the others are occupied. And for those who constantly travel, the headset will be much more convenient.
Via external sound card
We have already discussed above the case when a classic microphone for a computer was connected via a USB port. The problem was solved using an external sound card-flash drive, which will help this time too.
All you need to do:
- Connect the card to the laptop.
- Connect the appropriate plugs to it.
- Carry out minimal or complete setup.
Changing parameters can be done both in the program for managing the sound card and in the operating system. More expensive devices are equipped with a special application, but it does not provide any fundamental advantages.
Using an adapter
The cheapest option you can buy is an adapter. Outwardly, it is very similar to a USB sound card, but it only combines two channels without processing them. But such an adapter has a headset plug, so the laptop must also have a corresponding connector. It is wider than those intended for headphones and a microphone, and next to it there is an icon in the form of a headset.
When purchasing, it is important not to confuse it with an adapter for sound reproduction equipment.
Headset settings are controlled in the same place as the microphone settings described above. You just need to adjust the speakers as well. This may take even less time, since it will immediately become clear to what level to set the sensitivity and volume.
Using column
You can make such a connection only if there is an appropriate connector. It is better to immediately pay attention to this when choosing speakers. It can be either on a large speaker system or on laptop devices.
For a laptop, this connection is equivalent to a regular one. So you can configure it using the OS.
In such cases, you do not need to purchase any additional software to control parameters, unless these are USB speakers.
What to do if the sound when recording or talking is very quiet
You can adjust the microphone sound volume using system tools in Windows 7, Windows 10. To do this, you need to go to the recording device settings window, as shown above. Here you just need to select the name of the model you are using with the left mouse button and click the Properties button. It is located in the lower right corner of the window.
In the device properties, sensitivity levels are adjusted on the tab of the same name. Having switched to it, you should use the slider to set the acceptable sound volume. To save the settings, just click OK and close the settings window.
Connecting a microphone to a laptop is sometimes very difficult. We are talking about old devices - their connector does not meet modern standards. Therefore, to use a very old microphone, you cannot do without qualified assistance. The device must be taken to a workshop or electronics specialist to re-solder the wires to a modern interface. Only after this can you connect the microphone to the laptop using one of the methods described above.
Checking the internal microphone
If you are lucky and your laptop is equipped with it, you don’t have to connect anything else: you already have access to voice communication or audio recording. Just check if you have it enabled.
- Find the speaker icon in the notification area and right-click on it. Select "Recording Devices" - "Recording".
- On this tab, find "Microphone". Click on the "Properties" button in the lower right corner of the window.
- Notice at the bottom of the area that appears: the drop-down menu should indicate that the device is turned on. Eat? This means the connection is established.
- It's worth checking the sound level just in case. To do this, in the “Properties: Microphone” window, go to the “Levels” tab (second from the right) and move the slider all the way to the right. This way you will set the maximum sound level so that you can be heard well in any case.
If you cannot find the notification area on your desktop, everything described above can be done through the Control Panel. If you have Windows 7 , after clicking the “Start” button, select “Control Panel” - “Hardware and Sound” - “Sound”, and then follow the instructions indicated above, starting from the first step.
We bring to your attention an informative article about what a proxy server is and how to set it up.
Which microphone to choose.
There may be several reasons why you need to connect a microphone to your computer or laptop. The first is the desire to communicate with friends in voice chats or Skype. The second is the need to record your own voice for a video presentation, recording a song or something similar. Depending on these needs, different requirements for sound quality arise. For the first case, a simple microphone that comes with headphones or is installed on a table on a stand is quite suitable. Its price can be from 2 dollars. For the second case, you should not spare 15…20 bucks (and this is the minimum). You need a semi-professional microphone. Even a karaoke device does not guarantee the required sound quality. We will not dwell on the appearance of the microphone. We may only be partially interested in the connector. Cheap models are usually equipped with a 3.5 jack output. More serious microphones have a 6.3 jack output. To turn on a semi-professional device, you will also need a special adapter. Typically, computers and laptops have 3.5 jack microphone inputs.