Sandwiches in a sandwich maker: choosing the right bread
Choosing bread for a sandwich maker is probably the most crucial moment. After all, not every shape of bread will fit the shape of the sandwich maker’s plates. And the quality of the bread matters.
Bread for the sandwich maker
The ideal option is special bread for sandwich makers. It is sold in supermarkets. Imported and clearly overpriced. In my opinion, there are 16 slices (it is cut) and these 16 slices cost one and a half dollars (12 UAH). Isn't it too much?
Bread for toaster
Toaster bread is also very good for a sandwich maker. It is also sold in sliced form, which is very good :) Firstly, it is somewhat smaller in size than the shape of the plates. At the same time, it compresses well, so that the filling does not leak out and there are no squashed inedible edges. According to my observations, this is the best option for sandwiches in a sandwich maker. Moreover, it comes not only wheat-white, but also with bran. And sandwiches with bran bread are the best breakfast.
As for the loaf, sandwiches from it turn out very tasty. But size matters. Almost a third of each piece is simply thrown away, since it is absolutely impossible to eat the crushed and dried out loaf on the edges of the sandwich. It’s better to cut the loaf slices into halves and make mini sandwiches. It turns out well. Verified.
White brick
This bread is considered social, and therefore its quality is not the highest. I don’t know what they do in it differently from a toaster oven, but it makes sandwiches – you can’t bite them. And the size is not very suitable - you need to cut off the top.
There are sandwich makers in which the attachment supposedly corresponds to the shape of such bread. I haven’t tried it - I don’t know. But it doesn't look very similar in appearance.
Why do you urgently need a sandwich maker?
A sandwich maker or sandwich maker is popular among customers for the following reasons:
- very compact household appliance - will take up little space in the kitchen cabinet or on the table;
- useful for preparing a snack at home or at work;
- simple design and use - the operating principle is intuitive, and maintaining the sandwich maker is not difficult: there are often removable elements that are easy to clean;
- You can cook without using vegetable oil;
- suitable for taking with you on vacation or to the countryside - in addition to its compact size, it is also light in weight;
- in a sandwich maker you can quickly make sandwiches for a trip;
- unlike a toaster, it allows you to prepare different types of snacks, including not only those that use bread, but, for example, pita bread;
- the presence of replaceable panels further diversifies the food options - grilled meat or fish, waffles, hot dog sausages;
- does not consume a lot of electricity and is safe during use - many models have an auto-shut-off function.
Sandwiches in a sandwich maker: making the right filling
Sandwich filling is a never-ending topic. As many of us as the owners of this miracle of technology, there can be so many variants of one filling.
Sandwiches in a sandwich maker: filling consistency
But there are general points that it is advisable to observe in any case.
- Cheese for the filling is an almost irreplaceable ingredient. Any, even the simplest and most uncomplicated “inside” with cheese will be very tasty. And the sandwich won't be dry.
- The filling should be either hard slices (sausage, pickled cucumber) or a “spread”. Excessively liquid will leak through the bread and burn (this is especially true for jam, marmalade, etc.).
- It is very advisable to add something spicy or sour to any filling (except sweet, of course) - a ring of pickled cucumber, ketchup, tomato. Then the sandwiches won’t be bland, like my egg sandwiches turned out to be. If such a filling would be just right on a cold sandwich, then in a hot sandwich its taste was felt very weakly and was not pronounced. But I don’t want to wait for the sandwich to cool down.
- It’s better not to overdo it with the filling, because if all this deliciousness gets out, it will take a long and tedious time to wash the sandwich maker.
History of creation
Sandwiches have been prepared since the Middle Ages. Interconnected plates were placed on coals or an open fire . Pieces of bread with filling were placed inside the structure. The contents of the molds gradually fried over a few minutes.
With the advent of electricity, sandwich toasters were invented , where heating came from spirals. To avoid getting burned, the surfaces were covered with heat-insulating material.
In 1974, Breville released the first modern snack-n-toaster sandwich maker. A special mechanism cut the sandwich horizontally into two parts. The equipment was a success - in the first year of conveyor production alone, 400 thousand copies were sold.
About choosing other kitchen appliances:
How to choose a blender
How to choose a drip coffee maker
How to choose a kitchen chopper
Sandwiches in a sandwich maker: why do we need extra fat?
Almost everywhere where sandwiches in a sandwich maker are mentioned, it is said that the bread must be oiled on the outside, supposedly to obtain a crispy crust. I think this is completely unnecessary.
- Firstly, the crust turns out in any case - aromatic, crispy and rosy.
- Secondly, we don’t need extra fried fat at all. Although sandwiches are not the healthiest food, I don’t want to make them outright harmful.
- Thirdly, the filling usually contains something fatty (butter, mayonnaise), which soaks the bottom piece of bread right through. Verified.
Some tips for working with the device
When implementing recipes in a sandwich maker, it is worth considering all the features of handling it. The following article provides several tips that will help prevent device damage and also improve the taste of food:
- You can start cooking only when the walls are warmed up and the food is ready for baking.
- It is better to add as little as possible of moisture-filled foods, such as tomatoes and mushrooms. Otherwise, the bread will become soggy.
- During the cooking process, you must use only ready-made ingredients (including meat). The sandwich maker only heats the ingredients.
- It is necessary to wipe the internal surfaces only when they are hot.
- If the filling begins to leak out during the process, it is recommended to stop working, remove the food, rinse the molds and prepare a new portion with fewer ingredients.
- It is better to grease the bread with butter. First, it will prevent burning. And secondly, it will turn out more tasty and crunchy.
Sandwiches in a sandwich maker: and one more thing
Another common misconception is that sandwiches need to be placed in a well-heated sandwich maker. To be honest, I don’t understand the meaning of this. I tried it both hot and cold - there was no difference. At the same time, in a hot place there is a chance of getting burned quite well. For what? Conclusion - when making sandwiches in a sandwich maker, I put the bread and filling in immediately after turning on the device, and sometimes I turn it on after putting it in.
For the same reason that I don't grease the outside of the bread, I don't grease the pan itself where the sandwiches are placed. There's no point in this.
That's all my simple tricks for now. If I missed something, write to me and I will definitely include your advice in the selection.
All sandwich recipes on the website Buterbrodnitsa.Ru
How to cook in a sandwich maker
There are several rules that will help you prepare the perfect sandwich without damaging the device.
- Before you start cooking, you need to grease the surface of the sandwich maker with butter or vegetable oil so that eventually the pieces of bread do not stick and you do not have to tear them off.
- It is recommended to place sandwiches in specially designated compartments.
- Close the lid of the sandwich maker carefully, and open it only after the indicator lights up, indicating that the dish is ready.
- There is no need to put a lot of liquid filling inside the sandwich. During the cooking process, it may leak out and damage the surface of the device. It will be quite difficult to wash the device.
Important! It's best to warm up the sandwich maker before loading sandwiches. This will allow you to cook them faster and also carry out the process evenly.
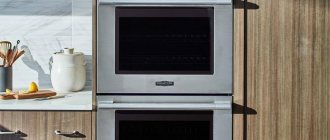
Sandwich maker (sandwich maker). Types and application. How to choose
A sandwich maker, or sandwich maker, is a kitchen heating device used for preparing hot sandwiches. It consists of two opening plates, between which slices of bread with filling are placed. The halves of the sandwich maker heat up and cook the sandwich on both sides. Cooking time until the crust is crispy and the cheese is melted is about 2-4 minutes.
Device and capabilities
Behind the plates of the sandwich maker there is an ordinary dry heating element. The simplest devices have fixed plates, so they can only prepare sandwiches of the same type. Sandwich makers in the middle and higher price segments are equipped with removable forms, so their scope of application is wider. Thanks to this, they can perform the functions of waffle irons, frying pans and grills.
In the case of the simplest sandwich makers that do not require removing the plates, you can prepare only one form of sandwiches:
- Triangular.
- Square.
- Rounded.
There are also flat universal sandwich makers. Unfortunately, the sandwiches placed in them do not retain their shape, so after cooking they do not look so appetizing and beautiful. If you use such a sandwich maker, the melted cheese often leaks out. In the future, it has to be scraped off from the working surface of the device.
Waffles in a sandwich maker with sour cream
This is a slightly modified version of the dough, and accordingly, the taste of the final product will be different. To prepare this dish, you will need the following ingredients:
- two chicken eggs;
- 200 grams of sour cream;
- half a glass of granulated sugar;
- a tablespoon of refined vegetable oil;
- a teaspoon of baking powder;
- one glass of flour.
The cooking algorithm is not too different from the previous recipe for a sandwich maker. You need to do the following:
- Mix eggs, butter, sour cream and sugar in one bowl. Process until a mass of homogeneous consistency is obtained.
- Add flour and baking powder. Mix again until a uniform dough is obtained.
- Leave it for 10 minutes.
- Using a spoon, gradually pour the waffle mixture into the sandwich tins.
- Cook for two to four minutes.
How to cook sandwiches in a sandwich maker: universal rules
- It doesn’t matter what model you have - a Mulinex sandwich maker or a unit from some other brand - be sure to grease the working surfaces or pieces of bread with butter or vegetable oil before cooking. This simple procedure is guaranteed to protect your dish from sticking.
- Place sandwiches in a sandwich maker strictly within the boundaries of the internal compartments. Make sure that the filling does not extend beyond the bread.
- Be very careful when closing the lid of the sandwich maker and open it only when the indicator light comes on, signaling that the product is ready.
- Don't put too much liquid filling inside your sandwiches. During the heating process, it will flow under the plates and you will have to spend a lot of time cleaning the device.
Important: Before loading a portion of sandwiches into the sandwich maker, be sure to warm up the unit a little. With this approach, all products will receive uniform processing.
Universal rules for handling electrical appliances
- It is recommended to lubricate the working surfaces of any model with a small amount of oil before starting cooking. This simple technique will prevent the bread from sticking to the surface.
- Before preparing the first portion of sandwiches in a sandwich maker, it is recommended to warm up the device. Thus, the heat treatment of the sandwiches will be more uniform.
- You should carefully monitor the consistency of the filling so that it does not spread beyond the bread piece and contaminate the frying surface.
- It is not recommended to use large quantities of fatty foods as filling. Excess fat under the influence of heat will begin to spread over the surface of the device, which will subsequently make cleaning difficult.
- There is a light indicator on the cover of the device. The lid of the device can only be opened after the corresponding light signal. Some models indicate the completion of the cooking process with a sound signal.
Some housewives questioned the first two recommendations and, violating them, did not see much difference in the quality of the prepared sandwiches. Therefore, making sandwiches without first lubricating the working panels with oil and preheating is also acceptable.
Sandwich recipes in a sandwich maker: TOP 5 most popular sandwiches
Cubano: Cuban-style pork sandwich
- For 1 serving you will need:
- Ciabatta bread – 2 slices
- Pork fried with onions – 100 g
- Dijon mustard – 1 tbsp
- Pickled cucumber – 1 piece
- Butter – 2 tbsp
- Hard cheese – 100 g
Cut the meat and cheese into long thin slices, and the cucumber into rings. Grease the outside of the bread slices with butter and the inside with mustard. Place shredded pork and cucumber on one piece. Sprinkle cheese on top and cover with the second piece. The Tefal sandwich maker, like models from other manufacturers, will prepare this dish in 3 minutes.
Hot sandwich in a sandwich maker
Euro sandwich with ham, cheese and apples
- For 1 serving you will need:
- Toast bread – 2 slices
- Cheddar cheese – 100 gr
- Lightly salted ham – 2 rings
- Sweet apple – half
- Bavarian mustard – 1 tbsp
- Mayonnaise 67% – 1 tbsp
- Butter – 2 tbsp
Cut the apples into thin slices, the cheese into long strips. Grease the bread evenly with butter on the outside and with a mixture of mustard and mayonnaise on the inside. Leave to soak for 5 minutes. Then place ham, apples and cheese on one slice. Cover with the remaining bread and place in the sandwich maker for 3-4 minutes.
Euro sandwich with ham
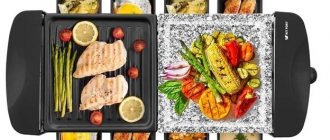
Light vegetable sandwich with soft cheese
- For 1 serving you will need:
- Grain toast bread – 2 slices
- Cream cheese – 100 gr
- Sweet tomato – 1 pc.
- Bell pepper – 1 piece
- Fresh cucumber – 1 pc.
- Lettuce leaves – 4 pcs.
- Mayonnaise 30% – 1 tbsp
- Salt - to taste
- Ground black pepper - to taste
- Chopped cilantro - a pinch
- Butter – 2 tbsp
Cut the tomato and cucumber into rings, the pepper into long strips. Grease the outside of the bread with butter, and the inside with a mixture of mayonnaise, pepper, salt and cilantro. Place 2 lettuce leaves, tomato, cucumber, pepper and cheese on one slice. Cover with remaining salad and bread. Both a regular sandwich maker and a grilled sandwich maker will bring the dish to readiness in 1.5-2 minutes.
Light vegetable sandwich
Spicy chicken and oyster mushroom sandwich
- For a standard serving you need:
- Toasted bread – 2 slices
- Baked chicken fillet – 100 g
- Oyster mushrooms fried with young carrots and white onions – 100 g
- Hot chili sauce – 1 tbsp
- Mayonnaise – 1 tbsp
- Salt - to taste
- Ground hot pepper (black and red) - to taste
- Butter – 2 tbsp
Thoroughly coat the outside of the bread with butter, and the inside with a mixture of peppers, mayonnaise and chili. Place chopped chicken fillet and oyster mushrooms with carrots and onions on the first slice. Cover with the second bread and place in the sandwich maker for 4 minutes.
Chicken sandwich in a sandwich maker
Sandwich with smoked salmon and mixed salad
For 1 serving you will need:
- Toast bread – 2 slices
- Smoked salmon – 100 gr
- Philadelphia cheese – 100 gr
- Caesar sauce – 1 tbsp
- Mediterranean sauce – 1 tbsp
- Mixed salad – 150 gr
- Dill – 50 gr
- Parsley – 50 gr
- Fresh lemon – 4 thin rings
- Ground black pepper - to taste
- Butter – 2 tbsp
Coat the outside of the bread with butter. Apply a mixture of sauces, chopped dill and parsley and ground black pepper to the inside. Place half of the mixed salad, 2 lemon rings, salmon and cheese on one piece of bread. Cover with the remaining lemon, herbs and a second slice of bread. The Redmond RSM M1402 sandwich maker will bring the sandwich to readiness in 2 minutes.
Sandwich with smoked salmon
Tip: You can find the most current sandwich maker recipes with photos on our website. We have put together an excellent collection of goodies that you can always please your family and friends with.
What is a sandwich maker
A sandwich toaster is a device for preparing closed sandwiches. Appetizing crispy toasts are topped with any filling: ham, cheese, jam, berries - whatever the gourmet’s heart desires. This is the main difference between a sandwich maker and a toaster - the ability to make sandwiches with filling.
Externally, the device resembles a small suitcase, which consists of two heating plates. Each part of this “case” contains heating elements – heating elements. The sandwich is clamped with plates on both sides and heated to the desired temperature.
Preparing a closed sandwich is very simple: place one slice of bread on the surface of the plate, then the filling, and then the second slice of bread. After this, the sash closes. Literally in 3-5 minutes you get a ready-made hot sandwich - a hearty and tasty snack.
It is easy to prepare sandwiches of a certain shape in a sandwich maker - it depends on the type of plates. They are round, rectangular and triangular. They have a protruding edging along their rim, which tightly squeezes the sandwich around the edges and ensures that the filling does not leak out of it.
Reference. Round sandwich makers are designed for regular loaves of bread, and square sandwich makers are designed for toaster bread. For triangular shapes, simply cut the bread slices diagonally. More complex models, in addition to a set of removable plates, have the ability to adjust the heating mode. Therefore, they are used not only for working with bread and dough, but also for frying steak.
The best option is when the sandwich toaster has several removable plates of different shapes. Thanks to this option, you can use different types of bread when preparing to change the taste of the sandwiches.
Benefits of buying sandwich toasters
If you are used to having hot sandwiches for breakfast, then a sandwich maker is exactly what you need. In the morning rush or when you need to quickly feed the whole family, the device will help you out like no other. In addition, the device prepares delicious hot sandwiches that cannot be made in any other way (for example, in the oven or microwave).
It’s convenient to have delicious sandwiches for breakfast at work by making them at home and simply taking them with you. Even children can handle making hot sandwiches. The sandwich toaster will also be appreciated by lovers of healthy snacks: it is not necessary to grease the removable plates with oil.
Another plus: in addition to sandwiches, the device is used for preparing other dishes. For example, pies, omelettes, scrambled eggs, waffles, pancakes, shawarma, potato pancakes. Some models have a mode for frying sausages, which is used for preparing hot dogs.
The sandwich maker has a clear design and a simple operating principle. Most of the parts included in the equipment are removable, making them easy to clean. The device is compact, which means it will not take up much space in the kitchen. But still, the main advantage of the technique, according to users, is the speed of preparation.
Popular and time-tested models
When choosing a sandwich maker, you should decide for yourself: do you need a universal model or a classic one without additional functions will do. The latter are relatively inexpensive and easy to use. Let's look at the top best such devices:
- Moulinex SM1540/1541 is a classic sandwich maker without additional attachments. Its construction is cast. It has four recesses for preparing hot sandwiches. The case cover has a lock for closing and two indicator lights. The internal surfaces are coated with a non-stick compound. The device heats up quickly and consumes no more than 700 W. The sandwich maker only works in one temperature mode.
- Kitfort KT-1609 Panini Maker is a stylish model with a simple design and mechanical controls. It has a monolithic panel with a non-stick coating, which means you don’t have to use oil during the cooking process. Thanks to the flat surface, in addition to sandwiches, it is possible to cook vegetables and grilled meat. The device is made of high-quality materials, so the panel heats up evenly and cools down slowly. The device is equipped with a heat-resistant handle and a tight lock.
- Vitek VT-1599 is a standard monolithic sandwich maker. There are 4 triangular indentations on the top and bottom panels for preparing hot sandwiches. Along the edge of these indentations there is a lip that “seals” the sandwiches, preventing the filling from leaking out. There is a latch lock on the handle for easy locking of the lid during cooking. The device operates in only one mode.
If you want to cook not only sandwiches, but also waffles, pastries and other delicacies, you should take a closer look at universal models.
In this rating, we will consider the best sandwich makers with replaceable panels:
- Redmond Multibaker RMB-M616/3 is a multifunctional device in a stylish black casing that consumes no more than 650 W. There is a compartment inside the device for storing the cord, so it is convenient to store and move. The sandwich maker is stable thanks to rubberized legs. The handles hardly get hot. In case of overheating, the device will turn off itself.
- Unit UDM-3010 is one of the best multi-baker models. The device comes with three attachments: for sandwiches, Viennese waffles and a universal grill. The device is stable on any surface, has overheating protection and consumes about 700 W. The handles of the device are made of high quality plastic, so they hardly heat up during cooking. Users note the ease of changing panels and reliable fixation. The device does not have a temperature switch; it only works in one mode.
- Gorenje SM703 is a sandwich maker for making homemade waffles, sandwiches, and grilling meat, fish and vegetables. The kit includes three standard removable plates. The case has anti-slip feet that allow you to stand firmly on any surface. The readiness of the dish will be indicated by a heating indicator light and a sound signal. A thick layer of non-stick coating is applied to the panel: food will not stick to the surface, and cleaning the device will not require additional funds.
Sweet recipes for the sandwich maker
Sandwich with condensed milk and apple jam
- For 1 serving you need:
- White bread – 2 slices
- Condensed milk – 4 tbsp
- Jam from apple pieces – 4 tbsp
- Butter – 2 tbsp
Coat the outside of the bread with butter and the inside with condensed milk. Place a portion of jam on one slice and cover with a second slice. The Steba SG 35 3-in-1 sandwich maker will cook this simple but very tasty sandwich in 1.5 minutes.
Sandwich with condensed milk
Open chocolate sandwich
For 1 serving you need:
- White bread – 1 slice
- Milk chocolate – 50-70 g
- Nuts (any) – 2 heaped tablespoons
- Butter – 1 tbsp
Grease the bottom of the bread with butter, place pieces of chocolate on top and cover them with chopped nuts. Place in a sandwich maker for 2-3 minutes.
How to choose a sandwich maker
For proper selection, we recommend focusing on the following key parameters:
- Decide on the functions that you personally need. Will it be a 3-in-1 sandwich maker or a device with the function of making homemade nut cookies, a hot dog maker or just a sandwich toaster.
- The higher the power, the faster the surface heats up and the food cooks. It is optimal if the device has a power from 640 to 900 W.
- Pay attention to the shape and features of the clamping plates, as this will determine the choice of bread to fry. If you like bread for toasting, the shape of the plates should be square or triangular. If you prefer standard bread, choose a slightly rounded shape. A universal option is a sandwich maker with one flat plate. However, the filling often leaks out during the melting process.
- Make your choice based on the number of users and the size of the sandwiches themselves. More often, devices designed for 2-4 pieces are purchased for one or two people; for a larger number of people, it is wiser to choose a more spacious model.
- The non-stick coating will help in cleaning burnt-on food. A more convenient option would be a model with removable inserts-plates.
- The device must have a heat-insulated body, otherwise there is a risk of burns. The material itself comes in two types: plastic or stainless steel. The first option is cheaper, but the metal is stronger and more reliable.
- The temperature regulator will help you select the degree of frying of the product.
- Try to choose equipment that has locking plates while the device is operating and fixing the mechanism housing flap.
- It is convenient when the equipment is equipped with an indication of the operating processes: heating, baking and readiness.
- The auto-off timer will simplify the operation of the device - you will not need to keep track of the time.
- The device must be stable. To achieve this, manufacturers provide the structure with rubberized legs.
- Pay attention to the possibility of storage in a vertical position and the presence of a compartment for the cord - removing it will give you more free space in the kitchen.
- The final factor determining the choice is the cost of the product. The price largely depends on the popularity of the brand, the availability of additional functions and the quality of the materials used.
The choice of manufacturer deserves special attention . To ensure that your equipment meets the parameters of safety, reliability and ease of use, give preference to proven brands. Such as ProfiCook, Gorenje, Clatronic, DEX, Moulinex, Russell Hoobs, Zelmer, Tefal, Philips.
Regarding the trends Saturn, Vitek, Aurora, MPM, Steba, VES, Magio, First, Maxwell, users often note rapid deterioration of the non-stick coating and uneven heating of the surface. Devices from these manufacturers are of average quality.
Operation and care
Now you know how to choose a sandwich maker. Let's start using it.
Reference. A red light on the body of the newly connected device will light up - after heating the surfaces, it will change its color to green. This means that the equipment is ready for use. The red color will periodically light up during operation, which indicates that the device is automatically maintaining the temperature.
The first thing to do is wipe the surfaces with a damp cloth and lightly oil them , which will prevent sticking. Then place two slices of bread on the bottom plate, add the filling on top and cover with two slices of bread. After this, the lid is lowered and after two to three minutes the finished dish is obtained.
Most models allow the use of different types of bread , but there are restrictions on the shape. For example, square slices work best as they “stick together” well and the filling doesn’t leak out. To make pies, thinly rolled puff pastry is used.
Sandwich maker 3 in 1: recipe for Viennese waffles
- Premium flour – 300 g
- Sugar – 150 gr
- Milk 2.5% – 200 ml
- Butter – 200 gr
- Eggs – 3 pcs.
- Baking powder for dough – 2 tsp
Grind the softened butter with sugar in a deep container. Pour milk in there and add eggs. Whisk until a fluffy mixture is obtained. Add flour and baking powder. Mix thoroughly until smooth. Pour the dough into molds (2 tbsp in each), level and close. The 3-in-1 sandwich maker will do the rest in 4 minutes. User reviews claim that the waffles turn out very tender and airy.
Viennese waffles in a sandwich maker
Sandwich maker 5 in 1: donut recipe
- Refined sunflower oil – 50 ml
- Wheat flour – 250 g
- Eggs – 3 pcs.
- Milk – 250 ml
- Baking powder – 1 tbsp. l.
- Salt – 1 g
In a deep glass container, combine the eggs with milk and beat everything with a whisk. Add sugar, flour and baking powder and mix everything very thoroughly. At the very end, add sunflower oil. The consistency of the dough should be fluid. Pour one tablespoon of dough into the cells and close the lid. The sandwich maker will do all further work within 3 minutes. Reviews from housewives say that the baked goods are rich and tasty.
Donuts in a sandwich maker
Sandwich maker 6 in 1: shortbread nuts
- Flour – 300 gr
- Butter – 200 gr
- Sugar – 100 gr
- Egg – 1 pc.
- Salt - a pinch
Warm the oil to room temperature and beat well. Add sugar and beat again. Add a little vanilla, egg and salt. Stir and quickly add flour with a pinch of baking powder. Mix very well, place in the mold, close the lid and bake until golden brown. Fill with cream or boiled condensed milk and serve.
Nuts with condensed milk in a sandwich maker
Sandwich maker: video instructions on how to prepare sandwiches
How to cook waffles in a sandwich maker?
To ensure the dish is completed correctly, simply follow the instructions below.
- A pack of margarine needs to be melted in a frying pan.
- In a separate bowl, mix sugar and all four eggs. Beat everything properly.
- Add flour and vanillin to the resulting mixture. Mix again.
- Pour margarine into the bowl and stir everything until a homogeneous mass is obtained.
- Pour the batter into the molds and bake for a couple of minutes until completely cooked.
Just don't pour too much dough into the sandwich maker. During frying, the waffles become larger in size and may therefore stick together.
Functional features of hybrid models
All types of household multifunctional toasters work on the basis of a common principle: supplying thermal energy through infrared heating elements. They successfully cope with making toast. Special clamps/recesses/grids designed for 2-3 or 4 pieces of toast at a time allow you to hold bread slices.
To collect crumbs and carbon particles, many models have removable trays that make cleaning the device easier.
Instrument selection criteria
The modern market offers a huge range of different sandwich toasters. When choosing the optimal model, you should pay special attention to the following factors:
- Toaster capacity or capacity. This parameter determines the number of sandwiches to be prepared simultaneously. The choice is made taking into account the real needs and composition of the family. The capacity of different models is 1-4 sandwiches.
- Device power. The maximum heating temperature and cooking time depend on it. Toasters are produced with power from 500 W to 1 kW. When choosing a device, you should remember that as this parameter increases, the cooking process speeds up, but the price also increases significantly. Electricity costs do not play a significant role, since the operating time of the device is short.
- Presence of non-stick coating. Modern devices have it even in budget models. Its absence indicates handicraft or counterfeiting.
- Case material. The most reputable devices have a metal body, in particular stainless steel. The main disadvantages are increased cost and weight. Cheap options are made with a plastic body of different colors. In this case, it is important that the plastic does not heat up excessively and does not create an unpleasant odor.
- Design features. To ensure ease of use, you should pay attention to the following nuances: the presence and convenient placement of indicators; the presence of durable and non-slip legs; sufficient length of the power cord and the presence of a compartment for its storage.
- Management and control system. It can be manual, semi-automatic and automatic (electronic). The number of modes ranges from 3-4 to 10-12.
- Functionality. They are expanded with the help of special plate inserts, which allow you to prepare various dishes. In addition, the presence of protective elements is of particular importance. Typical additional options are automatic switching to heating mode when ready and protection of the handle from heating.
Often the main selection criterion is the price of kitchen appliances. Based on this factor, the following categories of sandwich toasters are distinguished:
- A budget option. Its cost is 1000-1200 rubles. The fact that cheap does not mean bad is confirmed by budget devices from such manufacturers as Maxwell, Daewoo, Smile, Zelmer, Vigor, Scarlett, Supra, Energy.
- The average price range is 1200-2200 rubles. They have automatic control and advanced functionality. The most popular products are from Philips, Tefal, Redmond, Scarlett, Sinbo, Kitfort.
- Elite category. It combines progressive products with electronic control and a special design. A typical representative is the multifunctional device from the Moulinex company - Moulinex SW280233.
The selection of the desired product should be carried out taking into account the coordination of real needs, financial capabilities and technical characteristics of the device.
Don't forget about the aesthetic side. The attractive appearance and design of the device are also important.