Why do you need to wash
Food stored in the refrigerator can overflow and crumble, which contributes to the appearance of an unpleasant aroma in the refrigerator. The appearance of a layer of ice and frost on the walls of the unit, which forms as a result of warm air entering a closed space, can increase the load on the compressor. This will force kitchen appliances to consume more energy and exhaust their resources faster. These factors are the reason for regular defrosting.
Methods for defrosting a refrigerator
Since natural defrosting of the refrigerator sometimes takes all day, and we want to complete this action as quickly as possible, there are many ways to speed up the process. The only thing that you absolutely cannot do is forcefully peel off the ice with a knife or other sharp metal objects.
- Hair dryer. You should direct a stream of hot air inside the freezer, but keep the hairdryer at a distance so that drops of water do not fall on it. Do not direct a stream of hot air at the rubber door gaskets, as they may be damaged.
- Fan. You can place a fan in front of the open refrigerator; air flows from it will speed up the melting of the ice.
- Vacuum cleaner. Turn on the vacuum cleaner to blow air and direct the stream into the refrigerator. The ice crust will soon melt.
- Hot water. You can place a bowl of hot water inside the freezer, but be sure to place a wooden board underneath it. The water must be changed as it cools.
- Warmer. Fill the heating pad with boiling water and place it in the freezer. Change the water in the heating pad as it cools.
- Kettle. You can place a kettle with hot water on a stand in the chamber.
- Rag. You can soak a cloth in hot water and then wipe icy surfaces with it.
Causes of Ice Formation
The ice layer is formed due to the evaporation of moisture and the penetration of warm air from outside. This also happens if you keep the door open for a long time.
IMPORTANT! If ice is not removed in a timely manner, the load on the compressor increases. As a result, it may fail.
The resulting layer makes it inconvenient to put in and take out food, increases energy consumption and reduces efficiency. The cause is damaged or worn rubber seals that refuse to fit correctly when the door is closed. When placing dishes and foods in the refrigerator whose temperature is higher than normal room temperature, this will also lead to the formation of ice.
Less common causes include:
- compressor overload;
- clogged capillary pipeline;
- faulty defrost sensor or cooling valve.
Causes of icing
- The growth of a layer of ice occurs for certain reasons:
- Thermostat malfunction.
- Loss of door seal due to damaged rubber seal.
- In hot weather, the cooling mode is turned on to maximum.
- Frequent opening of the refrigerator door, or the door remains open for a long time.
It is recommended to defrost old refrigerators once a month. Otherwise, blocks of ice will cause the compressor to consume more electricity and make it difficult to access food in the freezer.
How long
This largely depends on the thickness of the ice layer formed and the defrosting method. It must be borne in mind that it will take time for the subsequent restoration of work. It can take a whole day to remove a thick layer of ice. Only then will all surfaces be completely clear of plaque.
IMPORTANT! How long it takes to defrost the refrigerator is indicated in the attached instructions, which must be read carefully. If you follow all the recommendations and properly care for the refrigeration unit, it will last for a long time without breakdowns.
The principle of defrosting models of all brands without exception remains constant. The duration of the procedure may vary, depending on the defrosting system, as well as the frequency, which is influenced by the year of manufacture of the refrigerator.
Read simple tips on how to defrost a Stinol two-chamber refrigerator in this article.
Life hacks to speed up the process
Sometimes it happens that you need to defrost the refrigerator much faster than planned according to the instructions.
In order to significantly speed up the process, you can use these proven life hacks:
- A piece of soft cloth must be moistened in hot water and wiped over the icy surface. As the material cools, it should be moistened again and again.
- Lay out a piece of clean cloth in several folds in the freezer. Fill a rubber heating pad with boiling water and place it on the material. Without closing the kitchen appliance door, wait for the water to cool completely.
- Place a wooden cutting board in the center of the freezer. Place a pan filled with hot water on it. The rising steam will melt the ice layer much faster. Do not use boiling water; it risks damaging the internal parts of the refrigerator.
Do you have a two-chamber refrigerator?
Not really
- Another effective way to speed up the process of melting frost inside the refrigerator is to spray the walls. Fill a spray bottle with warm water and start spraying the ice layer. Periodically collect the melted liquid with a cloth.
- For emergency defrosting, use special store-bought products. They contain components that accelerate the disappearance of ice from the walls and ceiling of the freezer. Such products not only help to quickly defrost the refrigerator, but also eliminate unpleasant odors, bacteria and mold. They are suitable for absolutely all models of kitchen appliances.
- Replace the fan heater with a hairdryer and get the same result. It’s just not safe to place it inside the camera, and holding it in your hands all the time is tiring. Also make sure that the flow of warm air does not blow over the seal.
- Use a vacuum cleaner to speed up the process. To do this, switch it to blowing, after changing the brush to a narrow nozzle. Direct the air flow alternately to different areas.
ADVICE! Open the refrigerator door and place a fan heater or heater opposite it. Do this so that melt water cannot reach them, and the air flow does not hit the rubber seal. This is one of the most effective ways to speed up defrosting.
Step 5 – Choosing a defrosting method
If you have time, simply open the door to allow the ice to melt naturally. Waiting time is 5-8 hours, depending on the thickness of the ice coat. With this method, the device takes the longest to defrost, but at the same time, the method is the safest and most gentle on the equipment.
How to quickly defrost a refrigerator?
There are 5 ways to accelerate defrosting:
1. Vessels with hot water . Place pots or bowls filled with water at 60-70 degrees on the refrigerator shelves and close the door. To avoid damage to the material, place the tank on a wooden stand or thick towel. After 20-30 minutes of active steam exposure, the ice will easily fall away from the walls of the refrigerator.
2. Hot cloth . Place a cloth soaked in hot water into the chamber. The method is effective on edges and areas with little ice. As an alternative, you can use hot water heating pads.
3. Hairdryer . Many of our readers and customers ask whether it is possible to defrost a refrigerator with a hairdryer. The answer is clear: yes, but subject to precautions. Use medium temperature. Do not direct air flow at the seals as the heat will cause temperature changes and subsequently reduce the elasticity of the rubber products. Maintain a distance between the nozzle of the hair dryer and ice formations.
4. Fan heater . Allows you to speed up defrosting up to two hours. The method is effective only in warm rooms. Direct the air flow to areas with the thickest ice; under no circumstances should the device be installed in the chamber itself.
5. Special means . Household chemical stores sell sprays that help remove ice crusts in a gentle manner. They also effectively fight harmful bacteria and eliminate foreign odors in the device chamber. Such products are absolutely safe for human health, since they are biodegradable and do not end up in food.
Periodicity
The frequency of defrosting the refrigerator chamber is determined by the rate at which a layer of ice appears. The 7 mm thick “coat” must be immediately removed to ensure proper operation of kitchen appliances. It is also necessary to focus on the characteristics of a specific household appliance:
- Soviet models do not have a built-in auto-defrost system, so the defrosting procedure should be carried out quite often - no less than 2 times a month.
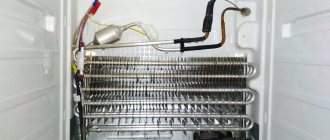
- A unit with a drip system, used in most modern models, develops ice on the rear wall during compressor operation. After turning it off, the melted frost flows in drops into a special container and evaporates from there. The disadvantage of this technology is that auto-defrosting only applies to the common chamber. And the freezer will have to be defrosted manually. The schedule and time of the procedure are usually set automatically and do not require user intervention.
- No Frost technology or dry freezing consists of a fan that distributes cold air. All condensed moisture evaporates directly in the cooling element. With such a system, the owner will not have to regularly defrost the unit, since No Frost applies to the entire refrigerator.
IMPORTANT! There are no devices that do not require defrosting at all. Even refrigerators with No Frost technology must be cleaned at least once a year.
Is it possible to defrost
The No Frost defrosting system is almost perfect. Thanks to the operation of the fans, condensate does not freeze on the walls, so ice build-up does not form. But it is still recommended to turn off and wash refrigerators with automatic defrosting at least once a year.
Drip systems in two-chamber refrigerators are installed only in the refrigeration compartment. The freezer requires manual defrosting. Models with two compressors are very convenient in such cases. You don't have to turn off the entire refrigerator, just turn off the freezer. While the top part is thawing, the other chamber will be cooling.
How often does a “snow coat” form in the freezer? Sometimes you have to remove snow from an old refrigerator every month. The reason for this is a worn seal, sagging door or frequent opening of the chamber.
When warm air constantly enters the compartment, the temperature rises. The motor-compressor is started more often for cooling, which leads to its rapid wear. Moisture from the air freezes on the walls of the compartment, causing ice and snow to form. This can be avoided by replacing the seal or adjusting the door.
A thick layer of ice and snow leads to disruption of heat exchange and rapid breakdown of the refrigerator.
As you can see, even equipment with the No Frost system can and should be defrosted. Units with a drip system are turned off for defrosting once every six months.
Step-by-step instruction
The main task when defrosting a refrigerator is to free the internal surfaces from frost while maintaining the freshness of food.
Manual defrosting can cause some difficulties, so it is better to use step-by-step instructions.
If you have a Liebherr refrigerator, we recommend reading detailed defrosting instructions here.
ADVICE! If the kitchen unit consists of two isolated chambers, then defrosting can be done alternately, transferring food from one compartment to another.
Turning off the device
First of all, you need to set the temperature regulator to zero and disconnect the kitchen appliances from the mains by removing the plug from the socket. This is done in order to eliminate the possibility of electric shock while cleaning the “insides” of the unit.
Product extraction
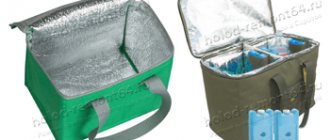
Next, remove food from the chambers and move it to storage so that it is exposed to warm air as little as possible. You can store them during defrosting in different ways:
- if it’s a cold season outside and you have a balcony, then it is recommended to move the food into a basin and take it out into the fresh air;
- purchase thick food foil or a thermal bag in advance and put food there;
- move the food from the refrigerator into a large pan and take it to the bath, placing it in cold water;
- If you live in a private sector, then while defrosting, containers with food can be taken to a cold cellar.
We recommend that you read other articles on our website: How to clean a coffee machine with citric acid - simple recipes
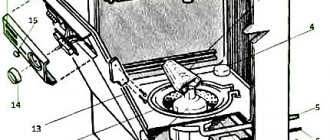
Removing shelves and drawers
After freeing the kitchen appliance from the food, proceed to remove all loose parts of the refrigerator. Carefully remove drawers, trays and shelves and wash them using liquid dish soap. Use only soft cloths or sponges.
Do not use solvents, bleaches, car cleaners, essential oils, or abrasive cleaners. They can damage the surface of the device or even cause a fire.
Flood protection
To avoid flooding the room with melt water, do not forget to check the patency of the built-in liquid drainage tube. It should come out from the back into a special tray. It is recommended to direct it into a basin or bucket. Don’t forget to empty the water from the special defrosting container as it accumulates. Place old towels or wrinkled newspapers near the back of the machine. Also place a thick cloth under the refrigerator to prevent water from damaging the flooring.
Selecting a method
Based on the built-in technology of the household appliance, choose the appropriate defrosting method. If the procedure is carried out at a normal, non-accelerated pace, then simply leave the door open and periodically check the condition of the chambers. On average, defrosting lasts from 2 hours to a day. It all depends on the thickness of the ice on the walls, the volume of the chambers and the air temperature in the room.
Removing ice
Never try to speed up cleaning your refrigerator by physically removing ice. Only natural melting or its artificial acceleration by adding a heat source or special chemicals. Any physical intervention can damage the internal coating of the unit, which will predictably lead to its damage. The maximum permissible action is to easily remove the layer, the removal of which can be determined visually. Take it with your palm and carefully separate it from the ceiling or wall of the chamber.
Read about how to clean the inside of the refrigerator after defrosting here.
Water purification
After the main flows of water have merged into a special receiver, excess liquid should be removed from the body. Dry rags or kitchen towels work great. Try to select absolutely all the water, because otherwise, when you turn on the device, they will become a place for new rapid formation of ice.
Drying and airing
To be more sure that not a drop of liquid will remain in the refrigerator, leave the doors open for another couple of hours. At the same time, create a draft in the kitchen. Let the insides of the unit be additionally blown with air currents. This will eliminate the possibility of rapid condensation after turning on the refrigerator and will completely remove any remaining unpleasant odors.
Leak test
While the last drops of moisture are drying, it is recommended to carry out additional diagnostics of the parts of the kitchen appliance. Carefully inspect the rubber seals on the chamber doors. If dry areas are found, they should be immediately treated with silicone grease. If it is not available, regular sunflower oil will do, but it must be refined. If you find cracks and other damage, then you should think about completely replacing the gasket. After all, it is she who is responsible for the tightness of the refrigerator, keeping warm air from getting inside.
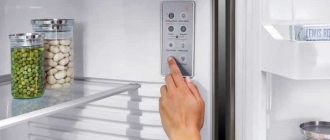
Connecting the device
After completing all these manipulations, you can turn on the equipment to the power supply. Just don’t rush to put shelves, drawers and food items back in their original places. First, give the device time to reach the required temperature. This usually takes up to half an hour. This will help extend the life of your assistant and prevent the rapid development of new ice build-up.
In this article you can find detailed instructions on how to turn on the refrigerator after defrosting.
How to defrost a refrigerator correctly and quickly? Step-by-step sequence of actions
We hope that our arguments regarding the advisability of defrosting the refrigerator were quite eloquent. Simply understanding the importance of such maintenance will not be enough - you also need to know how to properly and effectively defrost without damaging the system further. Our editors suggest you study the step-by-step instructions - just follow the sequence we described and do not indulge in experiments.
This is clearly the work of amateurs. Don't be like them, be sure to read our entire article!
Preparatory work
First of all, you will need to turn off the power to the equipment. Otherwise, the equipment will continue to work - why do you need “Sisyphean labor”? There is, of course, one exception - two-compressor refrigerators, in which each compartment functions separately from each other. But even their manufacturers do not recommend defrosting separately, because high humidity and electric current can often lead to serious injury or death to the owner.
Only a two-compressor model will allow you to defrost the freezer without turning off the unit from the power supply. But be careful!
Having dealt with the energy source, you need to open the door (or doors) and remove all products stored inside from the shelves and trays.
If you don’t know where to store food during defrosting, here are the most common and convenient methods:
- using a bag with a refrigerator function or thermal bags;
- moving to another working refrigerator (you can try to “rent” the unit from relatives, neighbors or friends);
- place the food in a large container filled with cold water (ideally add pieces of ice for greater effectiveness);
- if you perform the procedure in early spring, winter or late autumn, you can simply take the food out to the balcony (loggia);
- Residents of rural areas can use the cellar.
By creating a box on the balcony with an internal coating made of foil material, you can store food even in summer
Next, you will need to remove all shelves and trays from the “bows” of the device. The completion of the first stage will be the placement of rags or unnecessary paper (for example, old newspapers) at the bottom of the device - this “event” is necessary to prevent water from getting on the floor when melting.
Do not forget that the doors of the refrigerator must be open constantly to allow warm air to enter.
Many modern models are equipped with a special sump and drain hose. Thanks to this, the owner is freed from the need to place various hygroscopic materials at the bottom of the equipment.
Defrosting the refrigerator
The main part of cleaning the device from ice is the longest, but at the same time the simplest stage. You just need to wait from three to twelve hours (depending on the degree of icing, the volume of the chambers and the temperature in the room).
Watch the water spread if you don't want to ruin your floors or flood your neighbors
During this period, the ice completely turns into water and is removed from household appliances in all possible ways. The completion of melting is symbolized by the complete absence of traces of frost or ice on the entire surface of the refrigerator.
Currently, there are two ways to achieve melting of the ice mass:
| Natural defrosting | Artificial acceleration |
| Does not involve any external influences. Recommended by both manufacturers and experienced users, as it allows you to achieve maximum results. | It involves using a source of “heat” - it can be a bowl of hot water (not boiling water!), a hairdryer, or even a fan heater. Unfortunately, you have to pay for speed with low quality and an increased risk of breakdowns. |
Water treatment and removal
In the meantime, while the ice is melting, you can start cleaning the previously removed food boxes and shelves. Wipe them with a damp and dry cloth, you can add a little cleaning agent (just no abrasive substances or materials!).
If you wish, you can do a “big wash” by washing the elements in the sink or bathtub
Subsequently, remove any accumulated water from the refrigerator and clean the remaining interior surfaces.
Drying the remaining moisture and starting the device
We have almost achieved our goal! All that remains is to remove the excess liquid remaining on the body. To do this, you can use a dry rag or towel, as well as the thermal “elements” we mentioned earlier - hair dryers, etc. If the hostess has enough time, you can simply wait another hour or two.
Try to collect as many drops of moisture as possible onto a rag or sponge, because if they freeze, they will nullify all your painstaking work
While the last drops of moisture are drying, you can carry out additional diagnostics and check the rubber sealing gaskets on the doors. If there are dry areas on them, they need to be treated with silicone grease or sunflower oil, but always refined. If cracks and other damage are detected, you should think about replacing the gasket - it will no longer be able to prevent warm air from getting inside.
After these manipulations, you can connect the equipment to the network. But do not rush to place shelves, drawers and products in their original places - give the system half an hour to reach the required temperature. By doing so, you will extend the service life of your assistant and prevent the appearance of new ice build-ups.
After the procedure, the device can freeze food more strongly for some time at the same temperature values
Useful tips
In order to remove stains and unpleasant odors from the kitchen unit, prepare a soda solution in advance, which is recommended to rinse the inside of the refrigerator after the ice has disappeared. Its components are simple:
- 1 tbsp. l. soda;
- 1 liter of warm water.
Wash the walls of the chamber with the resulting solution using a soft cloth. Microfiber works great.
If, while unloading the refrigerator, you suddenly find food or kitchen utensils frozen to the inner shell of the refrigerator, do not try to tear them out of the ice. Let this object separate from the wall on its own during the defrosting process. Otherwise, you will face expensive equipment repairs.
In this article you will read about how to defrost the Biryusa refrigerator with your own hands.
IMPORTANT! Use accelerated defrosting methods as little as possible . Despite all the apparent safety of the chemicals used in this situation, such a procedure reduces the service life of the refrigerator by 25%.
It is better to defrost in the cold season. In summer, under no circumstances should the refrigerator be left for a long time without power, otherwise high air temperatures will prevent the device from restarting correctly. During startup, it will take a very long time to reach the required temperature, which will negatively affect its service life.
Under no circumstances use folk advice regarding defrosting, especially if it contradicts common sense. It is prohibited to treat the inside of the refrigerator with salt and vinegar to speed up the procedure. These products may damage the plastic sheathing.