Household gas equipment poses a high risk. Often the open fire of ovens and stoves may go out due to a draft or gas supply being cut off. To prevent leakage and gas supply, thermocouples are installed on the plates. Next, the topic will be covered: what is a thermocouple for a gas stove, the principle of operation, the main malfunctions and testing of this equipment. A description of how to do it yourself will also be given.
Device
The thermocouple for the oven and gas stove is designed according to the Seebeck principle. The scientist has found a way to produce a small fraction of electric current by heating various metals. The thermocouple consists of the following elements:
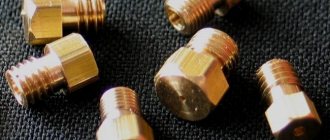
- Working tip with 2 types of metals inside. It is this part that is in direct contact with the open flame.
- Contact tube up to 1.5 meters long. This is the electrically conductive contact from the tip to the bolt mechanism.
- Solenoid valve. A mechanism that opens and shuts off the gas supply to the burners and oven. The valve is metal. Raised by magnetic attraction.
There are 2 main types of this device:
- Ungrounded. This type of pair has a split-coated tip. This approach made it possible to reduce susceptibility to external electromagnetic vibrations. The disadvantage is the connection method. Often the two halves are joined together by soldering or crimping. Both options lose their tightness with frequent and prolonged heating, due to an increase in volume.
- Grounded. A more common type of device. The tip is not separated by an insulating coating. This affected the sensitivity of the tip to electromagnetic vibrations from extraneous sources. Microwave ovens must not be installed near the oven. The electromagnetic field can cause the valve to open. Despite this, grounded thermocouples are the most reliable.
The shell with metal rods is fixed to the tube using: welding, soldering, crimping. The mounting depends on the purpose of the thermocouple and at what temperature fluctuations it will operate in the future. The most reliable connection is welding. This connection is not disrupted by the expanding surfaces of the housing. The chemical composition of the rods inside the housing also depends on the temperature. The rods are:
- Chromel is aluminum. Operates at temperatures - −200 ÷ +1000 °C. Denoted by the letter "K".
- Copel - chromel. −200 ÷ +800 °С. Refers to the most sensitive elements. Denoted as "L".
- Chromel - constant. −40 ÷ +900 °C. Has increased sensitivity. Designated "E".
- Copper is constant. – −250 ÷ +300 °C. Denoted by "T".
- Iron is constant. −100 ÷ +1200 °C. They are among the cheapest devices. Designated "J".
- Tungsten - rhenium. Operates at temperatures above +1800 degrees. Used in heating boilers. Designated "A".
- Nichrosil - nisil. −200 ÷ +1300 °C. Denoted as "N". Used on high-precision heating devices.
- Double platinum rhodium. +100 ÷ +1800 °C. Designated "B".
- Platinum - platinum rhodium. There are 2 types. Operates at temperatures up to + 1700 °C. Designation "S" or "R".
Knowing the composition of the internal rods, it is easy to select a suitable element to replace the faulty one.
The thermocouple kit also includes a tube and a valve. The tube has a conductive element inside. Often a wire enclosed in a fireproof sheath. The solenoid valve is necessary to open and close the gas.
Design and principle of operation
It is known that in a closed circuit, which consists of two conductors of different metals (for example, chromel and copel), a thermoelectromotive force (EMF) arises, provided that their hot and cold junctions have different temperatures (Seebeck effect). The value of the EMF depends on the materials of the conductors, the temperatures of their cold and hot junctions.
Typically, the voltage of a household thermocouple is in the range of 20-60 millivolts (mV), which is enough to open the gas valve, but, of course, not enough to operate complex automation and other modules that already require an electrical connection.
The module is not limited to a pair of junctions, but the thermocouple device is quite simple and understandable:
- The sleeve, inside of which there are thermoelectrodes with the “hot” junction of the conductors, is what is attached to the burner module of the boiler, next to the pilot burner (igniter).
- An extension cord, protected by a copper tube from external influence of electromagnetic fields, is used to connect the working part (hot junction) with the electromagnetic gas valve.
- A dielectric washer with a “cold” junction, it is this that is inserted into the socket of the gas solenoid valve.
Most often, thermocouples of domestic gas boilers use junctions made of chromel and alumel (TCA), chromel and copel (TCC), and iron and constantan (TLC). All alloys used, their markings and characteristics are listed in the table below.
| Thermocouple type (European classification) | Junction conductor materials | Russian markings | Temperature range, °C |
| K | chromel-alumel | THA | -200 – 1 300 |
| L | chromel-copel | THC | -200 – 850 |
| J | iron-constantan | TZHK | -100 – 1 200 |
| N | nikhrosil-nisil | TNN | -200 – 1 300 |
| T | copper-constantan | TMKn | -200 – 400 |
| E | chromel-constantan | THKn | 0 – 600 |
| S | platinum-rhodium-platinum | TPP10 | 0 – 1 700 |
How does a thermoelectric thermometer work as part of a gas boiler?
The operating principle of a thermocouple in a gas boiler is the same everywhere:
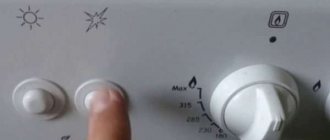
- First, a person mechanically opens the gas supply valve by holding the solenoid valve button for 15-30 seconds.
- Then the piezo ignition button is pressed once, a spark appears and the pilot burner lights up.
- The magnetic valve button is held down for another 30-60 seconds until the working junction of the thermocouple, located next to the igniter, heats up and produces the required voltage.
- After 30-60 seconds, the solenoid valve button is released, but combustion continues as the heated thermocouple produces enough voltage to hold the gas valve open. The boiler operates normally, without human intervention.
- Once combustion stops, the flame no longer heats the thermocouple, causing the voltage to be insufficient to hold the gas solenoid valve open and it closes, stopping the flow of gas.
How to choose a water softener for a gas boiler and extend the life of the heat exchanger
Principle of operation
A thermocouple is a fairly simple device. The working principle of a thermocouple can be explained as follows:
- The tip is located near an open flame.
- As soon as the gas stove or oven is turned on, the metal rods heat up and create an electric current.
- Current flows through the tube and enters the temperature sensor.
- An electromagnetic field is created in the sensor, which lifts the valve, opening the flow of gas to the burners.
If the flame goes out without human control, the thermocouple cools and the electrical voltage disappears. The electromagnetic field also disappears, thereby closing the valve. The flow of gas into the system is blocked.
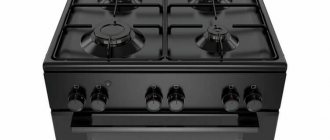
Thermocouples are most often installed inside ovens. This is necessary due to the lack of visual control of the flame. This gas monitoring device has a number of advantages:
- High accuracy.
- Long working period.
- Easy to install, replace, maintain.
The gas supply control device is reliable and durable. But it also has its service life.
Malfunctions
Determining a malfunction of a gas control element is quite simple. A faulty sensor has the following symptoms:
- When the burner is turned on, the flame does not light up. The reason is the gas supply valve has not opened. If the stove is equipped with a push-button switch, the button will press back immediately after pressing.
- After switching on, the flame burns for a short time and goes out again. The reason is the same. On plates with push-button control, shutdown will occur immediately after pressing.
So, there are only two reasons and both lead to the valve. Subsequent testing is necessary to determine the problem.
Examination
Checking the thermocouple for functionality is quite simple. To do this, you must first dismantle the element. You can clean it before dismantling. It is performed as follows:
- It is necessary to clean the tip body using sandpaper. Accumulated carbon deposits do not allow heat to pass through, which leads to prolonged heating of the thermoelement.
- You also need to check all electrical contact connections. Often, when several burners are turned on, the temperature rises, which melts the insulation of the wires. Uninsulated wires may touch the stove body, creating a short circuit.
- It is worth paying attention to the rigidity of the shrinkage of the terminals. Heating the copper tips can reduce contact with the conductor, causing the valve to simply not receive voltage to create a magnetic field.
- After cleaning, you need to turn on the stove again. If the problem remains the same, the thermocouple must be removed.
Often, one stove has thermocouples installed on all burners and inside the cabinet. If cleaning does not lead to the desired result, you will have to dismantle and check all the elements.
- Close the main gas supply valve.
- Understand the top panel of the slab.
- If the device is located inside the oven, remove the door.
- Find the solenoid valve.
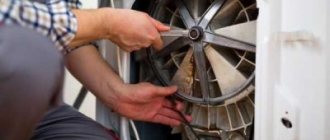
- Using a wrench, disconnect the element from the valve body. Gas regulators have different connections, simple fitting or in the form of terminals. The terminals must be disconnected carefully so as not to break the protruding tip. It will not be possible to restore it.
Next, you just need to inspect the surface of the element. If it is damaged, no inspection will be required. The part will have to be replaced. It is impossible to repair a melted pair. If the case is intact, you will need to check with a multimeter:
- Set the multimeter to the mode for measuring the minimum constant electrical voltage.
- The tube has a conductive contact; you need to connect the “+” probe of the multimeter to it.
- Connect the minus probe to the element body.
- Heat the tip over an open flame.
When heated, a working thermoelement should produce a fraction of the electric current of 17–25 mV. If the voltage is absent or below these values, the part requires replacement. It is not recommended to test the part for resistance. Such a check will only show the integrity of the case. A non-functional thermocouple must not be disassembled for repair purposes. It will not be possible to restore the heating elements, since it is impossible to find replacement parts.
If the thermocouple is working, the solenoid valve will require checking. It is difficult to repair; if it malfunctions, it is better to replace it with a new one. To check, the valve must be removed after first shutting off the gas supply. This procedure cannot be performed on working stoves. Further:
- Check the part for contamination.
- Remove and clean the filter; on the latest models it is located on the inlet side.
Next you will need a battery or power supply. The “+” contact from the battery must be connected to the only terminal of the device, the “minus” contact is supplied to the housing using a piece of wire. Within a minute, a click should sound, indicating that the locking device has opened. After disconnecting the battery from the terminal, the click should repeat, indicating that the shutter is closing. If the valve does not respond to the supply of voltage, it must be replaced strictly with an analogue one. If it closes while voltage is applied, the valve is also considered unusable.
Thermocouple for a gas stove, what is it
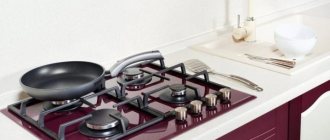
Gas equipment is considered the most suitable option for creating comfortable living conditions in the living quarters of a house or apartment. Many people are accustomed to cooking food using natural gas and heating their homes using gas equipment. This method can be called more economical and practical than using electrical energy for stoves or heaters.
But “blue fuel” is an explosive substance, the use of which requires compliance with certain safety measures. For this purpose, modern gas equipment has special design details. They perform the functions of an automatic gas supply regulator under various operating conditions.
Thermocouple
According to the definition of the international standard, a thermocouple consists of two connected conductors used as part of a device that measures temperature.
It remains to add: the wire material is selected with different signs of the thermopower coefficients. The maximum potential difference is achieved. The accuracy of measurements is directly determined by the value of the measured parameter.
Since instruments demonstrate absolute and relative errors.
A common thermocouple is considered to be alumel (– 17.3 µV/ºС), chromel (24 µV/ºС). At a junction temperature of 300 ºС, the product outputs a voltage of 12 mV to the contacts.
The digital meter evaluates the value according to the result obtained, and the gas stove carries out the necessary operations. In the simplest case, a thermocouple detects the presence of a burner fire.
The fire goes out - the safety valve is activated, shutting off the gas supply. The concept of safe use of the stove is being implemented.
Sometimes accurate temperature measurement is not required; the circuit is organized on a digital comparator that compares the thermocouple voltage with a given level. The threshold is crossed - the circuit is triggered. Further actions of the gas stove are determined by the algorithm laid down by the developers.
Thermocouples are used in household appliances due to their unparalleled reliability, low cost, and fault tolerance. Indeed, how can an ordinary wire break? If it breaks, it won’t take long to mend it. The soldering area can be easily restored. A gas stove with a thermocouple works reliably and is repairable.
The aspect of unification plays a significant role. thermocouple is easily replaced with another similar one. The alloys are easy to purchase separately; you can make your own temperature meter for a gas stove. An important criterion for the marketing attractiveness of equipment.
Seeing simplicity, the buyer is willing to spend money. Installation is simple. Anyone can lay a couple of wires. A few words about the purpose of a thermocouple.
Types of ovens, structure and principle of operation
There are appliances that are installed separately, and ovens that are combined with the hob. Burners located inside the structure are responsible for cooking food in the oven. There are three types of heating. You can find different models on sale:
- Units with a grill - with burners located in the upper part of the cabinet.
- Standard gas stoves with normal heating. This is a classic option - burners that are located at the bottom of the cabinet.
- Convection appliances. In this case, the heating elements are also located at the bottom, but even heat distribution is ensured by the fans built into the device.
But this is not the entire list of additional devices that may be in the oven. In addition to thermal fans, the mini-oven can be equipped with:
- electric ignition;
- thermostat, automatic cleaning systems;
- timers signaling the start or end of work;
- security system that controls the flow/presence of gas.
Along with the oven, future owners receive a set of baking sheets, a roasting pan, spits, etc. If we consider all the elements, then one of the main devices is the thermostat, the task of which is simple, but the work is necessary.
Now we need to talk about the signs indicating problems with this unit. Like all structures, the thermostat also “has the right” to break. It’s quite easy to understand that something terrible has happened to the thermostat. When the appliance is faulty, the cooking time increases, the food either burns or, conversely, remains raw.
Sources:
https://istra-gaz.ru/oborudovanie/termopara-v-gazovoj-plite-poshagovoe-rukovodstvo-po-remontu-i-zamene.html
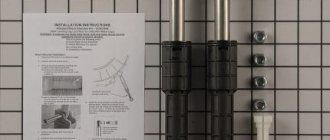
Replacement
Replacing the thermocouple in a gas stove should only be performed at a specialized center. But it is quite easy to do it yourself, subject to strict safety measures. Before replacing the gas stove thermocouple, you must purchase it. The element body is marked with an English letter. It is this marking that indicates the chemical composition of the rods inside the housing. Installing an element with a different composition may affect the valve opening or closing time and the overall sensitivity of the part. Also, parts with different markings may have connecting parts, thickness and length of the tube that differ from the original. You need to purchase a complete analogue. Next you need:
- Unplug the stove from the electrical outlet.
- Turn off the gas supply at the main valve.
- Remove the top panel of the gas stove.
- Disconnect the thermocouple from the mount. The tip is constantly at high temperature and may be difficult to unscrew. Before dismantling, it is better to use a rust remover. It is strictly prohibited to bend or break the fastener.
- Replace the faulty part with a new one.
- Reassemble the plate in reverse order.
- Connect the oven to electricity.
- Open the gas supply.
- Check the operation of the device.
Before changing the thermocouple, be sure to protect yourself from gas leaks and electric shock.
When purchasing a new part to replace an old one, you need to pay attention to the length of the conductive tube. It must be identical to the factory counterpart. When installing on a gas stove, it is necessary to install the tube at the mounting points; it should not dangle, sag, or be located near the flame.
Also, when installing the thermocouple tip, you must maintain the distance between it and the burner. A close location will significantly reduce the service life of the part; if the location exceeds 1 cm, this can lead to problems with gas ignition.
What is it and what is it for?
Purchasing a thermocouple for a gas stove is a concern for the safety of your family.
Essentially, it is a sensor that records temperature. But not the environment, but the flame of the stove burner. However, the developers did not try to monitor changes in the temperature of the fire, but only its presence. The fire is on, the sensor is heated, everything works fine. The fire goes out, the sensor has cooled down, the gas is turned off.
Buying a gas stove with a thermocouple is not much more expensive than without it, but the prevention of gas leaks is guaranteed.
Everything is simple, effective and inexpensive. The presence of the option slightly affects the price of the model. And the safety of such a stove increases.
Important! Escaped milk, a boiling kettle or soup can extinguish the flame. If there is no control system, then the gas enters the kitchen. When mixed with air, it forms an explosive mixture. An accidental spark or attempt to re-ignite the burner will lead to tragedy.
In general terms, a temperature sensor is a small cylinder made of two metals welded together. Wires go from it to the solenoid valve. It is he who controls the gas supply. The operation of the system is based on physical laws, which many forgot about immediately after school.
Let's repeat physics
The thermocouple is based on the laws of physics: a closed circuit of metal conductors produces an electric current when heated.
The first effect that formed the basis of a thermocouple was discovered by the German physicist T. Seebeck. In his experiments, he established that a closed circuit of two conductors of different metals forms an electric current when heated. In this case, the more the soldering of conductors is heated, the greater the current appears.
The German scientist T. Seebeck was the first to discover the physical phenomenon on which the action of a thermocouple is based.
One contact of the circuit becomes hot and is called “hot”. The other, “cold” one should be at a lower temperature. The temperature reading is taken from it. Since the dependence of the resulting current on the heating temperature is strictly linear.
Thermocouple markings
Before purchasing a device, it is important to understand the product labeling in order to choose the appropriate option.
Pairs of metals whose use is most effective were established experimentally. Depending on the metals used, the device has its own marking. Knowing it and the characteristics of the resulting junctions, you can choose a sensor suitable for your needs.
The following types are distinguished:
- K (ТХА/ХА) – nickel with chromium or alumel. Common, accurate and inexpensive with an accuracy of +/- 1.10 C and a range from -270 to 12600 C.
- L (THC) – chromel with copel. The main feature is durability.
- J – iron with constantan. The second most popular with a range from -210 to 7600C, is not durable.
- T – copper with constantan. A highly specialized device for particularly low temperatures.
- E – nickel or chromium with constantan. High-precision device for average temperatures up to 8700C.
- N – nichrosil. An extremely accurate but expensive device with a measuring range of up to 3920C.
There are alloys with added reinforcements on sale. They are not that popular, but they have their uses.
Where and how is it used?
In burners, a thermocouple for a gas stove works on a simple principle: whether there is a flame or not.
The principle of operation of a thermocouple for a gas stove is not complicated; it reacts to the presence and absence of a flame.
In the oven, you already need to control the heating temperature. The housewife sets the temperature and, depending on how close the actual temperature in the oven is, the sensor regulates the intensity of the gas supply through the solenoid valve.
A gas oven thermocouple controls the degree of heat, not just the presence of a flame.
The operation of the temperature sensor for gas boilers and water heaters is based on the same principle. The water heating temperature is controlled, which makes it possible to save gas consumption.
A thermocouple installed on a gas boiler and regulating water heating will save the family budget.
Electronic thermometers are often found. They are used to measure the temperature in rooms and in people. Such devices are much safer than mercury devices. At one time they were widely used in everyday life.
The thermocouple's low inertia property is widely used in industry. This makes it possible to measure small temperature differences. The use of sensors in aggressive environments and at high temperatures, about 2,000 degrees, is also highly valued.
There are thermocouples suitable for measuring temperature in aggressive environments. They have stable protective fittings.
Adviсe
Operation and subsequent repair of the thermocouple must be carried out in compliance with safety precautions.
- It is necessary to respond promptly to a gas leak. Even new gas protection may not work. This happens due to debris getting into the bolt seat. Debris appears in the gas supply system due to poor quality pipe repairs.
- Do not cool the thermocouple with water. A sudden change in temperature can destroy the rods that form the current.
- It is prohibited to operate thermocouples with adhered food or carbon deposits. Foreign coatings retain high temperatures. After turning off the stove, the shutter mechanism will not work, which will lead to a gas leak.
- After replacing the element, you need to monitor its operation for several days.
- It is prohibited to purchase parts from unknown manufacturers or low-quality counterfeits. For a new pair, it is better to contact a specialized store or service center of the gas stove manufacturer.
- If you have doubts that you will be able to check or replace the thermocouple yourself, it is better to entrust this to specialists and take the stove to a service center.
Replacing a thermocouple is an easy but very responsible process. Do not neglect simple safety rules.
How to check and replace a thermocouple
The main sign of a malfunctioning flame sensor is that the wick goes out simultaneously with the release of the button. Sometimes the problem manifests itself differently - the light on the igniter remains, but after igniting the main burner, the fuel supply is shut off again and the boiler goes out completely. Reasons for such problems:
- the thermal electrode is covered with soot and does not warm up well, causing the voltage in the circuit to drop below the minimum;
- burnout of the meter body;
- contact failure at the hot junction point;
- the fastening nut has been unscrewed, the working rod is skewed and is poorly heated by the igniter;
- the traction sensor has become unusable or its electrical circuit has broken.
The electrode heated by the igniter must be periodically cleaned of carbon deposits. The problem is that the contamination of the part is hard to see from the outside; you have to remove the bar or the entire panel with the burner
Clarification. A malfunction of the draft sensor causes similar symptoms, since this “limit switch” is connected in series with the thermocouple (in an open circuit). To eliminate the influence of the sensor, temporarily short-circuit its wires.
For diagnostics, you will need a multimeter or other device capable of measuring low voltage (up to 100 mV). How the check is performed:
- Close the gas supply to the heat generator or instantaneous water heater using the tap located on the supply pipe. Remove the casing or front panel of the unit.
- Using open-end wrenches, unscrew the nuts securing the thermoelectrode and connecting tube. Remove the flame sensor.
- Carefully inspect the working electrode, clean it of soot with a brush and rag. If burnouts are detected during a visual inspection, the thermocouple must unconditionally be replaced.
- Moving to the kitchen, light the gas stove burner. Connect the multimeter clamps to the center terminal and the copper tube. Set the lowest measurement limit – 0.1 or 1 V.
- Heat the thermoelement with a gas stove burner while observing the voltmeter readings.
The main condition: a working thermocouple for the boiler must produce a voltage of at least 0.02 volts. If the device shows zeros, the voltage fluctuates or does not exceed 20 mV, the element needs to be changed. Modern sensors cannot be repaired by re-soldering.
Advice. When buying a new thermocouple, always be guided by the brand and specific model of the boiler, so as not to get confused in the markings and designations.
If you don’t want to remove the element ahead of time, diagnostics can be performed directly on the boiler. After unscrewing the nut, disconnect the thermocouple tube from the automation and connect the multimeter as described above. While holding the key, light the igniter and take readings from the device. Disadvantage of the method: the impossibility of visual inspection and cleaning of the electrode from soot.
When installing a new thermocouple in a gas boiler, adjust the position of the heated rod. Ideally, the electrode is horizontal, does not deviate up or down, and is well washed by the flame of the wick.