Content:
- 1 Dead pixels: what are they, where do they come from and how to get rid of them
- 2 When is a dead pixel test necessary?
- 3 Warranty service
- 4 How to visually check the screen for dead pixels
- 5 How to check for dead pixels online
- 6 How to repair dead pixels yourself
One of the most annoying problems with monitors or LCD TV screens is the appearance of “dead” pixels. It is noteworthy that there is no escape from this problem - there will always be dead pixels, it is important that their number does not exceed the permissible limit. Only the premium segment of TVs is free from such shortcomings, but the price of such devices will be appropriate. 90% of buyers in any household appliances store pay attention to TVs of the second (II) and third (III) classes, which are considered optimal in terms of price-quality ratio. If you trust the seller and discover at home that the TV has a lot of dead pixels, it will be almost impossible to return it, because many manufacturers warn that this is not a warranty case. Therefore, it is important to check for dead pixels before purchasing, especially since it is not as difficult as it seems at first glance.
Why do you need a monitor test for dead pixels when purchasing?
It turns out that you can't always return a low-quality monitor back to the store. Manufacturers very often indicate that the monitor is a second-class product, not a first-class one, and such a product, in accordance with the standard, may have a certain number of dead pixels.
It’s unlikely that you’ll be able to return it, and no one wants to use a damaged monitor. That is why it is necessary to conduct a test at the purchase stage. Don't be shy about asking the seller to check. You have every right to receive a quality product, because you pay money for it, and in most cases quite a lot.
Dead pixels: what are they, where do they come from and how to get rid of them
Pixel is the smallest rectangular element with which an image is transmitted to the screen. With minor damage, malfunctions or assembly errors, the pixel may “die”.
The problem appears as dots whose color does not match the image. The reason for the violation lies in the malfunction of the matrix or its damage. You can detect dead pixels as follows:
- "Closed pixels" When you turn on your monitor or TV, some pixels on the screen remain dark. They are called "dead" and look like black dots.
- "Open pixels" Some pixels remain active after the device is turned off and continue to “burn” on a black screen.
- "Stuck Pixels" They are the most difficult to detect. They become visible only if their color clearly does not match the check table.
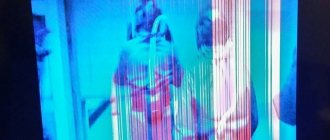
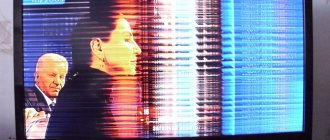
Checking for dead pixels is necessary if several defects are detected on the screen in one of the areas. In some cases, the defects are so noticeable that the size of the “broken” area is 10 points in length and 10 in width. Sometimes “dead” pixels line up horizontally or vertically and form noticeable stripes. Operating such a device will inevitably cause discomfort.
The matrix of a standard monitor contains about 6 million subpixels. In 4K displays, this figure can be thirty-seven million. A huge number of elements cannot work without failures, but the dead pixel test allows you to avoid buying a TV or monitor with large damaged areas.
Dead pixels: concept, reasons for their appearance
The display has a huge number of pixels. A dead pixel may appear on the TV, since it is impossible to guarantee their 100% serviceability. On the screen you can often see completely motionless dots glowing in one color. When the image changes, they do not change their location or change color. This is what a dead pixel looks like on a TV. It can be colored, white and black. The following reasons for such defects are identified:
- Typical manufacturing defect.
- Imperfect technology.
Dead pixels appear in 2 layers:
- Thin film transistors.
- Liquid crystals.
When the transistor that controls the liquid crystals fails, black dots begin to appear, which indicate non-functioning cells. It is simply impossible to control these crystals subsequently. When checking your TV for dead pixels, you need to turn on a light background against which they are visible. Some experts believe that they cannot be “cured,” although others argue that using a laser can return the pixel to partially working condition.
The second reason is caused by a subpixel frozen in one position. This problem manifests itself in the layer where the liquid crystals are located. Such a “frozen” object looks like a colored or burning (white) dot. The program for checking dead pixels on a TV will help identify and eliminate this defect through a series of physical manipulations. In some cases, dead pixels disappear on their own after some time.
It turns out that when choosing an LCD TV, it is not enough to pay attention only to the appearance of the product and check for the presence of numerous connectors, ports, and functions. An important point will be to check the product for matrix defects. Let's figure out how to identify dead pixels on a TV in order to protect yourself from purchasing a broken product.
When is a dead pixel test necessary?
When purchasing a TV or monitor, you need to test for dead pixels. Checking helps to avoid red tape with warranty service of the product or with its replacement. To prove that the product can be returned, an examination will be necessary. And only after the matrix has been checked for dead pixels and the presence of defects has been confirmed, can we talk about a malfunction. But this is not a guarantee of exchanging the device for a new one, because the owner will still have to prove that it was not his actions that caused the breakdown.
ISO13406-2 standards state that each monitor may have a certain number of faulty points upon sale.
Different manufacturers have different standards for the presence of dead pixels, depending on:
- how they are located;
- what is the monitor resolution;
- or what is the diagonal size of the display.
For example, LG standards recognize the presence of 10 stuck and 3 “dead” pixels on a 20-inch screen. Samsung's standards call for 7 dead spots, while Dell's have 6 stuck spots and 13 dead spots, depending on which display the fault was found on. Therefore, even a pre-sale check of the Samsung screen for dead pixels revealed several dead pixels in acceptable quantities - there’s nothing wrong with that. But if there are several devices, the dead pixel test will allow you to choose the “healthiest” device.
Cases when you should refuse a purchase - if testing for dead pixels reveals a deviation from the standard:
- if the monitor or TV is classified as class 4 (it can have up to 50 burning points, 150 “dead”, 500 “stuck”),
- if the monitor matrix corresponds to class 3 (this implies the presence of 5 “hot” points, 15 “dead”, 50 “stuck”),
- the second class of monitor quality assumes only 2 burning or “dead” points and only 5 “stuck” points,
- if the monitor matrix belongs to the first class, there should be no inconsistencies or defects on such a product at all.
Most standard brands of monitors or screens comply with the second class. They also need to be checked for dead pixels. The check should reveal no more than 5 malfunctioning pixels.
The class of a product affects its price. For example, monitors from the same manufacturer, but having different classes, may differ in cost several times.
Allowable number of dead pixels
Due to the complexity of the structure of LCD panels, the production of such screens is very difficult. Not even all companies that produce LCD TVs have their own production of liquid crystal matrices.
Such displays are produced by only a few companies in the world, and the rest simply buy ready-made screens from them for further production of televisions.
So, with such complex production, matrix defects are possible, manifested in the appearance of dead pixels. And they can only be identified on an already assembled device.
If we require manufacturers to 100% reject matrices with defects, then the production of LCD panels would be very expensive and this would lead to a significant increase in the price of LCD TVs and monitors. Therefore, a compromise was found in which the presence of a certain number of dead pixels on the TV screen was allowed, and this was formalized into certain standards.
According to standards, dead pixels are divided into several types:
- Dead pixels (also “dead” or “bad” pixels, the official name is defective pixels) are a defect in an electronic device that reproduces an image. Manifests itself in the constant brightness of the glow.
- Hot pixels are a defect in which the value of the output signal has an incorrect dependence on the input signal, or the output signal is most dependent on other factors (temperature, the value of neighboring pixels).
- Dependent pixels - the dependence of a particular pixel on the value of its surroundings. Typically not noticeable in realistic images. Can only be detected on the monitor by a “checkerboard” fill or “grid”.
- Stuck pixels are always “on”. Often the cause of their occurrence is external influence. They usually occur due to improper operation of the transistor.
Matrix class - maximum number of defects per million pixels
| Class | Type 1 | Type 2 | Type 3 | Cluster with more than one type 1 or 2 error | Cluster with type 3 errors |
| I | 0 | 0 | 0 | 0 | 0 |
| II | 2 | 2 | 5 | 0 | 2 |
| III | 5 | 15 | 50 | 0 | 5 |
| IV | 50 | 150 | 500 | 5 | 50 |
A cluster is a group of pixels located nearby.
The ISO 13406-2 standard establishes 4 quality classes of LCD matrix based on the permissible number of dead pixels on a TV or other device.
- Class 1: 0 defective pixels per million.
- Class 2: up to 2 defects of types 1 and 2 or up to 5 defects of type 3 per million.
- Class 3: up to 5 type 1 defective pixels; up to 15 - type 2; up to 50 defective subpixels per million.
- Class 4: Up to 150 dead pixels per million.
Among mass-produced LCD panels, there are practically no 4th class products.
The standard defines 4 types of defective pixels:
- Type 1: Constantly lit pixels.
- Type 2: pixels that are always off.
- Type 3: pixels with other defects, including defects in subpixels (RGB cells that make up a pixel), i.e. constantly lit red, green or blue subpixels.
- Type 4 (group of defective pixels): several defective pixels in a 5 x 5 pixel square.
You can check the screen for dead pixels by carefully inspecting the image, changing its solid fill to black, white, red, green, blue. The absence of “dots” of a different color in such a sequence certainly indicates the absence of dead pixels.
To make sure there are no “hot” and “dependent” pixels, it is additionally recommended to fill the TV screen with “checkerboard”, as well as a mesh.
| How to find dead pixels |
| Total number of pixels on screen |
| Ultra High Definition |
Warranty service
Why do manufacturers produce equipment that already has a number of faulty or defective points? The technology for creating monitors or televisions is complex. Not every electronics brand owner decides to start production of LCD displays. Writing off screens with minor defects will lead to a significant increase in the price of the product. Therefore, manufacturers and sellers have found a way out of this situation by offering the buyer monitors with minor defects at a reduced price. It allowed:
- leave the production of screens at the same levels and produce products in the same volumes without increasing prices,
- buyers will use equipment that has a certain percentage of dead pixels (these cases are not covered by warranty).
But buyers should know and exercise their rights and check the equipment before paying. Pixel testing must be carried out in-store.
Attention! Vendors in select stores often offer dead pixel testing for a fee. On average, the cost of such a service is 1000 rubles. According to the law, the buyer has the right to independently check the equipment he is interested in! Therefore, instead of paying sellers who want to earn extra money, it is enough to take a regular flash drive with you.
But today more and more electronics are bought in virtual stores - via the Internet. Therefore, the customer needs to be able to check for dead pixels at home. For this purpose, special tests or simple but effective programs were created. They are not needed only in cases where dead or burning spots can be detected with the naked eye.
It is important to check for “bitishis” before signing the document on acceptance of the TV!
Is it worth ordering a check for dead pixels? — Plus/minus
To completely protect yourself from various unpleasant surprises, we can recommend this procedure for checking the TV before purchasing. Here are tips that allow you to check your TV receiver in a store , and you can limit yourself to only those that are suitable for your situation. And you can bypass those moments that are difficult for you to implement. The main thing is that you see a working TV and can evaluate the quality of the picture with your own eyes.
External inspection upon purchase
First, check the packaging for various damages (dents, tears); if there were any blows to the packaging during transportation, then the TV was damaged.
Then check the presence of all correctly filled out documents, such as a passport for the device, a warranty card.
The coupon must be filled out correctly by the seller (warranty period, date of sale, stamp), the serial number in the coupon must match the number on the TV.
Check the external condition of the TV and remote control. Look for scuffs, chips, cracks, etc. The screws on the back of the TV should not show signs of tampering, otherwise your TV has already been sold and repaired.
By the model name, serial number and product code you can find out where and when this TV was made and for which country.
Even more detailed information such as operating time and number of starts can be found in the service menu. But it’s better not to enter this menu yourself if you don’t know what it is.
It is intended for specialists and the store is not obligated to include it for you. Incorrect operation of the service menu can lead to complete inoperability of the TV.
To enter this menu, you need to enter a certain set of characters, which depends on the brand and model of the device.
After this, you can turn on the TV and check its operation, the correct operation of the remote control, and work with external sources (USB flash drives, players, etc.). You can take your own flash drive and pre-record high-resolution videos and pictures on it to check for dead pixels.
Checking for dead pixels
When forming a picture on a TV screen, all pixels of the display must be used. With Full HD screen resolution, the entire display field consists of 1920x1080 pixels, which is just over 2 million pixels.
According to the rules, a certain number of non-working pixels is allowed; different standards allow a different number of defective pixels. So, having identified this defect at home in the form of one or two non-functioning pixels, you will not be able to return the TV back, so it is better to do this check before purchasing.
To search for defective pixels, you need to submit an image with a certain picture to the screen and examine the screen at close range. You can also use a magnifying glass. You need to look for a pixel that glows in a different color than all the others. The image resolution must exactly match the screen resolution.
Completely idle pixels, those that do not respond to the signal and are in a constant position, can be found in a uniform picture (filled with one color). Alternately, white, black and primary colors (red, blue, green) pictures are presented on the screen and look for pixels of a different color on them.
Broken pixel on a black background Broken sub-pixel on the screen
There are defective pixels that begin to work poorly when the matrix heats up. You will be able to identify them after the TV has been running for a while.
Read more Validity period for a medical certificate from a narcologist
There are pixels that do not work correctly depending on the operation of neighboring sub-pixels. You can detect such defects if you present a picture on the screen in the form of a checkerboard fill, color stripes, gradations, or a grid. Incorrectly functioning pixels will stand out from the overall structure of the picture.
The necessary pictures to check the image on your TV can be downloaded here. The resolution of the test images is 1920x1080 pixels.
To test Ultra HD 4K TVs, test images are here.
You can read how to use the image data here.
Non-uniform screen illumination
When a video signal with a uniform color fill (painted in one color) is supplied to the TV input, this color should appear on the screen without any color shades.
But, due to the technological features of manufacturing LED-backlit displays, such uniform illumination is difficult to achieve. Therefore, it is advisable to check the uniformity of the color field before purchasing.
Typically, such a defect is not considered a breakdown and the TV cannot be returned or repaired.
Such screen defects are called banding, glare and tint.
Tint can be translated as “color tone” and it shows how correctly the white color appears on the screen. When watching a regular video, you may not see this defect, because the picture is constantly changing. But if the picture is static, then the interference can be very noticeable and interfere with normal viewing.
https://www.youtube.com/watch?v=AVGbmDqLrAc
To identify tint, you need to apply a white or gray field to the screen. Interference in the form of stripes, spots and other shapes, painted in a different tone, on a uniform background may indicate the presence of a tint defect. Such interference is usually pink or greenish in color and located towards the edges of the screen.
If the defect is very noticeable, then it is better to choose another TV.
How to visually check your screen for dead pixels
Installing a standard color grid on the screen is a test for dead pixels, or rather, stuck pixels. The test is a grid of squares, stripes or a specially designed pattern. Any test contains five primary colors that allow you to find stuck pixels. Working with a test program will help determine whether the dead pixels are dead or stuck. While “stuck” pixels can be restored, “dead” pixels cannot be restored.
You can download images to check TVs or monitors for dead pixels
All you need to do is transfer them to a USB flash drive, install the flash drive into the TV in the store and launch the images.
If you test the TV using software, it must be connected to the computer processor. Smart TV can be connected to the Internet via Wi-Fi. There are special online services for this. But sellers are not interested in such checks. Therefore, it is better to take a laptop with you and download test utilities to your computer. You only need to connect to the TV via an HDMI cable and run the test. Software that offers colors to check for dead pixels includes:
- TFTTest.
- Dead Pixel Tester,
- IsMyLcdOk
Each program has several testing modes and allows you not only to test for dead pixels, but also helps eliminate the so-called “stuck” cells.
You can download the program
. The interface of TFTTest is extremely simple - you just need to start the test by pressing one button and the program itself will build a grid indicating dead pixels.
Before checking broken points, you need to run a non-pre-installed application. The Pettern section allows you to select the desired mode and check colors using the Color Selector option. Changing the test mode is done by selecting the Auto Color Cycle option. This program helps you quickly find stuck points. To test different areas of the screen, you can use the Exerciser option. Using a special dynamic area, you can carefully examine any area of the screen.
The second program helps diagnose the monitor matrix. It does not require pre-installation. The program has a special training option that appears on the screen after the program is downloaded.
The matrix is tested using the F2,3,4,5 keys. The program displays:
- painted areas,
- rectangles,
- vertical or horizontal sections.
All programs help flash pixels with several standard colors, so you can get rid of “stuck” pixels. But nothing can be done with the “dead”.
Types of dead pixels
When purchasing a device or during its operation, you can see a defective pixel on the screen that does not light up in the color it should. In total, there are three types of so-called “dead” pixels. Depending on its color, you can understand what type it belongs to and whether this damage can be corrected.
The first type is white, which is also called “hot pixel”.
The second type is black, also called “dead pixel” or “stuck”.
The third type is a colored dot, which appears due to the failure of one of the parts of the pixel. It is also called “stuck” or “subpixel”.
How to check for dead pixels online
If the download mode on your computer is limited, then you will not be able to download and run the program. Then you can use online monitor checking services. There are many websites that help you do testing. Among them are:
- Monteon,
- Vanity Monitor Test.
Using the first service, you can carry out seven types of checks. To run a test, you need to click a button and select one of the test types. The test is carried out using a looped video. It helps to detect stuck points and control their refresh rate on the monitor.
The second program helps to quickly detect picture defects. To use it, you must have a browser that supports Adobe Flash Player. The program allows you to select appropriate verification modes. This resource is good because it allows you to “catch” dead pixels not only on a computer monitor or TV screen, but also on a tablet, laptop or smartphone.
How to check a TV for dead pixels: inspection during the selection process
Pixels are the dots that create an image. The most important characteristic of a pixel is its ability to change colors. Thanks to the electricity supplied to the TV, microelements are able to change their position. But there are also dead pixels. They are almost invisible, but when viewing, discomfort appears, since the dots stand out against the background of the picture.
How to check your TV for dead pixels
To check for dead pixels, you can conduct a test using several photos of the same tone. To do this we do the following:
- We find or download the necessary photos.
- Let's save them to a USB drive.
- We connect the flash drive through the appropriate port.
- Launches the image. You can see dead pixels on them.
If we need to find white pixels, we use a black background, and for black ones, we use a white background. For red, blue and green - contrast backgrounds.
Advice! If several of them are located very close to each other, you will notice a spot that is not imaged.
Inspection during the selection process
Some stores allow you to inspect your TV for dead pixels before purchasing. The workers do this themselves, but charge a fee for the services. The way they work is the same, they use monochromatic pictures.
Note! You should only use the store's services when purchasing 4K TVs. In other models you can do this yourself. If there are defects, the company has no right to refuse replacement or repair.
With 4K TVs everything is different. They have several million raster points. Sometimes it is impossible to notice those that are not working, even when checking through monochromatic photographs. Here you should use the services of workers.
Note! When viewing in a store, replacement is possible even if their quantity is below the established limit (the TV works without problems). But if you have already bought the device, brought it home, and only discovered it, the store has the right to refuse free repair (this only applies to cases where the number of dead pixels is acceptable).
Allowable number of dead pixels
The instructions that are sold with the TV should indicate how many broken dots are allowed. As soon as their limit becomes higher than the permissible norm, the device is considered damaged. Most often, we buy TVs without defects, but the problem arises during operation. Therefore, the seller is obliged to provide a guarantee that provides free repairs.
Why do they appear
There are a number of reasons why such defects may appear:
- The matrix is constantly overheating or overcooling. Temperature changes cause the pixels to harden and become unable to move.
- High humidity. When water gets on the screen substrate, illuminated dots appear.
- Constant voltage drops. If there are problems with the electrical network, the transistor may fail. As a result, the current flowing to the pixels will cause them to adopt a fixed position.
- Manufacturing defects. Most often, they appear not during the process of creating a device, but during the process of testing it for functionality (for the three reasons listed above). This is why it is so important to check TVs before purchasing.
- If the monitor displays an image for a long time (several hours) without changing it. This will lead to the transistor burning out, and subsequently to the dots freezing. Even the most modern devices often break down for this reason.
- Damage during shipping. Before using the TV, it is brought home. You need to be careful when transporting, small shocks or pressure can damage several pixels.
Is it possible to restore dead pixels?
Some color TVs are made in such a way that this criterion can be restored at home (this applies to the Samsung brand). There are two ways:
- A video is downloaded on the Internet, the purpose of which is to warm up the matrix. This roller should run for about an hour and the warming up will help repair the broken spots.
- Take a cotton swab and press on the damaged area. Do not overdo it, as applying too much pressure may cause more dead pixels.
- If these methods don't work, you need to take your TV to an expert. He can fix it.
Before buying a TV, you must check all parameters. This will protect you from unnecessary nerves and unexpected expenses in the future.
Subscribe to our Social networks
Source: https://setafi.com/televizor/kak-proverit-televizor-na-bitye-pikseli/
How to repair dead pixels yourself
It is important for online store customers to be able to repair broken or stuck pixels on their own. Choosing an option to fix the problem is possible only after testing for dead pixels has been carried out. The test will help you understand how the problem appeared. Among the causes of problems are the following:
- Damage to the control transistor. In this case, “broken” pixels are removed from the monitor screen only with the help of a laser.
- Subpixel freezing. This failure can be corrected using special software. Removing freezes is done using the Bad Crystal program.
- Pixel error. It can be eliminated using the UndeadPixel utility. Dealing with errors is done by using a special area that can be placed over the defect and constantly changes color. Running the program for several hours allows you to eliminate the problem. This program is not suitable for restoring dead pixels.
EIZO Test Monitor will help you fix pixel errors on any device. It includes 24 tests. This makes it possible to quickly identify faults in any area of the monitor. Restoration of violations is carried out according to eight scenarios. The pixel will not only be installed, but will also undergo contrast and brightness calibration. The program helps the user change settings.
There are a number of programs that allow you to remove defects from the screen:
- Bad Pixel is a professional paid service that helps save equipment owners from problems in 10 minutes.
- DeadPix is a universal program suitable for both Windows and Android. It makes it possible to detect and then correct stuck pixels using cyclic color changes.
- PixelHealer is a utility that works with Windows. It helps correct stuck pixels by quickly changing and flickering different colors.
- JScreenFix is an online service. It is suitable for working with a computer, tablet, phone and any other device. With its help you can only detect faulty points. This is done by moving the study area to the desired area of the monitor.
The Internet resource YouTube has also created its own program to restore normal operation of points. This is the PixelFixel service, which allows you to restore points in 12 hours. It is recommended to turn it on and leave it running all night. The high speed of image change is not suitable for a person with normal vision. Therefore, it is better to turn the monitor towards the wall while the program is running.
In addition to using special software, pixel restoration can be done manually. But this method is only suitable for stuck or hot pixels. You need to take a regular cotton swab and gently press the black dots of the screen with it. Then you need to wait 10-15 minutes. After which, the “hot” pixel can work normally, and the stuck one can enter into balance with the other points. But this method of recovery can lead to matrix failure. If you press the cotton swab too hard, the neighboring pixels will also die and the equipment cannot be exchanged or returned.
It is not recommended to carry out technical checks on your own or to physically impact the matrix, as this can only aggravate the problem and lead to more serious problems.
Found a mistake? Select it and press ctrl+enter
- 60
“Treatment” of dead pixels
Now you know what dead pixels are on a TV and how to find them. Often such defects appear already during the operational process. You won't be able to see the blackheads on your own. You can get rid of colored pixels like this:
- Physical treatment.
- Hardware massage.
For the first method, you need a regular cotton swab, which should be used to massage the damaged area where the “stuck” pixel is located. Such manipulations are done in a circular motion, and the device must be turned off. This method is not completely safe. Due to careless movement, you can not only not get rid of the problem, but also damage the TV.
To restore dead pixels on a TV using the second method, you need to use special programs. They are easy to find on the Internet. Common software includes BadCrystal. The program is not always able to cope with the task, but it’s worth a try. In practice, it removes stuck spots in a couple of minutes or days. Another popular utility is JscreenFix. It provides search and elimination of defects. Operating time is 20 minutes – 10 hours.
It turns out that a test kit is enough to safely visit the store and purchase a new TV. When checking the device, rush is unacceptable. The test should be done slowly, each area of the screen should be examined step by step.
