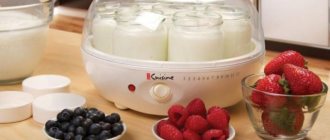
Distinctive features of Mulinex yogurt makers
The Mulinex company is one of the leading manufacturers of kitchen appliances, including yogurt makers, which are distinguished by their high quality and wide range of capabilities. The company presents several models to customers, which, in general, are practically no different from each other, have a similar set of functions and a similar technology for preparing yogurt. Devices may differ in appearance - design, body color, location of the control panel, etc., as well as in capacity and number of jars in which ingredients for making fermented milk products are placed. All models of yogurt makers fit perfectly into the kitchen interior, decorated in both classic and modern styles.
Each Moulinex yogurt maker is equipped with a digital timer that automatically regulates the cooking time of the product. In addition, the standard package includes instructions for using the Moulinex yogurt maker, written in several of the most popular languages, and a recipe book, from which you can obtain detailed information about the technology for preparing yogurt, the required products and their quantities, etc.
How to make yogurt
The operating principle of all yogurt makers is that the device maintains the required temperature for a certain time, which is required for the fermented milk bacteria to react and turn into a delicious, healthy product. Having loaded the ingredients into the jars and covered them with lids, all that remains is to turn on the device and set the timer. During the entire cooking time, there is no need to open the yogurt maker and check if everything is in order - the well-functioning mechanism works flawlessly and allows you to forget about the cooking process until it is completed.
Of the products needed to make yogurt, you only need milk and starter - special fermented milk bacteria, thanks to which the fermentation process will begin. To obtain the most delicious homemade yogurt, it is recommended to take homemade milk with a high percentage of fat content, after boiling it. If you use store-bought milk that has been pasteurized, then it is not necessary to boil it, you just need to heat it to the required temperature.
As for the choice of sourdough, dry sourdough is the most preferable, a wide selection of which is available in pharmacies and supermarkets. Such starter cultures are specially designed for making yoghurt at home and contain an impressive bacterial composition. It should be remembered that a variety of bacteria will contribute to obtaining the most delicious and healthy yogurt.
It is noteworthy that next time the prepared yogurt can serve as a starter in itself - just add a couple of spoons of the finished product to the milk and place it in the yogurt maker. The exception is baby food - a secondary product is not suitable for feeding babies under 1 year of age, since the bacteria content in it increases several times compared to the primary version.
What happens during the process of making yogurt: chemical reaction
It is known that traditional Greek yogurt appeared for the first time. What modern yogurt is not made from in production. In the process of making dessert, a chemical reaction takes place: a controlled process of coagulation of fresh milk occurs under the influence of high temperature. During the milk reaction, large fat particles are broken down into smaller ones, which are subsequently enveloped by the proteins contained in the milk. After this stage, the milk must be heated, which will help eliminate all harmful bacteria from the product. At this time, the clumped protein enzymes unfold. Then they spread throughout the entire volume of the product, forming a reliable molecular lattice, which will be the basis of the yogurt mass. NOTE! The heating temperature of the milk should be no more than 76°C. This will help preserve the lively taste of the future yogurt, which will not hide the notes of fruits and berries.
Instructions for use
The process of making yogurt in a yogurt maker is extremely simple.
- You need to take milk heated to 40 degrees (no more and no less, otherwise yogurt will not work).
- The starter is added to the milk and mixed thoroughly until the lumps disappear.
- The mixture is poured into jars, which must first be doused with boiling water to eliminate foreign bacteria. After this, the jars are closed with lids and placed in a yogurt maker for a period of 8 to 12 hours.
- After the time has passed, the yogurt maker will signal the end of the cooking process - the jars can be removed and immediately placed in the refrigerator for 6-24 hours to stop the growth of bacteria and allow the product to thicken.
Choose milk: natural or pasteurized
It is ideal to use pasteurized store-bought milk for making homemade yogurt in modern electrical devices, since a product with a low fat content (approximately 2.5-3.5%) is better suited for these products. If desired, you can use natural fresh products from a dairy or from agricultural farmers. The product should first be boiled and cooled to room temperature. Otherwise, you risk getting fermented baked milk instead of rich and tender yogurt of dubious quality.
Important nuances when preparing
Ideally, the finished yogurt should not spill out of the jar, even if it is turned upside down . If the product turns out to be liquid, it means that it did not spend enough time in the yogurt maker; if it is too thick, with separated whey, it means that the cooking process was delayed.
At this stage, you can add any fruit, jam, preserves, honey to the yogurt. However, nothing prevents you from making yogurt sweet right away by adding the necessary additives before placing the jars in the yogurt maker.
Natural yogurt can be stored in the refrigerator for no more than 5 days, however, if the product is consumed by children under 1 year old, it is not recommended to store it for longer than 2 days.
In order not to forget the date of preparation of yogurt, the Mulinex company has equipped the lids of the jars with expiration date markers . The mechanism is extremely simple - you just need to turn the digital indicators in search of the required symbol.
Yogurt makers and homemade yogurt: nuances of preparing delicacies
Now you can purchase various models of yogurt makers, which differ in the manufacturer’s brand, power, additional functions (indicators, timer), and volume. However, the general technology for preparing homemade fermented milk dessert will be the same for fermenting yogurt in a Moulinex yogurt maker and for any other.
When using a device with one container designed for 1-1.5 liters, all the milk starter is poured into this bowl. If the yogurt maker has several small plastic or glass jars, usually from 6 to 12 pieces with a volume of 100-220 ml, then the milk starter is poured into them in equal proportions. Moreover, in both cases the containers have lids, which do not need to be screwed at all. Their presence or absence will not affect the final result.
When looking for an answer to the question of how to make yogurt yourself, you need to take into account a number of nuances that are relevant for yogurt makers Tefal, Delfa, Redmond, Moulinex and for any other similar devices of other brands.
- The power of the yogurt maker, usually in the range from 6 W to 20 W, directly affects the fermentation time and energy consumption.
- The process of how to make yogurt in a yogurt maker most often takes from 6 to 10 hours. The longer the container with the milk starter is heated, the thicker and more sour the product may end up being.
- When setting the right time on the timer or setting the alarm clock, it is important to remember that if you overdo it, you may end up with cottage cheese, fermented baked milk, or yogurt instead of yogurt. After all, with the help of this household appliance it is possible to prepare various fermented milk products at home.
- The milk chosen for yogurt should be fresh and heated to 35-45 degrees. Pasteurized milk will need to be boiled and then cooled slightly to successfully create homemade yogurt in a yogurt maker. If the temperature of the liquid is higher, then all the necessary and beneficial bacteria will simply die.
- Powdered milk is not suitable for making homemade fermented milk dessert.
- You should not add sugar to yogurt in advance, this can provoke unnecessary fermentation, the absorption of sucrose by bacteria, and as a result, preparing yogurt in a yogurt maker will end up with an incomprehensible mass at the end. For the same reason, you should not add fresh fruits or berries in advance; it is permissible to use dried fruits, soaked or boiled berries and fruits, as well as concentrated products and sugar syrup.
- Before starting the procedure, you must sterilize the single bowl of the yogurt maker or the small jars in it. This is necessary to destroy pathogenic and unnecessary microorganisms that can negatively affect the process and result of preparing homemade delicacies.
- If you are using a yogurt maker designed for several jars, then you should always fill all of them with future yogurt. Inside the device, during the entire cooking time, the containers should fit as closely as possible to each other.
- While home fermentation is taking place, the household appliance must not be touched, moved, or rearranged.
- The resulting yogurt should be stored at home in the refrigerator, under a tightly closed lid, for no more than 5-8 days.
Several original recipes
In order to prepare yogurt in the Mulinex yogurt maker, you need to familiarize yourself with the attached recipe book. Having tried already proven recipes, you can start experimenting.
Recipe 1
To prepare yogurt you will need 2 liters of milk and 0.5 g of dry starter. Pour homemade milk into a saucepan and boil, cool to 40 degrees, add bacteria, stir. Pour the mixture into jars and place in a yogurt maker for 6 hours. To cool the finished product and obtain the final consistency, place the jars in the refrigerator for 2 hours. Before use, add fruits or berries to taste - fresh or pureed.
Recipe for making yogurt in a yogurt maker with Activia
Kitchen appliances: whisk, ladle, yogurt maker.
Ingredients
| Milk 6% | 1 l |
| Yogurt Activia | 1 jar |
Preparing the ingredients correctly
- It is better to use 6% fat UHT milk. There is no need to boil this milk, just heat it to the required temperature.
- Before you start creating a dairy product, you need to rinse all the jars of the yogurt maker and kitchen utensils that you will use to prepare it with boiling water.
- Initially, use Activia for the starter and leave one jar, which will serve as the starter for the next batch.
Step by step recipe
- Heat 1 liter of milk to 36-40 degrees. Add 150 g of Activia yogurt to it and mix well with a whisk.
- Place the milk mixture in a ladle with a spout and pour into the yogurt maker jars. There is no need to fill them to the top.
- For Moulinex equipment, set the time to 8 hours. Leave the finished product in the refrigerator for 3-4 hours. Store it covered in the refrigerator for no more than 4 days.
- Kefir is prepared in the same way, only it is better to take UHT milk with a fat content of 3.2%. and add Bifidumbacterin starter.
Video recipe
Dear chefs, I invite you to watch a short video that describes in great detail the recipe for making delicious homemade yogurt in a yogurt maker.
Cooking options
- Natural dairy product can be combined with any syrups, fruits or berries.
- It can be added to fruit salads, sauces and cake creams.
Here is another option for making yogurt with starter, which consists only of natural ingredients and is sold in pharmacies. This starter is very convenient to store, and a dessert made from it will be as healthy as possible for your entire family.


