What does an electric or manual meat grinder consist of - device and parts
In fact, the parts and operating principle of an electric and mechanical meat grinder are almost identical. Therefore, knowing the structure of one, you can easily understand other modifications.
The only difference is that the electrical appliance has a motor. The action of a manual meat grinder starts the rotation of the handle.
Another difference I can mention is the fastening of the mechanical device to the surface - an electric meat grinder does not require such fixation.
I think that when you figure out how to use a meat grinder, you will want to make minced meat - so read on to learn how to choose the right meat for it.
Electric motor
The electric motor allows the working part (screw) to function - on average, the performance indicator is 30 kg per hour, but it may vary depending on the model and functionality of the device.
In conjunction with the engine in any meat grinder there is a gearbox. Its task is to reduce speed and increase torque. The gearbox consists of gears of different sizes, made of plastic or metal - most often manufacturers use plastic. Devices with metal gears are less common (since they are more expensive), but are considered somewhat more reliable.
In addition to the gearbox and motor, manufacturers also install control boards and fuses.
Screw
From German, the word “auger” is translated as “snail” - obviously, the name is due to the appearance of the part. The main task of the element is to move the meat inside the meat grinder towards the exit. It is made from durable metal alloys - when the meat hits the ribs of the auger, it is trimmed, ground, turning into minced meat.
You can connect the auger to the housing using:
- Metal hexagon. This method is found on low-power devices. To use a meat grinder with such a mount without problems, be sure to make sure that there is protection against jamming.
- Plastic spline connection. It is installed on medium-power meat grinders. This method has a significant disadvantage - if the edges break off, the engine will run idle.
- Metal spline connection. This mount is installed on powerful meat grinders. The more faces such a slot has, the better it can withstand loads.
Cutting part
The main part of this part is the knife, which cuts the products passing through the working container. Modern models are equipped with forged screw-shaped knives made of stainless steel, so they are not afraid of contact with liquid.
During rotation, these knives are partially sharpened on the grid, which is also made of steel.
But for high-quality cutting and long-term operation, it is recommended to periodically sharpen the knives yourself with sandpaper. The sharper the edge, the better the meat is processed.
The shape of the knives is also important, as it directly affects the shape and quality of chopping products. For example, curved ones are considered the most optimal because they easily crush veins and fibers and prevent the auger from clogging.
Lattices
Grates are perforated discs with holes, the size and shape of which determines how the mince will be. There are options for hole diameters:
- small - from 3 to 3.5 mm;
- medium - from 4 to 5 mm;
- large - from 8 to 9 mm.
You can change the grates to get the consistency and grind you want.
For example, small grids are most often used for grinding nuts, and large ones are used for preparing juicy minced meat for pasties.
The discs have a different number of holes through which the minced meat comes out. The maximum quantity can reach 48 pieces - meat for meatballs, chopping cheese and nuts is best achieved with such a detail. A disk with 18 holes will produce coarse minced meat; it is usually convenient to make homemade sausage from it. Modern models are equipped with different disks.
You might be interested in recipes for delicious homemade sausage.
Clamp
The task of the part is to fix the grid and rotating knives. In working condition, the clamp nut tightens itself, since all parts rotate quickly.
Modern meat grinders come with a special device that will help you unscrew the nut or tighten it. In earlier generation models, the nut can be unscrewed by hand counterclockwise (for example, by wrapping it in a cloth).
Tray
Products for grinding are loaded into it - sometimes manufacturers call it a tray in the documentation. There is a hole in the tray leading into the neck of the meat grinder, through which the products are pushed down by a pusher.
The element is made of plastic and metal - in the first case, the tray is less wear-resistant and loses color over time. Trays come in different shapes and sizes, it all depends on the configuration and configuration of the meat grinder.
Additional accessories and functions
In modern realities, a meat grinder is quite capable of replacing a food processor or blender in the kitchen. With various attachments included, you can:
- Make juice with pulp from fruits and berries.
- Thinly slice cheese and potatoes and other hard vegetables. Cutting vegetables is possible in various ways, depending on the shape of the vegetable cutter
- Use special attachments for molding cookies.
- Use the tubes for cooking sausages and sausages.
- Grind coffee and poppy seeds.
- Make noodles.
Read expert advice on how to choose a meat grinder and what to look for when purchasing.
How to sharpen a meat grinder knife?
What to do if the knife is dull and does not want to cut meat? You can sharpen a knife for a meat grinder yourself
, there are a lot of ways: from a machine with a grinding wheel to a file and sandpaper. There is a lot of information about this on the Internet, and we will not dwell on it.
In our article we would like to touch upon several other sides of this issue.
Frankly speaking, sharpening knives for meat grinders is extremely undesirable, even somewhat impractical and unwise.
- Firstly, you need certain skills and experience - otherwise you can only make things worse.
- Secondly, when sharpening the cutting elements of a knife, the blades are not sharpened, but rather ground down! By sharpening the knife, we automatically increase the gap between the grid and the knife, which we wrote about above! Accordingly, we have to return to the point where it is indicated about the unpleasant procedure...
From this we can conclude: if the meat grinder does not turn the meat well, then one of the reasons may be a dull knife. And accordingly, you just need to replace it with a suitable new one.
Advice!
If your meat grinder begins to turn meat poorly, then it’s time to change the cutting element! And second: not all meat grinder knives are the same and universal. It is very important to know that all knives vary depending on the brand and model of the manufacturer. We also advise you to consider that other parts may need to be replaced.
As we discussed earlier, the knife and the grid are almost always in close contact with each other, which means that the grid can also be subject to wear, so our recommendation is to replace the knife at the same time as the grid. By the way, we have kits for these purposes.
How to assemble a meat grinder correctly
The assembly principle is quite simple - you can figure it out without any problems if you have assembled a conventional manual meat grinder of an old modification at least once.
First of all, you need to study the instructions - in fact, all electric meat grinders are technically similar.
For clarity, I will give you a photo with a diagram of how to assemble a meat grinder:
How to properly assemble a meat grinder - instructions:
- First, connect the gearbox housing to the auger housing, its end should be immersed in the gearbox groove. Once the parts are in the desired position, turn the auger clockwise until you hear a click. If you installed the parts incorrectly, you will not be able to turn the auger.
- When you put the auger in place, make sure that the protrusion coincides with the hole in the housing. Otherwise the shaft will not work.
- You need to put a blade and a grid on the other end of the auger so that all the holes and protrusions match, and it is important to install the knife with the correct side of the blade. The photo shows how to correctly place a knife in an electric meat grinder.
- Now the structure can be fixed with a clamping nut.
- Place the loading tray and check the build quality. If you hear uncharacteristic knocking or clinking noises during operation, disassemble the meat grinder and try again.
Electric meat grinder
Electric meat grinders are currently gaining significant demand. This is primarily due to their large number of advantages in comparison with other types of these devices. This concerns significant power, an increased level of safety, and the absence of the need for rigid fixation on the table.
Device
In order to understand the principle of operation of an electric meat grinder, you need to understand its structure. This device consists of the following parts:
- metal or plastic body;
- lattice;
- knife for food processing;
- fixing disk;
- electric motor;
- pusher;
- minced meat receiver;
- tray;
- screw shaft
Reference! Additionally, the components of electric meat grinders can be a variety of knives, attachments or auxiliary devices.
Principle of operation
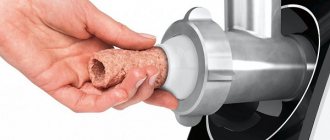
Well-cut food products should initially be placed in the meat receiver. Using a pusher, pieces of meat are pushed by a person into the sleeve, after which they fall onto the augers. They have ribs that make it possible to reduce the volume of the largest particles. After passing through this mechanism, the crushed pieces collide with the grid. Slowly pressing through the latter, they are cut using a sharp knife, smoothly sliding along the surface.
Operating rules
In order for the electric meat grinder to be in good functional condition for a long time, it is necessary to adhere to some rules, such as:
- Pieces of meat should not be sent for processing along with bones.
- All components of the device must be thoroughly washed and dried after use.
- You need to constantly monitor the sharpening of the cutting elements. This will reduce the rate of engine wear.
By following the above rules, you can achieve long-term and reliable use of an electric meat grinder in the kitchen.