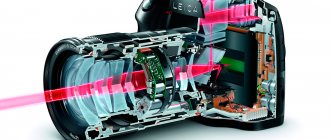
At the beginning of February, I wrote about how to choose a DSLR camera. Let's say the choice of model has already been made and you are going to the store. In this article I just want to describe the process of checking the camera directly in the store. Once again I would like to remind you that almost always buying a DSLR means buying a “body” and a lens. And testing is divided into four stages: first we inspect the camera, then the lens, then we put it on and test the already turned on camera, and only if everything is satisfactory we proceed to the “assembly” tests. We will leave the issues of checking the lens for another article, but here we will give basic recommendations for the carcass.
So, you came to the store, you immediately need to tune in to a leisurely, calm choice. The purchase is not cheap, if something does not work, then in 90% of cases you will have to go to a warranty workshop (the seller will not replace the product just like that), so it is better to inspect and check everything before paying.
Checking the appearance of the camera
The first thing you need to pay attention to is the appearance of the camera. It is advisable that you be the first to pick it up, i.e. There should be no fingerprints, no dust, and there should be protective stickers on the screens.
Quite often it may be that sellers have already shown the camera. This is not a reason to demand a new one, you just need to test it a little more carefully, perhaps it has some defects and someone refused to buy it, or perhaps they just wanted to hold it in their hands.
When inspecting, pay attention to possible scratches and chips; there should be none at all. All screw connections must be free of screwdriver marks on the heads. Moving parts (doors for memory card and battery compartments) should open and close tightly without problems, and the seals on their internal parts should be in place. Nothing should play or creak. It is worth carefully inspecting the rubber pads in the grip area so that they do not come off.
Enabling and checking the matrix
If everything looks normal, then you can install the lens and turn on the camera. Make sure in advance that the battery is new and there should be no scratches on its contact pads.
The first thing to do is check the camera matrix for “dead pixels”. To do this, in manual mode (M), with autofocus disabled, without removing the lens cap, take a picture with a shutter speed of a few seconds and ISO 400. We download the result to the computer; we most likely will not notice the problem on the camera screen, zoom in to 100% and carefully We inspect the entire field of the photo for “cold” or “hot” pixels. If they are present, then white or colored dots will be visible against a uniform black background. This type of camera needs to be replaced immediately.
Example of dead pixels
Almost all sellers will insist that such pixels are present on any matrix, on any camera. This is wrong. If there are dead pixels, they are hidden using the camera firmware. This procedure is done at the production stage and the matrix must be “clean” in the store. In principle, you can contact the service and they will also hide the defects, but why do extra work and waste your time. If “dead” pixels are located on the periphery of the frame, then you can put up with it, but think about whether you need such artifacts in all photographs without exception.
Checking the Camera Controls and Screens
If everything is in order with the matrix, then the next stage of testing will be to check absolutely all the buttons, wheels and levers on the camera. Feel free to ask the seller what a particular button is for. Pay special attention to the joystick; it should handle presses in all directions without any problems.
The next point is to check the main screen. Again, there should be no unlit or constantly glowing dots on it. Then we go to the upper auxiliary screen, if there is one, of course. The situation is similar, all characters should be displayed. And don't forget to check the backlight of this screen.
The last point is the viewfinder, there should be no visible dust, bubbles, scratches, etc., all focus point indicators should be displayed normally.
Checking the camera electronics
The last check point is to test the camera electronics. Most likely there won’t be any problems here, but it’s better to make sure the camera is fully operational once again.
Take several pictures in automatic mode. First of all, you need to check the operation of white balance, exposure metering and autofocus in different conditions, say, take a picture indoors and from a window. The white balance should not be too biased towards warm or cool tones. The exposure should be more or less even, there should be no strong overexposure or completely dead shadows. Autofocus is highly dependent on the lens, so here we are simply checking the operation of the system itself; there should be no obvious mistakes in both the telephoto and wide-angle positions. Checking electronics is a rather subjective action; if the overall quality of the photos suits you, then most likely the camera is working fine.
Be sure to open the photos you took on your computer to check the recording on the memory card; there should be no artifacts on them.
This completes the SLR camera test. It remains to check the lens and their joint work. How this is done can be found in one of the following articles.
Related Posts
Checking for dead pixels and remapping them
You can check for white dead pixels by taking several JPEG (full resolution) pictures with the lens cap closed. We set the manual mode, a short shutter speed (within 1/200 - 1/30 s) and a low ISO value (100 - 200). We also take a picture of a light, uniform background (for example, a white sheet) - this is a check for the presence of black dots (in practice this is rare). Next, we view the pictures at 100% size.
So, if there are dead pixels on the camera, then you can, in principle, take it to a service where they will remap it, that is, they will update information about the defective sensor elements.
But you can try to carry out this procedure yourself. Some cameras (for example, Olympus, Sony) have a special function in the “Pixel Mapping” menu.
In Canon cameras, the procedure is a little more complicated - here are the steps that the American support service suggests for “reflashing” dead pixels for 5D:
- Remove the lens and place a body cap on the mount (“Please insert a fully charged battery, remove the lens, and place a body cap on the camera.”).
- Set the P-mode (“Turn the camera on in Program mode, “P” on the mode dial.”).
- Select from the menu “CMOS sensor cleaning.” (“Press MENU, go to the SETUP menu, and select Sensor cleaning.”).
- Press SET (“Press the SET button.”).
- Click OK (“Select OK.”).
- Press SET (“Please press the SET button.”).
- The shutter has opened, and the line “CLn” (“The mirror will lock up and the shutter will open. CLEAN will blink on the LCD panel.”) blinks on the LCD display.
- After a few seconds, turn off the camera (“After a few seconds turn the camera off.”).
After this procedure, dead pixels should no longer appear. This procedure does not work
(tested several times) or has little effect on
hot
pixels.
Unfortunately, for Nikon cameras (current models), the remap operation is not performed autonomously, but using a special program. The camera is connected to the computer via USB. I came across a similar program for the D200 on the Internet (Nikon D200 Shooting Image Adjustment Program).
Note
.
If, when purchasing a new compact
camera (which does not shoot in RAW), you find constantly burning dead pixels, then, in my opinion, it is better to abandon such a camera. It should have already been “flashed” at the manufacturer’s factory, and if new dead pixels appear (and there are a lot of them!), then it is not a fact that the sensor will not “crumble” further. If you have already purchased a camera with dead pixels, then you should not be upset. Most likely, these dead pixels will appear in rare photos and you can fight them programmatically (see point 6).
4
Checking the camera matrix for dead and hot pixels
To check the matrix of a SLR camera for dead and hot pixels you need to:
- Disable noise reduction - Noise Reduction OFF
- Set the sensor sensitivity close to the minimum, for example ISO 100
- Set exposure mode to manual - M
- Disable auto focus - AF/MF in MF position
How to do it? - Look in the instructions for the camera. To save time in the store, you need to study the necessary sections of the instructions in advance. It is not necessary to look for instructions for a specific model. Any instructions for a camera of the same class and manufacturer will do, because manufacturers very rarely radically change the settings menu within the same class.
If you have not found where the noise reduction is turned off, checking will not guarantee the full serviceability of the camera matrix. Let’s not dwell now on the question of why this is so - anyone who wants can learn more about dead and hot pixels...
To check the camera for dead pixels, you need to take three frames without removing the lens cap with the above settings and shutter speeds: 1/3 sec, 1/60 sec, 3 sec.
Finding dead pixels in a photo
After the test, carefully review the footage at high magnification. It is better if you can download them to your computer and view them on your monitor screen.
If in a photo taken with a shutter speed of 1/3 sec. there are no gray, blue or red dots (hot and cold pixels), then you can assume that the matrix has passed the first stage of testing.
If you see several dots of the color indicated above, you should look at the frame taken with a shutter speed of 1/60 sec. If no colored dots are visible in this frame or there are significantly fewer of them (hot pixels appear at long shutter speeds), we consider that the camera has passed the first stage of testing.
Now, look at the shot taken with a long shutter speed of 3 seconds. With a fully functioning matrix, up to 5-6 colored dots (those hot pixels) may appear at a long shutter speed. This is not considered a defect due to the peculiarities of the matrix manufacturing technology. In addition, a small number of colored dots at a long shutter speed will not affect the quality of photographs in any way, because at long exposures, noise reduction is usually automatically turned on and the colored dots will not be visible. Moreover, such extremely long shutter speeds are used extremely rarely in normal photography. It is also possible that colored dots may appear at high sensitivity values - these are also hot pixels, but at high ISO values you also often have to turn on the noise reduction.
It's another matter if colored dots are visible at medium shutter speeds in combination with low ISO values. This indicates that the matrix has faulty pixels - most likely dead (broken). Theoretically, if there are less than 5 such pixels, then this is not a defect - this is a technology cost. Of course, it’s better if there are no dead pixels at all... If there are more than 5 dead pixels, then I would advise you to refuse to buy such a camera and check another camera.
Instead of looking for dead pixels manually, you can download a program to check your camera for dead and hot pixels
How to check a camera when purchasing?
We looked at the main points of checking a camera when purchasing, focusing on SLR cameras. If you buy a point-and-shoot camera, many of the checks will not be needed: checking the matrix, back/front focus - this is not relevant for compacts. And checking a SLR camera when purchasing after this article should become a more understandable process for you. I hope you found this article helpful in some way. Good luck with your choice!
Related articles: How to choose a DSLR camera? Verified online stores Canon vs. Nikon vs. Sony vs. Pentax
Long exposure noise reduction
Almost all modern DSLR cameras have a long exposure noise reduction
(Long exposure noise reduction). This method is fundamentally different from noise reduction in RAW converters or the Reduce Noise filter in Photoshop and the like.
an additional photo after the normal shot.
the same
duration
(with the same ISO), but with
the shutter closed
. The result is an almost black frame, as when testing for dead pixels with the lens cap closed. This auxiliary image is not written to the memory card, but is used to “subtract hot pixels” from the previous normal image (dark frame subtraction).
I admit, at first I was skeptical about this function and paid attention to it quite recently, when I decided to test its operation on a long exposure of about 10 minutes (see Fig. 8, 9):
| Rice. 8. Canon 5D, f/16, ISO 50, 10 min, Capture One 5 |
| Rice. 9. Comparison of two 100% crops: Long exposure noise reduction = Off/On. Default settings in the RAW converter (move the mouse over the image to compare frames) |
In my opinion, long exposure noise reduction does more than just remove hot pixels
, but also
better reduces digital noise
in night photos (the noise is noticeable even at ISO 100 if the shutter speed is longer than 30 seconds).
That is, unlike traditional noise reduction in a RAW converter or graphic editor, this method leaves more details
. In the future I will definitely experiment with it when shooting the starry sky (as soon as the clouds disperse
Flaw
Noise reduction with a long exposure is
twice as long
. And if for astrophotography a shutter speed of 30 minutes is the norm, then with the noise reduction function turned on it’s already a whole hour!
How to check if a camera is stolen?
- Check that the serial number on the camera matches the number on the camera box.
- Check the contents of the camera: in addition to the box, it usually includes a USB cable and instructions.
- Run the camera's serial number through the database of stolen photographic equipment.
- Check to see if the serial number has been erased on purpose. If the area of the number is more aged than the camera itself, it is better not to buy it.
If you buy a camera secondhand, discuss the possibility of returning it at least within a few days. During this time, you will have time to shoot and understand whether the camera is suitable for you or not. When buying a camera from someone else, it is better to sign a receipt and indicate in it the terms of purchase and sale, the possibility of a refund and the moneyback period.
Share on social networks VKontakte
36891