Advantages and disadvantages of home photoepilation
There are many ways to remove excess hair from the body. And each has its own advantages and disadvantages, including photoepilation. Let's look at its advantages first.
- This is a non-invasive and non-traumatic procedure, without direct contact with the skin. The probability of getting some kind of infection is zero.
- There is no problem with ingrown hairs here, since the hair in the same place does not grow again (the follicle is completely removed).
During the procedure, the effect is only on those hairs that are on the surface. However, the skin contains follicles in an inactive form that will later grow into hairs. To completely get rid of vegetation, the procedure must be repeated. I am glad that, despite this circumstance, the result will be noticeable almost immediately.
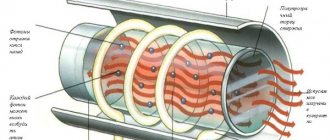
The photoepilator acts only on hairs in the growth phase
Photoepilation also has its weak points. When choosing a hair removal method for yourself, you need to know the disadvantages of the procedure.
- For 100% results you need to do several procedures.
- Devices for home use are low-power, so they can even leave visible hairs. Requires more passes than in a salon.
- A contraindication to photoepilation is high skin sensitivity.
- Facial hair appears due to systemic problems in the body, most often hormonal. Therefore, after removal, even by promising methods, they can reappear. Photoepilation cannot be done frequently; it can harm thin, sensitive facial skin, so at some point you will have to choose another method.
- The coarser and darker the hair, the more effective the photoepilation method is. It does not work well on gray, light (without melanin) hair.
- For girls intolerant to pain, the procedure may cause discomfort. Before the first photoepilation, it is necessary to conduct a sensitivity test.
- There is evidence that radiation from the device can negatively affect tumors, transforming them from benign to oncological.
On very light hair, photoepilation will be ineffective
What parameters should you use to choose a home photoepilator?
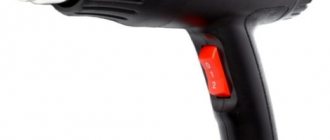
If there is no reason to abandon this particular method of hair removal, it can be done at home. It's convenient and ultimately inexpensive. The device for home photoepilation looks similar to a travel hair dryer. The battery capacity is enough for 150 flashes of the emitter. When choosing a device in a store, you should pay attention to the following characteristics.
- Power. For maximum effect, you need a device with 5-10 J/sq.cm. A gentle effect on the body is possible at 3-5 J/sq.cm. skin.
- Area of simultaneous impact (usually 1-6 sq.cm.)
- Frequency of light pulses. The normal speed is considered to be 0.5 pulses/sec.
- Lamp operating life. For a home appliance, 200 thousand pulses will be sufficient.
- UV filter. Its strength is shown by a special indicator.
- The quality of the device itself. It is better to buy a device intended to affect the body from a trusted manufacturer.
Compact home photoepilator Philips
Important! To carry out the procedure, you need additional accessories: safety glasses, anesthetic gel and antiseptic.
How to choose a device for photoepilation at home
If there are no contraindications, photoepilation can be done at home using a special device. It looks like a small vein and is charged from the mains. One charge is enough for 150 pulses.
Before purchasing a gadget, you should pay attention to several points:
- power. The indicator is determined by the thickness and color of vegetation. The optimal exposure is 3-5 J per square centimeter of the body. For complete hair removal, a device with a power of 5-10 J/cm2 is sufficient;
- capture area. The devices can process from 1 to 6 cm2 of skin per flash;
- flash speed. Devices with a pulse delivery speed of 2 seconds are the safest;
- lamp performance. The number of flashes depends on the indicator. The optimal value for home use is 200 thousand;
- quality. Chinese devices are not always effective, so pay attention to equipment from well-known brands;
- UV filter strength. It is shown by a red-orange indicator.
In addition to the device, you will need special glasses, a gel with a cooling effect and antiseptics.
Where does hair removal begin?
Each photoepilator always comes with an instruction manual or video review; if there is none, information can be found on the seller’s official website. Requirements for preparing for hair removal vary depending on the specific model. Some manufacturers recommend first removing regrown hair with a conventional machine, while others recommend growing it up to 3 - 4 mm.
Two weeks before the first session, you need to stop tanning, self-tanning and solariums, and also stop taking antibiotics . A full cycle consists of several procedures, their number varies from 5 to 10. For 6 - 7 weeks before the first hair removal, you should not use wax, electric epilator or do sugar hair removal, otherwise the procedure will not bring results.
Before starting the session, experts advise doing a test flash on the skin. Such manipulations are dictated by safety measures: there is always a risk that the skin will be too sensitive to photo lamps. If there are no negative reactions, then you are allowed to continue using the photoepilator.
Stages of the procedure
Photoepilation is carried out on all parts of the body, but in order for the procedure to be as efficient as possible, it is necessary to prepare for the process correctly.
- two weeks before hair removal, you should not sunbathe under the sun or in a solarium;
- one day before the session, do not use creams containing alcohol or oil. This is fraught with the appearance of a burn;
- consult with an oncologist if you have moles and warts on your skin to know that hair removal will not cause harm;
- the length of the hairs should not be more than 2 mm;
- In the intervals between sessions, you should use a razor to remove hair; sugaring or waxing should be completely avoided.
The procedure is quite simple: the cosmetologist places the client on the couch and puts protective glasses on his eyes. Before the procedure itself, the specialist applies a gel to the area to be epilated to prevent the risk of burns. A photoepilator with an anesthetic attachment treats the area, evenly distributing light pulses.
After the manipulation, the cosmetologist removes the remaining gel and applies moisturizing or restorative cosmetics and then prescribes the next photoepilation in about 3 weeks.
After the procedure, in the first hours, you may experience redness and a slight burning sensation on the skin, which will disappear by the end of the day. If the tingling does not stop, it is recommended to use the healing and anti-inflammatory cream Panthenol or its analogues, which contain the active ingredient dexpanthenol. You should not take baths, steam rooms or saunas, swimming pools or hot baths for the first three days. Use the washcloth with extreme caution, avoiding touching the area being epilated.
Cover the treated area with photo flashes from sunlight and apply sunscreen with maximum protection.
Attention! After 7 days, a crust forms on the healing area, which must not be torn off, otherwise a scar may form on the area.
Epilator settings
Before using the photoepilator, you need to set the optimal flash power. Experts advise starting to use from the minimum level; it is also worth reading the manufacturer’s recommendations - they should be indicated in the user manual.
If you have not used such services before, the easiest place to start is in the armpit area. On the one hand, you need to make several flashes at the first power level, if there are no unpleasant sensations, on the other hand, repeat the procedure at the second stage.
It is important to know! If during a session in the affected area the user does not feel anything at all, it means that the power is too low and there will be no result. It is forbidden to endure obvious painful sensations - this indicates that the power is too high.
During use, it is easy to determine what settings are necessary for an effective result. There are models where the power level is determined automatically by a special sensor - in this case the task is simplified.
Subtleties of the procedure
So, after quality preparation, you can proceed to the main step.
- The first thing to do is set the required power. To do this, you can start from the lowest level. If you do not feel the characteristic pain, then you should increase the level.
IMPORTANT! It is strictly forbidden to endure severe pain. This indicates that the power is too high, which may subsequently cause harm to the skin. Most often, manufacturers themselves indicate which level is best to adhere to. If you are new to this matter, it is recommended to start from the axillary area.
- As a result, when you present the device to the site, the light on it should light up. If the light is green or blue, it means you did everything right and the surface fully matches the settings. If the red light comes on, it is worth rechecking the device indicators.
- Thus, the unit must be driven horizontally and at an angle of 45 degrees. That's when you can achieve maximum effect.
REFERENCE! If you know your most sensitive areas, then it is best to first coat them with a gel specifically designed for this purpose.
- The epilator will make a sound itself, so you will know that the procedure is complete.
As for the time, it depends on where you are removing hair. For example:
- It takes 20 to 30 minutes for your feet.
- Bikini - 15–20 min.
- Deep bikini - from 20 min.
- Armpits - from 15 min.
Skin preparation and first session
Before use, it is necessary to prepare the skin as before a salon procedure; for this, it is cleaned and treated with any non-abrasive peeling or scrub. At home, honey, tomato puree or a ready-made product from the store will do. Long hair and stubble are removed with a razor. In some cases, after depilation you need to wait until the hairs grow to 2 - 4 mm. Do not neglect the rules specified in the instructions for use - this affects the effectiveness of the procedure.
The photoepilator window must be clean; many devices come with a special napkin. Also, almost all modern models are equipped with a touch sensor. When the device is applied correctly, it emits a sound, light or vibration signal.
After the flash, the epilator also signals that it can be put away. Experts recommend moving the device along a horizontal line and not treating the same area twice during the procedure. Experienced owners, on the contrary, advise treating areas of skin “overlapping”. If the instructions require the use of gel, it must be applied, this will increase the comfort and safety of hair removal. When processing large areas, it is recommended to switch to sliding mode, if provided.
How long does it take to epilate:
- legs – from 20 to 30 minutes;
- bikini area – 15-20 minutes;
- deep bikini area – 20 minutes;
- armpits – 15 minutes.
How to properly use a photoepilator at home
Before using a home appliance, you must first study the instructions and become familiar with the basic functions and capabilities of the device. But regardless of the photoepilator model, the procedure is carried out according to the same principle.
How to prepare for photoepilation
The instructions for using the photoepilator recommend preparing in advance. First of all, two weeks before the procedure you need to avoid sunbathing and visiting the solarium. Peeling is done on the selected area of the body; you can use special products or regular honey for it. The procedure will remove dead skin particles from the skin and increase the effectiveness of hair removal.
If the hair in the selected area is long enough, it needs to be shortened to 2-4 mm. You can use a trimmer or a regular razor, but after using the latter you will have to wait until the stubble grows.
Preparation for the photoepilation procedure also affects the home device itself. Before the session, you need to wipe it with soft cloths to remove dust and stains. Before you begin removing vegetation, it is recommended to wear dark glasses to protect your eyes from ultraviolet radiation.
Advice! Before putting the photoepilator into operation, you need to check its performance, recharge it if necessary, and set the settings for a specific hair and skin type in advance.
How to do photoepilation at home correctly
Videos on how to use a photoepilator at home demonstrate that the process is not particularly difficult. The lamp of the device is placed on the surface of the skin, the device is put into operation and begins to move in the horizontal direction. To increase the comfort of photoepilation at home, it is allowed to pre-treat the epidermis with a cooling gel; it will reduce possible discomfort.
A slight burning sensation while using the epilator is considered normal.
User opinions differ regarding the processing algorithm. Experts advise treating the same area only once per procedure. But owners of photoepilators note that the effectiveness of sessions increases if you move the home device “overlapping” diagonally. The last tip makes sense only when removing hair from legs or arms, since sensitive areas increase the likelihood of burns.
How long home photoepilation will take depends on the area of the body. It takes about half an hour to treat the legs; the armpits require sessions of up to 15 minutes. Removing hair from the bikini area also takes 15-20 minutes.
Skin care after photoepilation
Even the most careful photoepilation, one way or another, injures the skin. After the procedure, the epidermis needs special care, which comes down to several measures:
- Immediately after the end of the home hair removal session, the skin should be treated with a moisturizing nourishing cream.
- During the day after the procedure, you should not take a hot or too cold shower, or use chemical hygiene products.
- During the course of home photoepilation and two weeks after it, you should not go to the solarium, sunbathe in the air, or remove hair by any other means other than regular shaving.
- If the procedure was carried out on open areas of the body, then you need to use sunscreen when going outside for 14 days.
When conducting deep bikini hair removal sessions at home over the next two days, it is not recommended to wear tight or synthetic underwear. When treating the facial area, you need to use alcohol-free cosmetics throughout the course.
Attention! Sensitive skin may react to using a photoepilator at home with redness. In this case, it is recommended to use Panthenol gel or similar products.
Skin care
After an hair removal session, in most cases, you need to use a soothing cream or gel. Slight redness is possible, and to avoid irritation, cosmetologists recommend refraining from saunas, hot baths and protecting the treated areas from all types of tanning.
There should be no obvious pain or burning sensation. Sensitive skin may react to the procedure, but not experience discomfort. If you have any doubts about the condition of your skin, you should consult a doctor for advice. Most often, if you are bothered by itching or burning after epilation, it is enough to reduce the power next time.
Allergic reactions to photo flash occur, but are extremely rare.
Frequency of procedures
Since the epilator only removes visible hairs, the procedure will have to be repeated several times to achieve the best result. Safe intervals are listed below.
- On average, there should be 5-8 weeks between procedures.
- Areas with darker hairs (arms and legs) can be irradiated once every 2 months.
- Intimate areas (bikini, armpits) should be treated once every six months.
- The mustache is removed from the face once a month.
- It is better to choose the frequency of use of the photoepilator together with a specialist, individually. It should be remembered: the darker the hairs, the slower they go away.
How soon can you expect results?
Under the influence of radiation, only the bulb dies, the hair itself remains on the surface. It disappears over time (within 10-14 days). In general, hair volume is reduced by half in 3-4 sessions. When calculating the frequency of procedures, we must remember that radiation only works on those hairs that are on the surface.
In just 5 procedures you can achieve a significant reduction in hair growth
Features of the procedure
Photoepilation has a number of limitations and nuances:
- the method is suitable for girls over 16-17 years old;
- hairs growing from moles cannot be touched, you can get severe burns, plus the consequences in the long term can be unpredictable;
- Do not apply to damaged skin;
- during menstruation there are no medical restrictions on the procedure, but it may be a little more painful than usual;
- in the warm season, photoepilation can be done no later than 2 weeks before tanning;
- if the skin is prone to the appearance of stretch marks, photoepilation is undesirable;
- The radiation of the device does not affect the lymph nodes in the affected area (in particular, in the armpits).
If you follow all the rules and recommendations, photoepilation does not harm your health and is quite comfortable.
Preparation for the photoepilation procedure
When preparing for the procedure, it is important to properly prepare the skin so that in the end you do not have to face unpleasant consequences. Let's look at how to prepare your skin for photoepilation at home.
How to prepare your skin for the procedure
It is worth paying special attention to this moment, since it is very significant and the effectiveness and productivity of all actions depends on it.
- You must first contact a dermatologist. He is the one who will tell you what type of skin you have. In addition, the specialist will give permission or refusal to conduct the session.
- If he has given you permission, you can proceed with further actions. In a few days, or better yet 2 weeks, it is recommended to stop sunbathing and taking antibiotics.
- The next step is to stop using wax or perform hair removal.
- You should just tame the hair length by one or two millimeters with a razor the day before the procedure.
- In addition to all of the above, it is worth protecting yourself from the possibility of allergies and skin damage due to sensitivity. To do this, it is recommended to carry out a so-called check. It is characterized by a test flash.
- Therefore, if there is no redness, then manipulations can continue.
- The final stage of preparing your skin will be to cleanse it using various scrubs or similar products. This is necessary to ensure that it is clean, purified and completely dry.