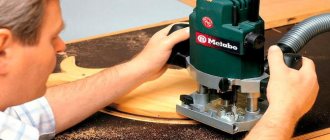
One type of home renovation work is replacing and laying ceramic tiles. Tiles are produced in certain standard sizes and do not always, when covering the surface, completely fit into the geometric parameters of the room. There is a need to shorten the decorative product. A tile cutter is designed to perform such operations. To use the tool correctly, you need to familiarize yourself with the device and its application features.
What is a tile cutter?
As the name suggests, this tool is designed for cutting tiles. In fact, it is similar in principle to working with a glass cutter - in both cases it is necessary to break the surface bonds of a fragile material in order to obtain an even fracture line.
In the case of tiles, you should cut through the surface layer of the glaze with a special cutter, and then break the product.
Essentially, a manual tile cutter is a flat piece clamp with a built-in glass cutter that moves in a straight line.
The diagram clearly shows the main parts of the desktop device:
- a platform on which the tiles are laid and which does not allow the product to break due to uneven load. All the impact from the work of the cutter is transmitted to the full plane of the tile;
- the foot, as in a sewing machine, presses the cut panel against the platform with a certain force;
- the supports hold the guides and the cutter carriage in the desired position, transmit the force from cutting the glaze to the platform, and through it to the work table;
- a carriage with a cutter, moved by the movement of the handle, cuts the product.
The photo below shows another type of design that allows you to conveniently install the panel for cutting diagonally or at a different angle.
This tile cutter from Bosch provides for the exact position of the carriage in relation to the edge of the tile, changing the angle of the cut using a square, and has side retractable supports for large-sized products.
Another useful type of device is a tile cutter with a ballerina. This device, in the form of a kind of “compass”, where a cutter is installed instead of a lead, helps to cut round holes for pipes, sockets, switches, and so on.
To simplify the marking of panels, models with a laser pointer are often used.
There is also a very simple variety - actually tongs with shock-absorbing pads on the contact planes.
Such products are used to accurately break tiles with an already cut layer of glaze. Their effectiveness is low, but the risk of uneven fracture is high.
In fact, the capabilities of a manual tile cutter, like any other tool of this type, depend more on the skill of the worker than on the functionality of the product. But it is better, of course, to choose products with additional functions - if they are needed for work.
Features of modern tile cutters
So, a tile cutter is a specialized tool designed for cutting finishing tiles made from various materials (ceramics, stone, porcelain stoneware, etc.) to form a high-quality cut.
The main structural components are:
- A cutting element, or roller, made of carbide steel.
- A goniometer, or protractor, in combination with a rotating ruler, provides the ability to cut tiles at an angle. Models of a high professional level can be equipped with a special device that allows you to cut round holes - a “ballerina”.
- Guides rigidly fixed in supports
- A foot whose functional purpose is to break tiles.
- A base or platform that provides a stable position for the tool.
- Handle.
However, knowledge of the design features of the tool does not guarantee a high-quality result.
The process of using a tile cutter as a cutting tool is characterized by several distinctive features:
- Possibility of making cuts at angles of 45 and 90 degrees.
- Providing high-quality and fast cutting.
- Ability to cut tiles for various functional purposes (cladding, flooring).
What are the advantages of using electric tile cutters?
You should purchase a machine for cutting tiles with water if you are processing durable materials at a professional level. The following advantages will help you make a positive decision about purchasing or renting a machine:
- Efficient cutting of materials of different thicknesses. Depending on the model of tile cutters, they allow you to cut parts of different thicknesses, which is very convenient, for example, when you need to get the appropriate size of a product. On machines, depending on the model, the maximum permissible thickness of materials that can be cut with a tile cutter is indicated.
- Lack of dust formation is one of the significant advantages, which is achieved due to the presence of a water cooling system
- High productivity - water during the cutting process lowers the temperature of the disk, eliminating its overheating. The diamond-coated wheel does not heat up and does not melt, so it lasts long enough and efficiently, eliminating engine overload
- You can cut any types of materials from tiles to glass
- Long service life not only of the machine, but also of the cutting disc. You can work on one disk for at least 2-3 years with daily appropriate manipulations
- The ability to obtain not only a straight cut at an angle of 90 degrees to the main surface of the material, but also at different angles, pre-setting the position of the disk
The ability to cut materials of different sizes depends on the dimensions of the table. That is why, before buying a machine, it is necessary to consider what materials you plan to cut - their thickness and dimensions. Electric tile cutters with a water cooling option have a number of disadvantages. These disadvantages must be taken into account immediately before purchasing machines.
Types of water cooling on tile cutters
Water is supplied to tile cutters through an auxiliary system consisting of a supply hose, which is connected to a container or reservoir containing water. The design also uses a pump responsible for pumping water from the reservoir to the work area.
The water supplied to the cutting area flows into another tank, which is located at the bottom of the table (under the tabletop). This reservoir fills up during operation, so it must be cleaned. Electric tile cutters use two types of water cooling systems:
- Conventional - when clean water from one reservoir is supplied to the working part, and then accumulates in another container. After filling the container, this water must be disposed of. The disadvantage of the system is that it is necessary to constantly add water to the first container
- Circulating in a circle - this option is more advanced, but has its drawbacks. Water from one container is supplied to the working part, and then enters another container, from where it is pumped back to the first. The disadvantage of the system is that water is re-supplied with dust and small particles, which negatively affect the pumping equipment
If the tile cutter does not have a water cooling function, then you can implement it yourself by using a bottle with a hole in the cork. During the cutting process, one person controls the cutting disc, and the second applies water to the working surface of the tool
Water-cooled electric tile cutter: advantages and disadvantages
The advantages of any thing can only be assessed by comparing its capabilities with a similar product, and an electric tile cutter is no exception. Let's start in order. A clean, smooth, and most importantly high-precision cut without chipping the edges of the tiles - only this tool can combine all these three advantages. For example, its manual counterpart also cuts tiles evenly - the accuracy and cleanliness of the cut is questionable. In fact, a manual tile cutter does not cut, but breaks the tile smoothly - the end of the tile is by no means smooth, as the diamond blade of an electric tile cutter makes it. You ask, what about the Bulgarian? It chips the edges of the tiles - unfortunately, without water cooling of the disc it will not be possible to make a smooth, high-quality cut. No dust. In principle, a manual tile cutter is also dust-free, but, unlike an electric one, it does not have the above advantages. Possibility to make cuts at an angle. No other tile cutting tool can cope with this task. Why are such cuts needed? Have you ever seen wall corners laid at 45˚? Believe me, they look much more attractive than corners lined with special corners. Trimming speed. This advantage of this tool will show itself well when laying tiles in large volumes - believe me, an electric tile cutter will give odds to its manual counterpart and even an angle grinder.
Don't miss: How to choose an entrance door
How to use a tile cutter
In addition, one cannot discount the nuance that, unlike a manual tile cutter, an electric one can be used to cut segments of any shape in tiles. If you really want to, you can even cut rectangular holes in the tiles. There is also a limited ability to make curved cuts of high purity - this, however, requires practice and dexterity. And in general, with the help of an electric tile cutter you can cut even the most durable tiles. For example, some types of porcelain stoneware designed for floor use cannot be cut with any other tool.
Stationary electric tile cutter photo
Pros and cons of the manual model
The undoubted advantages of a manual tile cutter include:
- independence from the power grid. This device can also be used where there is no electricity or it is temporarily turned off. When working in wet areas - for example, when tiling a bathroom, swimming pool, sauna - the ability to cut tiles directly at the workplace, without going into another room with a working outlet, is very important;
- no temperature restrictions.
- Injuries when using the device are practically excluded. Maximum – damage due to accidental fall of the device on the leg or pinching of a finger;
- mobility. The products are small, even the largest options, weigh up to 1...3 kg, are easily transported and do not require special conditions of transportation and storage.
The main disadvantages are:
- the difficulty of cutting small strips along the edge of the tile. If the distance from the edge to the cut is less than 3 cm, only an experienced cutter using hand tools will be able to make an even cut;
- problems when working with tiles of non-standard sizes. Both very small and very large specimens are difficult, sometimes impossible, to cut;
- the need to exert physical effort to make the cut.
Other possible shortcomings depend rather on the specific model chosen:
- tile fracture due to excessive depreciation;
- excessive force resulting from insufficient lever length;
- insufficient size of the working area;
- uneven movement of the carriage;
- difficulty in replacing the roller (cutter) or its insufficient quality.
These points (except for the last one, it is not always possible to check the quality of the cutter in a store) should be paid attention to when purchasing.
How to use a manual tile cutter?
In order to get an even cut line without damaging the ceramic tiles, you should follow simple rules:
Tools for cutting tiles.
- Before starting work, carefully check the condition of all elements of the tile cutter: the diamond roller should rotate without much effort, the movements of the carriage should be smooth, without jerking. Be sure to check the integrity of the roller - if chips or chips are found on its surface, the roller should be replaced by purchasing a new one at any building materials store. To make the movement of the roller on the surface of the tile smoother, apply a few drops of oil to it.
- The surface of the bed should be kept clean. No dirt, grains of sand or small fragments of tiles are allowed.
- Markings are applied to the tiles. To do this, use a construction pencil or marker with easily washable ink. The tile is placed on the bed in such a way as to align the cut line with the trajectory of the carriage.
- The handle is lowered until the diamond roller touches the surface of the tile. After this, with light pressure, pull the carriage towards you. Try to perform the operation in one pass, as otherwise the fracture may turn out uneven.
- After cutting the enamel, the carriage is placed in a position where it will be in the 1/3 of the tile closest to you. The handle is pulled down, during which special “wings” press on both parts of the tile, easily breaking it.
Don't miss: How to choose the right plastic crosses for tiles: sizes, shape
Scheme for cutting tiles with a glass cutter.
A manual tile cutter allows you to separate pieces of tiles with a width of 5-6 mm (depending on the thickness of the material). If you need to cut a narrower strip, you can make a cut with the diamond roller of the device, and then, using pliers, gradually break off the excess part of the tile.
During operation, metal “wings” can leave small marks and chips on the enamel surface. In order to avoid this, some craftsmen glue pieces of electrical tape to their lower surface.
Professional models of manual tile cutters have adjustable guides with markings in inches and centimeters that can be fixed in a given position. This allows you to avoid marking the tiles, which makes working with large volumes much easier. The guides also move at different angles, making shape cutting possible.
The cost of professional tile cutters is quite high and depends not only on functionality, but also on the manufacturer. Some devices are also equipped with a so-called ballerina. This is a simple mechanism that allows you to cut round holes in tiles for sockets and switches. At first glance, the presence of this function greatly simplifies the work, but in most tile cutters the “ballerina” works very incorrectly. Therefore, it is easier to make a hole with a regular round tile crown.
A manual tile cutter has some limitations for work: it can easily cope with tiles whose thickness does not exceed 12 mm. It is also quite difficult (and sometimes simply impossible) for them to cut hard surfaces: porcelain stoneware, granite and tiles made from other natural materials. For such cases, a rational solution would be to use electrically driven devices.
How to cut tiles
The process of high-quality, fast and easier cutting of ceramic tiles is ensured by performing some simple measures. They are as follows:
- Pre-soaking the tiles in moderately warm water almost completely eliminates the appearance of chips and cracks during the cutting process, and therefore significantly minimizes the amount of scrap.
- Periodically lubricate the cutting roller and marking line with machine oil, thereby reducing the coefficient of friction.
- Move the carriage using even hand pressure in a smooth, non-jerking motion, making only one cut.
Having completed all the preparatory activities, you can proceed directly to the work process.
So, how to use a manual tile cutter correctly:
- Using a marker and ruler, mark the ceramic product to be cut.
- Place the product on the working surface of the tool platform and secure it with clamps so that the line of the marking you made is exactly under the wheel of the cutting element. To facilitate this process, there is a central mark on the tile cutter bed.
- While moving the handle, place the cutting part roller at the beginning of the marking line (closest to you) and press it lightly.
- In the direction “away from you”, evenly and smoothly move the carriage with the cutting element along the line of the applied marking, making a small depression in the front layer of the product being cut.
- Move the handle to the non-working position and place the presser foot at the center point of the resulting cut.
- Using gentle pressure (impact), break the product into two parts.
Cutting porcelain stoneware
Porcelain stoneware or gres is characterized as a finishing material with increased hardness, which introduces certain nuances into the process of cutting it using a manual tile cutter. For example, the material used to make the tool must be more durable, and the cutting element must be defect- and wear-resistant.
Otherwise, the procedure remains similar to the procedure described above.
As a rule, the thickness of porcelain stoneware, which is cut with a manual mechanism, does not exceed 15.0 millimeters.
Tool limitations
It is believed that a manual device of this type can only cut tiles up to 15...16 cm thick. At the same time, roller devices provide minimal cutting force, a rigid carriage provides greater impact, and only the most powerful bearing models can handle panels with a thickness of 15...16 mm.
Manual models are of little use for tiles and porcelain tiles with a relief surface. If the cutter does not reach the bottom of all the recesses, the layer of glaze will not be cut evenly. Therefore, a smooth fault cannot be expected.
With respect to porcelain stoneware, the limitation on thickness may be more serious: even bearing tile cutters do not always cope with panels with a thickness of 15...16 mm.
How to properly cut tiles with a manual tile cutter
This procedure can be performed without any problems, just follow the manufacturer’s instructions.
Sequence of operations:
- mark the cutting line. This can be done with a felt-tip pen or pencil, marker - depending on the surface of the product. For models with a laser pointer, this item can be skipped;
- The tile is fixed on the platform so that the cutting line and the wheel align as accurately as possible. If you need to make a cut diagonally or at an angle, it is convenient to use a model with a square and corner markings. If you use a simple device, without supporting corner sides, simply turn the tile into the desired position;
- by moving the carriage, an even cut is made to the end of the tile;
- lower the lever, thereby pressing on the tile on both sides of the cut. The ceramic splits along the cut line.
If the leverage is not enough, you can lay the tile on the floor, placing a narrow bar under the cut line, and simultaneously press (step on your feet, place heavy objects) on both sides of the cut.
Important: increasing the distance from the cutting line to the load application points, of course, increases the leverage and reduces the impact force. But at the same time, this increases the risk of the panel breaking not due to a cut, but arbitrarily.
As always, there are certain nuances:
- the cut is made once, it is not worth running the cutter several times in one place - the break will be uneven, with jagged edges;
- the force applied to cut the glaze must be strictly measured, as well as the force on the lever to break the panel. It is better to practice on waste or unnecessary trimmings before performing important work;
- play of the cutter (wheel) and its incomplete mobility (jamming, jerky movement) are unacceptable, the device must be adjusted and lubricated before starting work;
- Before cutting, you should check the cleanliness of the platform (presence of debris, splinters, large dust) and its stability.
Porcelain tiles should be cut according to the same principles, making allowances for the greater strength of the material. It may take more force to cut and break the panel.
In addition, a short video about exactly how a standard manual tile cutter works.
Types of tile cutters
Manual tile cutter
Manual. It belongs to semi-professional instruments. It is good because it is a stand-alone device for operation. A manual tile cutter looks like a cutting table, which is covered with a relief elastic material. Has sharp edges at the cut site.
The cutter with a convenient lever handle is located above the rib on two longitudinal guides. Good manual tile cutters cost over $100. If you only need to cut tiles once, it is better to borrow this tool. Make sure that the cutter is not on plastic couplings, but on bearings.
Electric professional tile cutter
Professional electric. You can’t do without it in situations where you need to cut porcelain tiles. This tile cutter is a more complex machine. It provides water cooling, the cuts will always be smooth and even. You can cut at different angles, some machines have a laser guidance system.
When purchasing a professional tile cutting machine, you need to pay attention to power. The cost will be several times higher than that of manual tile cutters.
Round and figured cut
The question often arises of how to cut ceramic tiles if you do not need to reduce their length/width/split diagonally or at an angle, but make a round hole.
For these purposes, a core drill or, otherwise, a diamond crown is best suited. This issue is discussed in more detail here. It is worth noting that the presence of a ballerina on a tile cutter or separately does not negate a more rational drilling option, but for the sake of one hole, of course, it is not worth buying expensive drills for tiles and porcelain stoneware. Both for working with the ballerina and for drilling, it is advisable to mark the future center of the hole. The problem of vibration is successfully eliminated by working with tiles laid on a 3...5 mm layer of water in a shape that exactly matches its dimensions.
A combination of several cuts, straight and round, will help you make a more complex cut. If the transitions of the curve along which the cut is made are sufficiently smoothed, or a broken line is used, it is convenient to use a grinder and an angle grinder with an appropriate disk.
Cutting tiles with a grinder
This video shows the general principle of operation of a grinder, including grinding the edges of a fault.
However, you should understand: such filigree work requires good skill. In addition, quite often when cutting with a disk - both straight and curved - chips occur. To cut tiles with a grinder without chips and other problems, craftsmen recommend sticking masking tape along the cut line and marking it. By the way, this is convenient to do with a regular pencil.
To make work easier, it is better to fix the tiles or porcelain tiles on the work table.
This is convenient to do with special clamps. In this case, depreciation of the supporting surfaces of the clamps and at least minimal depreciation of the work table is required - this will help to avoid unwanted vibration leading to chips on the tile and its uneven fracture.
It is recommended to place polystyrene foam, polyethylene foam and other similar materials on the table.
Sometimes it is not possible to get an even cut; in this case, you can “select” the material with a grinder to a certain contour, and then smooth the edge with an abrasive.
If it is necessary to make a rectangular cutout or cut a tile along a broken contour, straight cuts are made.
Unfortunately, it is difficult to avoid cuts in the corners.
A grinder is also convenient for sanding not entirely smooth edges of tiles after cutting. For this purpose, special flexible abrasive wheels are used.
What do you need to cut tiles without a tile cutter?
In addition to the already mentioned grinder or angle grinder, glass cutters (aka wet cutters) are used. You can use them to cut tiles at home along a line of any complexity, but the problem lies in the need to apply a strictly defined (and quite large) force to make a cut and break the tile. Moreover, the more complex the cut line, the higher the risk of an uneven fracture.
It's easiest to work with straight contours.
To divide the panel, you will need to cut the tile without a tile cutter along the desired contour and carefully break it. As shown in the diagram above, a thin strip, nail, knitting needle or other similar object is placed under the fracture site. What’s interesting: you can use a glass cutter to cut over one place several times, and you also need a break line on the back of the panel. It can be sawed through with a hacksaw. Before breaking the tile, you need to “tap” the entire line, as when cutting glass, and then make a sharp break. It is convenient to rest the tile at the fracture site on the edge of the table or other corner. The fracture is cleaned with abrasive.
Another option is to use a jigsaw, regular or electric. Of course, the electric one is more productive and, due to its high cutting speed, has a lower risk of incorrectly breaking the tile.
What’s valuable is that using a jigsaw has virtually no restrictions on the thickness of the material being cut. The only limitation is the permissible immersion depth of the jigsaw blade, and in most models it is at least 3...5 cm.
For work, metal files are used, the cut is cleaned with abrasive to a smooth surface.
How to use a manual tile cutter correctly
To use a manual tile cutter correctly, you should be guided by the following technology:
- Draw a marking line on the front side of the tile using a marker or felt-tip pen.
- Fix the material using special clamps, while the marking line should be located exactly under the cutting wheel.
- Place the cutting element at the beginning of the marking and lightly press it.
- Holding the handle, smoothly move the carriage away from you along the cutting line. The pressure should be strong enough to cut the glaze. If you apply great force, you can break the tile or damage the glazed layer at the cut site. Insufficient pressure will not allow you to disturb the hard coating and then break the tile.
- Move the handle to the middle, lower the lever (if included), then press it or hit it sharply. If there is no lever, the tile is placed on the edge of the table along the cut line and broken by pressing on the part protruding beyond the edge.
Don't miss: Pasting doors with self-adhesive wallpaper
If everything was done correctly, the tile should break neatly exactly along the cut line. Some models have a built-in ruler and swivel base for cutting tiles at a 45-degree angle. More details in the video: