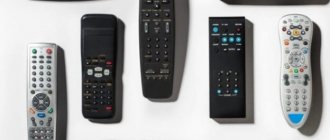
What types of television antennas are there?
Main types of antennas:
- meter (MV), length from 1.5 m;
- decimeter (UHF), length from 15 to 40 cm;
- all-wave (MF + UHF), combining both types.
To receive digital TV signals, you need a UHF antenna, but an all-wave antenna may be suitable.
For high-rise buildings in cities, it is recommended to use collective antennas. Their positive aspects:
- Excellent TV signal quality.
- Configures the wizard during installation. Residents of high-rise buildings do not need to configure anything additional.
- Regular maintenance, which is monitored by the management company, HOA, and provider.
The disadvantages include:
- Difficult to install. It is produced only by a specialist.
- High cost.
- Subscription fee, which is charged by television broadcasting operators after concluding contracts.
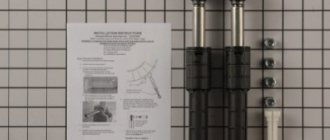
Outdoor individual antennas are installed in the private sector or in low-rise buildings. They pick up a signal from a nearby TV tower. The quality of the signal will depend on how the antenna is oriented in space.
There are indoor antennas, with and without an amplifier:
- flat unidirectional, reliable and inexpensive, precise orientation is important for them;
- spatial - the most reliable and expensive, for installation outdoors;
- frame ones, the simplest ones, require being located near the repeater.
There are also active and passive antennas. The difference is where the television signal is received and transmitted - directly to the television device or through an amplifier. Passive antennas work well when the signal is strong. Active - through the amplification block.
When choosing an antenna you need to consider:
- Distance to the nearest TV tower. The antenna should be located 30-40 km from the tower. At greater distances, the signal loses quality.
- Obstacles between the television tower and the TV. Various buildings, for example, can interfere with the signal.
- Distance from antenna to television receiver. A long antenna cable weakens the signal; you may need an amplification device or another, more expensive cable.
- Power. At high power, a television signal travels long distances.
In the room, the antenna is placed near the television receiver and turned in the direction of the television tower.
Active or passive
All wave receivers can be divided into several groups: by type of design, method and location of installation, and other parameters. An indoor antenna for digital television is always a choice dilemma: should it be active or passive? A passive indoor antenna is one that does not have a built-in signal amplifier. According to the majority, this is the type of device you should choose for your home. This approach is based on the judgment that the length of the cable to the TV is short, only a few meters, so the device does not need an amplifier, because the signal in this section is not distorted.
It will be interesting➡ Ways to check transistors for functionality
An active indoor antenna, that is, with a built-in amplifier, helps out when it itself is obviously low-power, and its installation is supposed to be at a considerable distance from the digital decoder. The cable will inevitably be subject to signal loss. Television antennas with an amplifier have their supporters, but it is worth recognizing: the signal is received by the catcher itself, and not by its amplifier. How it copes with this task largely depends on its design, otherwise manufacturers would not be struggling with the best passive models, but would simply equip them with amplifiers, entrusting all the work associated with reception to them.
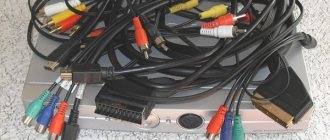
Types of connecting plugs.
Amplifiers for indoor television antennas compensate for losses that occur on the way to the television receiver - receiver or TV. Each coaxial cable has a so-called attenuation coefficient, i.e., as the length of the cable increases, the level of the received signal decreases. If this distance is only a few meters, and the signal is obviously strong, then passive indoor antennas are quite suitable for watching digital television.
The situation is the opposite: there is a large house in a populated area with a good digital signal, one indoor radio wave receiver, cable splitters for several rooms, sockets and a wire length exceeding, for example, 40 meters. Each element - a splitter, a socket, and especially a long cable - causes a decrease in the signal. This is where it makes sense to use an active TV signal catcher.
When choosing between active and passive designs, use common sense: do not buy an expensive signal receiver with a powerful amplifier if you live five kilometers from a TV tower. The signal level of the active device may be so strong that it “overloads” the tuner or it produces strong noise and interference. As for the amplifier, it is a device that consumes electricity. Its consumption is small, but it is there. The active model only works when the amplifier is connected to the network. A device receiving waves with the amplifier turned off does not become passive; it cannot receive a signal at all.
How to connect a TV to an antenna.
What you need to do to connect the antenna cable and F-connector
To do this we need an antenna cable, an F-connector, a utility knife and wire cutters. We unscrew the F-connector, take a utility knife and strip off about one to one and a half centimeters of the upper braid of the cable. Braid and foil remained under the top insulation. We move them to the side. After that, another layer of insulation has to be removed. We retreat 0.8-1 centimeter from the edge and perform a similar procedure. Then we screw the F-connector onto the wire. The cable core should protrude 0.5 centimeters from the edge of the F-connector. If it is longer, cut off the excess with wire cutters.
TV signal splitters.
Necessary equipment for connection
To connect the antenna to a television receiver or set-top box, you will need a coaxial cable with a resistance of 75 Ohms. There are copper cables coated with a thin layer of copper.
When choosing a cable, consider:
- type of signal (satellite dishes are installed using imported cables);
- distance to the TV tower (especially important for outdoor antennas connected at a considerable height);
- diameter of the central core of the cable (standard – 1 mm);
- various interference during installation (here you need a cable with maximum shielding);
- outer shell: black – PVC, white – polyethylene (master’s choice – PVC).
The following brands of cables are most often used:
- RG 6. High quality and inexpensive. Production: Russia-China.
- RK 75. Made in Russia, high quality. Can be used for any type of connection.
- RG 59. Ineffective at a distance of more than 200 m.
A plug is used to connect the antenna cable.
The F-plug is recommended for use with all modern television devices.
Cable connection procedure
There is a certain procedure when connecting a coaxial cable. Violating this order may result in undesirable consequences (at a minimum, you simply won’t be able to connect the cable). First, find out which coaxial cable you are using. This can easily be checked on the cable insulation. And then move on to your connector. There are several standard types of connectors: F-connectors and N-connectors. You need the device connector to match your cable, otherwise the money spent on buying a cable will be wasted.
If your coaxial cable fits the device perfectly, then you can proceed to the actual preparation of the cable itself.
So, the recommended sequence for preparing a coaxial cable for connection to the device:
1. Stripping the wire. We step back from the edge of the cable by about 1 cm and make a circular cut. We do this carefully so as not to touch the screen and foil from below. We step back a few more centimeters from the folded edge of the foil and make another cut.
2. Remove the cut insulator. Screw the prepared end clockwise onto the connector. Now the tools will come in handy: using pliers, tighten it until it stops.
3. Remove all excess with wire cutters.
The main rule is to do everything carefully so as not to damage the core, screen and braid.
But that's not all. If we have figured out the sequence of cable preparation, then there is also such a process as directly connecting the cable to the crimp connector.
What do you need to connect the crimp connector and cable? The process consists of several stages:
1. Prepare a ferrule. Then cut off the rubber insulation from the cable (approximately 6 mm).
2. Get rid of the half of the cable that is already without insulation, right down to the copper wire limit.
3. Pull the copper fiber out of the cable.
4. Connect your connector to the insulation and tighten with pliers.
5. Get rid of unnecessary protruding wires.
And voila, you have connected the crimp connector and cable. And it’s not even complicated, is it?
Step-by-step instructions for assembling the antenna cable
At this stage you need to mount the plug on the cable:
- Remove 1 cm of the connected cable from the outer insulation.
- Turn the braid and foil back, where the whole cable is.
- Remove the internal insulation and expose the central core.
- Screw the F-plug onto the unscrewed braid.
- Shorten the central core to 2-3 mm.
- If necessary, screw the adapter onto the screwed-in plug.
The installation of the plug is the same when connecting the antenna cable directly to the TV or through a set-top box.
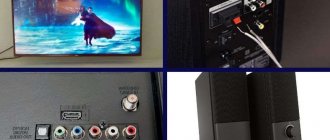
Connecting and configuring different types of antennas
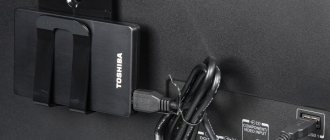
The back panel of the TV is equipped with a socket where the antenna is connected. It is easily recognized visually: it is a metal groove with a hole or a protrusion inside the plug. To receive a satellite signal, there is a second connector nearby with a thread onto which the plug is screwed.
Connection to a public antenna
Connection to a collective television antenna occurs after concluding an agreement with the management company. Nowadays people are more often turning to providers of various telecommunications services.
A branch is added to the common house cable, going to the apartment. A plug is attached to the end of the cord stretched around the apartment. It connects to a TV receiver or set-top box. All that remains is to set up TV channel reception.
Connecting the cable to an individual antenna
There may be two connection options here. If the antenna manufacturer has provided the ability to attach a cable and plug, it is easy to assemble the circuit. If you need to connect the cable yourself, you need to follow these steps:
- Remove the top insulation from the cable and turn the braid back.
- Remove the insulation from the central core.
- Insert the core into the screw connection and tighten it with a screwdriver.
- Press the braid and cable with another terminal.
Setting up a TV antenna
To set up a television antenna you need:
- Check the signal level. Go to “Menu”, select “Auto Configuration”. A signal level scale will appear on the screen. When the signal is above 50%, a passive indoor antenna is suitable.
- Point the antenna in the direction of the repeater. Use the interactive map of CETV (https://map.rtrs.rf/) to find out where the nearest TV tower is located. The antenna must be oriented in this direction.
- Find areas with better signal reception in the room where the television receiver is located. To do this, simply move the antenna around the room, usually such places are located near doors or windows.
- Launch the channel search function on the TV: “Settings” – “Automatic search (setup)”.
Instructions for setting up digital television yourself
To connect your TV to the digital terrestrial TV network to receive the DVB-T2 standard, you need a TV with a DVB-T2 tuner, or a DVB-T2 digital receiver that decodes the digital signal from the antenna. The type of digital receiver required depends on your TV - for newer TVs with a composite audio/video input (RCA), an HDMI digital high-definition input, a corresponding receiver with a corresponding output will do. If you have a TV that does not have a composite input, you need a receiver with a SCART output.
For older televisions without the above inputs, a receiver with a television radio signal output, connected to the antenna socket of the television, is suitable. First you need to connect the antenna, receiver and TV with the appropriate cords and cables, depending on the connection diagram used. To do this, you will need the TV itself, an antenna for receiving a UHF TV signal and an HF connecting cable. The antenna is installed in the direction of the Television Center, which broadcasts digital television. After meeting these requirements and the necessary connections, select the image source “Digital Terrestrial Television DVB-T2” in the TV menu and perform an automatic channel search according to the instructions for the TV.
Connecting a set-top box and TV.
If no channels were found in the automatic search, the problem is most likely a weak signal. Therefore, in this case, you first need to achieve a good signal level, either by choosing the correct direction of the antenna, or by selecting it (for example, replacing the antenna with a more powerful one). To configure the antenna to the maximum, you need to select the “Manual Tuning” item in the Menu of your TV, displaying signal level scales, and set the digital frequency channel of your region. By changing the direction of the antenna, it is necessary to achieve the maximum signal, preferably with a “Quality” level of at least 70%. If the signal level “jumps” or is not there at all, install the antenna in another place, for example, by raising it on a mast, or replace it with a more powerful one.
It will be interesting➡ How to check the throttle using a multimeter
To do this you will need: a TV that supports the HDMI high-definition standard, a digital receiver that supports HDMI, an antenna for receiving a UHF TV signal, and connecting wires. After meeting these requirements and the necessary connections, select the HDMI input type on your TV and automatically scan for channels in the receiver according to the instructions for the receiver.
Related material: HDMI pinout.
If no channels were found in the automatic search, the problem is most likely a weak signal. Therefore, in this case, you first need to achieve a good signal level, either by choosing the correct direction of the antenna, or by selecting it (for example, replacing the antenna with a more powerful one). To configure the antenna to the maximum, you need to select the “Manual Tuning” item in the Menu of your TV, displaying signal level scales, and set the digital frequency channel of your region. By changing the direction of the antenna, it is necessary to achieve the maximum signal, preferably with a “Quality” level of at least 70%. If the signal level “jumps” or is not there at all, install the antenna in another place, for example, by raising it on a mast, or replace it with a more powerful one.
To do this you will need: a TV with an RCA input, a digital receiver with a 3RCA output, an antenna for receiving a UHF TV signal, a connecting cord 3 - RCA (“tulips”). After meeting these requirements and the necessary connections, select the AV input type on your TV and automatically scan for channels in the receiver according to the instructions for the receiver.
If no channels were found in the automatic search, the problem is most likely a weak signal. Therefore, in this case, you first need to achieve a good signal level, either by choosing the correct direction of the antenna, or by selecting it (for example, replacing the antenna with a more powerful one). To configure the antenna to the maximum, you need to select the “Manual Tuning” item in the Menu of your TV, displaying signal level scales, and set the digital frequency channel of your region. By changing the direction of the antenna, it is necessary to achieve the maximum signal, preferably with a “Quality” level of at least 70%. If the signal level “jumps” or is not there at all, install the antenna in another place, for example, by raising it on a mast, or replace it with a more powerful one.
To do this you will need: a TV with a SCART connector, a digital receiver with a 3RCA connector, an antenna for receiving a UHF TV signal, a Scart-tulips connecting cord. After meeting these requirements and the necessary connections, select the AV input type on your TV and automatically scan for channels in the receiver according to the instructions for the receiver.
If no channels were found in the automatic search, the problem is most likely a weak signal. Therefore, in this case, you first need to achieve a good signal level, either by choosing the correct direction of the antenna, or by selecting it (for example, replacing the antenna with a more powerful one). To configure the antenna to the maximum, you need to select the “Manual Tuning” item in the Menu of your TV, displaying signal level scales, and set the digital frequency channel of your region. By changing the direction of the antenna, it is necessary to achieve the maximum signal, preferably with a “Quality” level of at least 70%. If the signal level “jumps” or is not there at all, install the antenna in another place, for example, by raising it on a mast, or replace it with a more powerful one.
To do this you will need: any TV, a digital receiver with a radio frequency output, an antenna for receiving a UHF TV signal, a connecting TV cable. After meeting these requirements, perform an automatic search for channels in the receiver according to the instructions for the receiver; automatically search for channels by searching for a channel from the receiver.
Connection via TV sockets.
If no channels were found in the automatic search, the problem is most likely a weak signal. Therefore, in this case, you first need to achieve a good signal level, either by choosing the correct direction of the antenna, or by selecting it (for example, replacing the antenna with a more powerful one). To configure the antenna to the maximum, you need to select the “Manual Tuning” item in the Menu of your TV, displaying signal level scales, and set the digital frequency channel of your region. By changing the direction of the antenna, it is necessary to achieve the maximum signal, preferably with a “Quality” level of at least 70%. If the signal level “jumps” or is not there at all, install the antenna in another place, for example, by raising it on a mast, or replace it with a more powerful one.
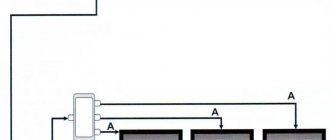
How to connect several TVs at once to a single antenna
You will need splitters (couplers) or. How the connection occurs:
- Strip the coaxial cable.
- Place the F-plug on the cable and insert it into the input hole of the splitter.
- Insert TV wires into the outlet holes using connectors.
Splitters have from two to eight outputs, depending on their model.
Basic mistakes when connecting an antenna and their solutions
Many people have very similar difficulties here:
- No TV signal. Try moving the antenna around the room. If this does not help, it is recommended to choose another reception option (for example, satellite TV).
- Not all channels are received. Most likely, only one channel package is connected. First you need to determine the broadcast frequency of the repeater (tower) using the RTSR card, then manually configure the remaining channels in the menu. Enter “Menu” – “Channel settings” – “Manual tuning” – “Program”. Using the button on the remote control, assign the channel the desired number. Run “Search”, then “Save”. Set up other channels in the same way.
- The signal is noisy. The antenna also receives additional noise. You need to place the receiver higher, keeping the direction towards the television tower.
Connecting an antenna to different TVs
Is there a difference in connecting antennas to TVs of different brands? There is no clear answer “yes” or “no” to this question. Each receiver model has its own pros and cons. Some models may have a built-in tuner, others are intended only for digital television broadcasting, and for others you will need to purchase additional equipment.
- Sony TV. Some TVs of this brand may have a built-in receiver and the ability to connect analog and digital television. When connecting, you will need information from the operator about the frequency of the radio signal, type of polarization, and symbol rate. After installing and connecting the antenna to the Sony TV, you need to go to the menu and configure the signal.
- LG TV. Most LG models have a special LNB Satellite IN connector, into which you can easily connect an antenna if you know the basic connection rules. With this type of connector it is not necessary to buy a tuner. The next step is setup through the menu. First you need to select the type of antenna (satellite, digital), then you can start setting up channels.
- Samsung TV. Modern TV models of this brand usually already have a built-in DVB-S/S2 receiver. Therefore, there is no need for additional or special equipment, and when connecting the antenna to a Samsung TV, it is enough to follow the diagram specified in the instructions for the equipment.
It will be interesting➡ Options for connecting circuits for pass-through switches
How to check if the connection is correct
When the image on the TV screen periodically disappears, it means that the antenna is working at the limit of its capabilities. The signal strength can change due to rain, heat, wind, or any noise outside the window. Overheating or hypothermia has a bad effect on the contacts in the receiving antenna.
Expert opinion! A master with many years of experience in connecting television antennas, Andrei Yakovlev, advises choosing an antenna with a reserve level of the receiving signal. TVs have a function with which you can check the quality and signal level.
For successful reception, the signal level must be at least 60%, and the quality must be 100%. Check the correct location of the antenna in space, check the distance to the TV tower. Check the integrity of the cable periodically.