Bread plays an important role in our diet. When did you...
Page 2
- Image
- Text
Bread plays an important role in our diet. Have you ever dreamed of baking bread for yourself at home? You can do this with our bread maker. It doesn’t matter whether you have experience or not, you just need to load the ingredients and the bread maker will do the rest. You can easily bake bread, muffins, cakes, without any intervention. But don't rush - first you should
Still, get acquainted with your new bread maker. Take some time for this, and do not be discouraged if your first attempts are not entirely successful. If you don’t want to wait a long time, then the recipe, which is located in the “Quick Start” section, will help you in your first steps. Keep in mind that bread baked in a bread machine is denser than bread bought at a bakery.
INTRODUCTION
FIRST STEPS
Tips for baking bread.
1.
Read the instructions carefully and use the recipes: bread in a bread machine is baked differently than “by hand”!
2.
All ingredients used should be at ambient temperature (unless otherwise stated) and carefully weighed. Measure liquids using the supplied graduated beaker. Measure liquids using the included measuring cup. Use a double scoop, with a tablespoon and a teaspoon.
If the dosage is incorrect
the results will be bad.
3.
Use ingredients before their expiration date. Store them in a cool, dry place.
4.
It is important to measure the exact amount of flour. Therefore, weigh the flour on a kitchen scale. Use dry yeast from a packet. Unless recipes indicate otherwise, do not use baker's yeast. After opening a packet of yeast, use it within no more than two days.
5.
To avoid interfering with the rising of the dough, it is recommended to load all the ingredients into the container from the beginning and try not to open the lid during the cycle (unless otherwise instructed). Carefully follow the order of the bookmarks and the quantities of ingredients indicated in the recipes. Add liquids first, then add solids. The yeast should not come into contact with either liquid or salt.
General order of bookmarks:
Liquids (butter, vegetable oil, eggs, water, milk) Salt Sugar First half of flour Powdered milk Special solid ingredients Yeast
64
Selecting a program, Using the bread maker
Page 4
- Image
- Text
66
1 > White bread 2 > Quick white bread 3 > French
bread
4 > wholemeal bread
The MENU key selects one of the various programs. The indicator indicates the execution time of the program. Each time you press a number key on the display panel, you go to
following program, from 1 to 12:
The default setting is displayed for each program. Therefore, the exact settings are selected manually.
PROGRAM SELECTION
When you select a program, a sequence of steps is activated that are performed one after another.
1. White bread program, allows you to bake
bread according to most recipes for wheat flour.
2. This program is equivalent to the program
Quick bread, but in quick baking mode. Meat-quiche may seem less fluffy to some.
3. French bread program, corresponds to
recipe for traditional French white bread.
4. Program Whole flour bread, selectable
for baking bread from bran flour.
5. This program is equivalent to the program
White bread, but in quick baking mode. The crumb may seem less airy to some.
6. Sweet bread program, adapted for
recipes for sweet breads with high sugar and fat content.
7. This program is equivalent to the program
Sweet bread, but in quick baking mode. The crumb may seem less airy to some.
8. Very quick bread program
Only suitable for the SUPER QUICK BREAD recipe (page 70).
5 > instant wholemeal bread 6 > sweet
bread
7 > quick baking sweet bread 8 > very fast baking mode
9 > cake 10 > jam 11 > dough 12 > baking only
USING THE BREAD MAKER
9. The Cupcake program allows you to make
Baking and pies using dry yeast.
10. The Jam program is intended only
for automatic preparation of sweet filling in a container.
11. The Dough program is not intended for
baking. It is designed for kneading and rising any yeast dough, such as pizza dough.
12.The Baking Only program carries out
baking in the range from 10 to 60 minutes. It can be selected separately and used: a) in conjunction with the Fresh Dough program, b) to warm or crisp bread that has already been baked and cooled before it is removed from the container. c) to complete bread preparation in the event of a long power outage during the bread baking cycle.
Do not leave the bread maker unattended while program 12 is running.
To interrupt a cycle before it has completed, manually interrupt the program by long pressing the key
.
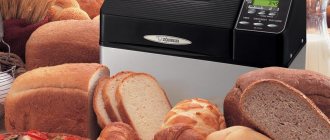
Bread makers "Moulinex"
MOULINEX bread makers are very popular today. Among the many models, you can choose an option that has several baking forms. In such a bread machine you can prepare not only traditional bread, but also rolls, buns and much more. In addition, the device allows you to choose one of three available crust baking levels, which is very important for those families in which each member has his own preferences. Some models have a function to keep baked goods warm. How to use the Moulinex bread maker?
In the event of a power outage: if this occurs in...
Page 6
- Image
- Text
68
In the event of a power failure: if this occurs during a work cycle, the program execution is interrupted by a power outage or incorrect operation; The bread machine has a 7-minute power reserve, during which the program is saved. The cycle resumes with
stopping places. After this time, programming is lost.
If two programs are to be run in succession, wait 1 hour before starting the second operation to allow the appliance to cool completely.
PRACTICAL TIPS
You can program your bread maker so that your baked goods are ready at the selected time, up to 13 hours in advance. Delay mode cannot be used for programs 8, 9, 10, 11, 12. This step is activated after selecting the program, degree of browning and weight. The indicator indicates the execution time of the program. Calculate the time between starting the program and the date by which you want to receive your baked goods. The bread machine already includes automatic program cycles. Buttons
And
select
time(
increase and
decrease
time). Use short presses to increase or decrease the time in 10-minute increments and a short beep will sound.
Long presses change the time in increments of 10 minutes continuously. For example, it’s 20:00 now, and you want your bread to be ready at 7:00 tomorrow. Set 11 o'clock using buttons
And
. Click
to the button
. A beep sounds.
A beep will sound and both timer dots will flash. The countdown begins. The operation indicator lights up. If you make a mistake and want to change the time setting, press and hold the button
to sound
signal. The indicator displays the default time. Set the desired time again. Make sure that individual ingredients are not perishable. Do not use the delayed mode when preparing dishes containing raw eggs, yogurt, cheese, or fresh fruit.
Fats and vegetable oil:
fats
give bread fluffiness and taste. This bread also lasts longer. Excess fat slows down the rise of the dough. If you use butter, cut it into small pieces for a more even distribution in the dough, or soften it first. Do not put liquid oil into the bread machine. Avoid contact of fats with yeast, as fat may prevent the yeast from hydrating.
Eggs:
eggs enrich the dough, improve the color of the bread and
contribute to the formation of a tasty crumb. If you use eggs, reduce the amount of liquid ingredients. Crack the egg and add liquid to the volume specified for liquid in the recipe. Recipes call for a medium 50 gram egg; for larger eggs add a little flour,
for smaller eggs, reduce the amount of flour.
Milk:
you can use fresh or
powdered milk. If you are using powdered milk, add water to the original volume. If you are using fresh milk, you can also add water - the total volume of liquid should be equal to the volume specified in the recipe. Milk also has an emulsifying effect, resulting in more uniform cavities and a better-looking crumb.
Water:
water saturates and activates the yeast. She
also saturates the starch contained in the flour and ensures the formation of crumb. Water can be replaced, partially or completely, with milk or other liquids. Liquids should be at room temperature when added.
OTHER PROGRAM SETTINGS
INGREDIENTS
SELECTING BREAD WEIGHTBread weight is set by default.
SELECTING THE WEIGHT OF BREAD The default weight of bread is 1000 g. This weight is approximate. To obtain bread of other weights, use detailed recipes. In programs 10, 11, 12 the weight of the bread is not adjusted. To set the weight of the dough, press the key to select 500, 750 or 1000 g. The indicator light lights up next to the desired weight. Attention! For some recipes, baking 750g bread is not possible. See recipe book.
Delicious recipe! Puff pastry chicken fillet cheese
SELECTING GOLDEN CRUST COLOR (BROWNING) Browning intensity is set to MEDIUM [MOYEN] by default. In programs
There is no browning. You can choose from three degrees of browning - LIGHT CRUST (L) - MEDIUM CRUST (P) - DARK CRUST (H) [CLAIR/MOYEN/FONCE]. To set the selection, press the button
indicator lights up the desired degree of browning.
START/STOP To turn on the device, press the button
The indicator light will light up. The countdown will begin. You can interrupt or cancel a delayed program by pressing the button for a long time
Warming up Used in programs 4 and 5 to improve the rise of the dough.
Kneading Ensures the formation of the dough structure, and therefore the ability to rise quickly.
Calm Allows the dough to calm for improved rising quality.
Rising The time the yeast acts during which the bread rises and acquires its aroma.
Baking The dough turns into pulp, ensuring a crispy golden brown crust.
Keep warm Allows you to keep bread warm after baking. However, it is recommended to remove the bread from the pan after baking.
shows what the baking process of a specific program consists of.
Warming up: works only in programs 4 and 5. The stirrer does not work during this time. Heating increases the activity of the yeast and helps bread made from flour, which usually rises poorly, rise.
Kneading: The dough goes through the 1st and 2nd kneading cycles between rising cycles. During these cycles, and in programs 1, 3, 4 and 8, it is possible to add ingredients - dried fruits, olives, slices of lard, etc. A beep indicates when this can be done. The general table (page 78-79) and the “additional” column indicate the operating time of the bread maker. This column indicates the time that is displayed on the indicator when the sound signal sounds. To know more precisely after what time the beep sounds, you need to subtract the time indicated in the “additional” column from the total baking time.
For example, the "optional" column says 2 hours 51 minutes and the "total time" is 3 hours 13 minutes, so ingredients can be added after 22 minutes.
Rising: dough in 1 m, 2 m or 3 m rising cycles.
Baking: Bread in the final stage of baking.
Keep warm: For programs 1, 2, 3, 4, 5, 6, 7 and 8, you can leave the food in the appliance to complete cooking. After baking, the keep warm cycle will automatically start for an hour. During this hour the display will show 0:00. A beep will sound regularly. At the end of the cycle, the device will automatically turn off after several beeps in a row.
Baked bread is very sensitive to temperature and humidity...
Page 7
- Image
- Text
69
Baked bread is very sensitive to temperature and humidity. If the room temperature is very high, it is recommended to use a cooler liquid than usual. At low temperatures, you may have to heat the water or milk (to a temperature no higher than 35°C).
Sometimes it is also useful to check the condition of the dough during kneading: it should be a homogeneous mass that easily lags behind the walls of the container: > if there is unkneaded flour left, add
some water,
> otherwise it may be necessary
add flour.
Flour or water should be added very carefully (one tablespoon at a time), and ensure the quality of the dough before adding new portions.
A common mistake is to assume that adding yeast will make the dough rise better. On the contrary, if there is too much yeast, the structure of the dough becomes more fragile, it rises high and falls during baking. The quality of the dough can be assessed by lightly tapping it with your fingers - the dough should “resist” indentation, and the dents on it should gradually smooth out.
Flour:
The weight of flour depends greatly on its type. IN
Depending on the quality of flour, the resulting baked goods may also change. Store flour in an airtight container, as it can react to fluctuations in temperature and humidity by absorbing or releasing moisture. Adding oat flour, bran, wheat germ, rye flour, and finally whole grains to the dough produces a heavier and less fluffy bread. It is recommended to use premium flour unless otherwise specified in recipes. The results are also influenced by how much the flour is sifted - the more whole it is (that is, if it contains particles of the shell of wheat grains), the less the dough rises, and the denser the bread turns out. You can also find ready-made baking dough in stores. When using this test, follow the manufacturer's instructions. In general, when choosing a program, adhere to the requirements for finished baked goods. For example, for wholemeal bread, use program 4.
Sugar:
preferable use
refined sugar or honey. Never use refined sugar or lump sugar. Sugar feeds the yeast, gives the bread flavor, and improves the golden brown color of the crust. Salt: Salt adds flavor to baked goods and helps regulate yeast activity. It should not come into contact with the yeast. Thanks to salt, the dough turns out hard, compact, and does not rise very quickly. Salt also improves the texture of the dough.
Yeast:
yeast ensures the dough rises.
Use active dry yeast in packets. The quality of yeast varies and it does not always expand at the same rate. So the quality
bread may vary depending on the yeast used. Old yeast or improperly stored yeast does not work as well as freshly opened dry yeast. All proportions in recipes are for dehydrated yeast. If you use fresh yeast, you should take triple the amount (by weight) and dilute it with a small amount of warm, slightly sugared water for a more effective effect. Dry yeast can be sold in the form of small balls, they should also be diluted with a small amount of warm, lightly sugared water. This yeast is used in the same proportions as dry yeast in sheets, but we recommend using dry yeast in sheets as it is easier to prepare.
Additives (olives, oils, etc.):
Can
use your own recipes, adding any desired additives; however, you should: > strictly observe the time indicated by the sound
signal for introducing additives, especially the most delicate ones,
> keep in mind that the hardest grains (e.g.
flaxseed or sesame seeds) can be added
at the very beginning of kneading, to make it easier to use the bread maker (for example, when manually
setting the time),
> carefully drain moisture from very wet
ingredients (olives),
> lightly roll fatty ingredients in flour to
obtaining a more homogeneous dough,
> don't add them in too much quantity - this is
may damage the test.
PRACTICAL TIPS