On the hottest summer days, the only salvation from the sweltering heat is a regular floor fan.
Not everyone can afford a full-fledged split system or even a mobile air conditioner.
But unfortunately, even this inexpensive and accessible wind blower breaks down from time to time. Chinese models especially fly like seeds.
And there is an overwhelming majority of them in our market. What to do if the fan stops rotating and working? What are its main problems and why does it break down?
Let's take a closer look.
Why doesn't the fan work?
In total, there are 5 main reasons for the failure of floor fans:
- old dried grease or lack of it
- dried out capacitor
- blown thermal relay or fuse
- turn short circuit of windings or wire breakage
- mechanical displacement of the motor shaft
The main problem of cheap models, which for some reason few people pay attention to, is incorrect casting of the blades. Because of this, an imbalance occurs, bearings break, and gaps increase.
You cannot influence this in any way, since you already bought a fan with such an initial defect. Sometimes it seems to work, the impeller rotates normally, but it does not blow.
That is, there is no cooling air flow from it. Why is this happening?
Due to the incorrect angle of attack of the blades. Its petals are deformed and drive the air flow in a circle, rather than throwing it out.
This effect can appear over time, after the fan has been standing in direct sunlight for a long time and its impeller, having heated up, begins to gradually change its shape.
This can only be treated by replacing the impeller with a new one.
Floor fan
Although these fans have long given way to air conditioners, many homes, apartments or offices still use them heavily, especially on hot summer days. Such a unit requires disassembly, since over time the working mechanisms become clogged and corroded. As a result, the working pendulum mechanism accelerates more slowly, the blades do not receive the required rotation speed, and the fan loses its performance.
It is recommended to carry out preventive cleaning and lubrication of fan parts annually before the start of the season, since it becomes clogged during storage. You will need a screwdriver for disassembly.
Algorithm for disassembling a floor fan:
- Remove the protective grille. It is secured with three special levers that can be easily opened by hand.
- Disconnect the blades. They are attached with a nut to the rotation axis. The nut is made so that it can be unscrewed by hand. Its peculiarity is that when ordinary nuts are unscrewed counterclockwise, the nut securing the blades is unscrewed clockwise, and screwed counterclockwise.
- 3. Remove the bearing and inner grille. It is also attached with a nut, but this nut must be unscrewed as usual, counterclockwise.
- 4. Unfasten the machine operating mode button. It can be easily removed by hand.
Removing the blades, protective grilles and casing
- Remove the casing. The main operating mechanisms of the fan are protected by a casing. It is attached to the body with two screws on the front side of the fan and one screw on the back. It is important to be careful when removing the cover after removing the screws. Immediately behind it are all the working mechanisms connected by cables, so you can be careless and damage the motor or cables when removing the casing.
- Remove the pendulum mechanism. It is located on the back side of the fan, and is secured with the same bolts. Disconnect carefully, keeping an eye on the cables.
- Check the rotation of the main working axis. If the axle rotates freely, it means it is not rusty, but if it rotates with difficulty and squeaks, it needs lubrication.
- Get the engine. It is in a metal so-called. "box". This box is bolted to the back of the fan. After opening the box, you must be especially careful because there are 4 small cables inside that must not be damaged under any circumstances.
After removing the engine, full access to the main working axis of the machine is available. It must be checked for rust and various types of deformation. If corrosion is found, you need to clean the axle from it without damaging the threads. If the cause of the malfunction of the fan is deformation of the axis, it must be replaced.
Fan axis lubrication
Floor fan does not spin
The most common problem is dried out lubricant or lack of it. The fan begins to jam, lose speed and, as a result, the load on the engine increases. The wind blower no longer operates at full capacity.
The motor, wound with a thin wire of 0.2 mm, begins to heat up and the windings gradually burn out.
How is such a defect detected? In this case, the fan stops rotating. It hums, but the impeller does not spin.
It also happens that it starts only at 3rd speed, and does not respond at all to the first two. It just doesn't have enough power to turn the shaft.
In order to start it, you have to brazenly spin the blades like on old airplanes.
By the way, the same symptom can occur if the starting capacitor is damaged. Without instruments, how can you find out which reason is to blame for the breakdown?
To do this, you need to at least get to the engine shaft by removing the protective casing and blades. If the shaft rotates by hand with great difficulty, then blame dirt and dried grease.
And if it spins easily and has inertia, then most likely the air conditioner is covered. Symptom - you plugged in the fan, but it doesn’t spin. At the same time, you crank the engine up and it starts.
If you hold the fan blades with your hand while working, it may stop again. The capacitor is checked with a multimeter if it has an appropriate capacitance measurement scale.
To replace, select a new condenser according to the same parameters as indicated on the body of the old one.
By the way, a capacitor that is not yet completely dry also affects the speed. If you notice that they have fallen and the fan has begun to spin more slowly, this is a sign to check it.
The problem of tight rotation is solved by new lubrication of the bearings. So-called plain bearings are used here. Some people call them bushings.
It’s a bit expensive to use balls in such designs, and they rattle over time. For repairs, it is not at all necessary to disassemble the entire engine. Just unscrew a few screws and spray the required areas with WD40 universal aerosol.
The fan does not turn to the sides
How to fix a floor fan if it stops spinning (turning) from side to side? It's all about the crank, the mounting screws of which can become loose or unscrewed. To find out, you will need to disassemble the motor housing. If during operation of the unit the body turns with a delay or a complete stop, then the gears in the gearbox should be checked for engagement. It is also necessary to check the gear switch itself, namely, its movement up and down.
Disassemble the gearbox and remove the main gear. The shaft will also have to be pulled out. Apply lubricant to all moving parts and assemble the gearbox. If the gears are heavily worn, they require replacement, although it is quite difficult to find analogues of broken fan parts. In this case, you will have to assemble the unit without a gearbox and use the cooler in normal mode, when the air masses move in one direction.
How to disassemble a fan - instructions with photos
How to get to the bushings without removing the engine? To begin, unscrew the central screw on the back wall of the protective casing.
Another self-tapping screw is hidden in the adjustment button-lever for turning or stopping the fan head.
After this, the back cover can be easily removed from its place. What's underneath? Here you can see the rotation gearbox that gives rotation to the entire head.
A special rod connects to it from below.
The starting capacitor of the engine is fixed on top.
By the way, keep in mind that it may not be there in different models. In this case, look for it near the speed shift buttons.
To access the motor bearing, you will need to remove the gearbox. It is secured with three screws and supported from below by a rod.
Tighten the screws and disconnect the rod. After this, the gearbox is removed from the shaft and you have access to the rear bushing.
There is no need to unscrew or disassemble anything else. Vedashka will do the rest for you.
Place a narrow guide tube on the WD40 can and poke it several times into the gap between the shaft and the bearing.
After spraying WD40, turn the shaft in different directions by hand and move it back and forth a little.
Excess thickened grease, foreign debris and dust will gradually come out. This excess dirt can be easily removed with cotton swabs.
If you have a thick lubricant like cyatim or litol, it is advisable to apply it to the gear worm. After these cleaning procedures, drop a few drops of sewing machine oil onto the bearing from the outside.
Just don't apply it too much. Otherwise, it will eventually spread all over and dust will stick to it, turning back into dirt. As a result, you will again get a wedge and a problem with fan rotation.
In some models, felt washers are placed near the bushings. They are saturated with oil and when heated, the oil flows onto the shaft, lubricating it.
Everything is assembled in reverse order. Rod - three gearbox screws - outer cover.
By the way, if you overtighten the central screw on the back cover, and this is a self-tapping screw, not a screw, it can pass through the plastic of the rotary gearbox and rest against the shaft.
You will again have problems with revs and jamming. Sometimes the cause of a breakdown is trivial and unpredictable.
We've sorted out the rear bearing, then move on to the front part of the fan. There is a protective cap in the center here.
It unscrews, attention - clockwise, since the thread here is left-handed.
You throw it off and remove the propeller from the shaft. You now have access to the front journal bearing.
The principle is the same here. First, squeeze out and soften the old grease and dirt with a Vedashka, and then apply new one.
After that, put the propeller back on and close the lid. Having completed the repair, turn on the fan at high speeds, let it run for a few minutes, and switch to the speed required.
Breakdowns of household floor fans
The approach to repairing floor or table fans should be rational. The presence of speed, tilt and rotation control units for the fan significantly complicate the design. The main task is to identify the cause. If the problem is simple, then you can try to repair it yourself.
The fan is noisy, but the blades do not rotate
The most common breakdown of floor fans is when the device makes noise, but the blades remain motionless.
The reasons may be as follows.
- The bearing grease has dried out or thickened. It's easy to identify the cause. The engine is disassembled and the presence and condition of the lubricant is checked.
- The mounting of the bearings on the shaft has shifted. This occurs due to the depletion of the life of the bushings, which are made of bronze or brass.
- Motor malfunction. To check, it is necessary to disassemble the engine and check the resistance on the windings of the housing and armature.
- Loss of capacitance due to capacitor failure. It is necessary to check the capacitance of the capacitor with a tester.
If the reason is in the lubricant, you need to remove the remaining thickened lubricant by cleaning the parts with gasoline, and pour fresh engine oil into the bushings. Care should be taken to ensure that no oil gets on the motor windings.
Fan motor
If the bushings wear out, you need to look for new ones in the store or take them from another non-working device. It will not be possible to restore worn-out ones.
If the motor winding is damaged, you will have to rewind it in a workshop or buy a new motor. It is difficult to restore the winding on your own.
If the capacitor malfunctions, you must replace it with a new one from the store. If this is not possible, then it is easier to purchase a new fan.
The fan makes a whistling sound
Whistling sounds may appear several months after purchase. The fan hums or squeaks due to deformation of the propeller or loosening of the plain bearing fasteners. Exposing the blades to direct sunlight or high temperatures leads to bending and imbalance during rotation. Similar sounds are also caused by indentation as a result of mechanical damage to the protective grille, to the surface of which the tips of the blades begin to reach.
Bearing failure
If extraneous noise occurs, do the following:
- disconnect the device from the power supply;
- remove the protective grille and inspect it for deformations;
- remove the propeller, inspect the blades for possible bends;
- inspect the bearing fasteners, check that the bolts are tightened.
The bending of the protective grille can be easily corrected by carefully straightening it with your hands to the desired state.
Note! If the geometry of the blades is damaged, the propeller will most likely have to be replaced, since polyurethane cannot be returned to its original shape at home.
If the cause of extraneous sounds is loosening of the fasteners, then you just need to tighten all the bolts until the backlash is eliminated.
The device does not turn on
If the fan does not respond to pressing the power button, it may indicate a broken wire in the cable, a damaged connection between the cable and the terminals in the socket, or a malfunction of the socket itself. The button block or the speed shift buttons themselves may also be damaged.
First of all, you need to check whether the control light comes on when you try to turn on the device.
If the light does not light, you need to do the following:
- measure the voltage in the outlet by connecting a working device to it;
- unscrew the plug and check for damage where the wires are connected to the terminals;
- disconnect the cable and check it with a tester for current flow.
If there is a malfunction in the plug, you need to restore the connection of the wires, possibly soldering the terminals. If a violation occurs in the wires inside the cable, it should be replaced with a new one.
Checking contacts with a tester
If the light comes on, but the fan itself does not work, the following steps should be taken:
- make sure that the device is disconnected from the network;
- disassemble the control panel, which is located on the fan housing;
- Use a tester to check all key contacts for current conductivity;
- check the speed controller with a tester.
If you discover that one of the buttons is broken, you should either purchase a working replacement from a radio store, or make a direct connection, bypassing it. If the speed controller fails, it must be resoldered or also replaced with a new one.
Fan does not turn
The reason why the fan does not turn left and right is that the crank is not working correctly.
To fix the problem you need to do the following:
- remove the back cover by unscrewing the fixing bolts;
- check the connection of the crank with the gear under the gearbox;
- put the crank in place, or replace it if it is broken.
A situation may also arise when turns are not completed completely. In this case, it is necessary to check the travel of the gear switch along the vertical axis. If there is any malfunction in its operation, it is necessary to disconnect the fixing bolt and lubricate the shaft, gear and upper part of the gearbox. If the plastic gear is worn out and you cannot find the part on sale, you will have to accept the fact that the fan does not rotate.
Good gear
When installing the impeller after eliminating the malfunction, you must follow the balancing rules, otherwise the fan will not rotate normally. The simplest and most convenient way is static balancing.
Install the fan manually, set the initial rotation by hand and mark the top point of the impeller with a pencil or marker. They make several more runs and check whether the obtained points of advantage coincide with the initial mark. If they do not match, then there is a fault in the bearings that need to be lubricated or replaced. If they match, take objects with different weights, such as nuts, pieces of electrodes, etc. For fastening, electrical tape, adhesive tape, mastic, plasticine, and thin wire are used.
Then they begin to attach them as a counterweight to the point of preponderance in order to achieve the loss of its permanent place. For a more accurate selection, you can grind off the weights using a hacksaw. After finding the optimal weight, the weight is welded or glued to the non-working side of the disk.
Balancing with screws allows you to quickly determine the required settings experimentally. But this option is not available on all fans.
You can also carry out balancing on balancing trestles by contacting specialists.
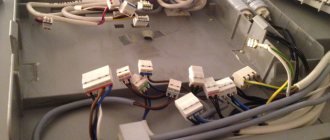
Short circuit of windings or broken wires
If the damage is more complex and simple lubrication does not help, you will have to disassemble the fan in more detail.
First, you do all the disassembly machinations as indicated above. After removing the propeller, unscrew the plastic front lock nut, which is located immediately behind it, and remove the entire protective frame.
In your hands you still have the motor itself and the leg in which the power wires pass and the push-button mechanism is located.
You disassemble this leg by unscrewing 6 screws.
First of all, check the soldering of the wires. It is quite possible that one of them, or even several, has fallen off or burned off.
If everything is intact, how can you figure out which wire goes where and is responsible for what? Start testing with two wires from the power plug.
One of them, let it be black (as in the photo below), goes directly through the backlight to the fan motor.
The second wire goes to the lower terminal of the dial switch (button 0).
Next, by pressing the corresponding buttons - 1st speed, 2nd, 3rd, certain switch contacts are closed, and thereby the engine speed changes.
Each wire from these buttons goes to its own terminal on the winding, with a greater or lesser number of turns. By applying voltage to them, you make the propeller spin faster or slower.
Floor fan connection diagram
A simplified diagram of a wind blower looks like this.
Typical circuits for most inexpensive 3-speed floor fans are something like this:
Pressing each button is accompanied by the closure of its contact group.
In this case, the other contact group opens at this moment.
Sometimes these contacts burn out or do not reach their plate. Then you lose any of the speeds.
All this is checked simply with a Chinese multimeter, in circuit continuity mode.
If your very first wire breaks or there is no contact on it, the fan motor simply will not start. Therefore, if the fan is completely inoperative, check it first.
Unless, of course, before you make sure that the plug itself and the power cord from it are working properly. This is also caused by the tester.
Place one end of the probes on the pin of the plug, and touch the other end to the contact pad on the “0” button. If working properly, there should be zero resistance.
Then you can check the wires in the same way at all speeds. Contact probe for the plug - another probe for the outgoing wire from the corresponding speed button to the engine.
If there are zeros everywhere, then the switch and wires are working.
Next, check the second contact on the plug and the wiring that goes directly past the switch to the engine. Make sure your cord is intact here too.
Only after this can you proceed to checking the windings of the motor itself.
Making your own graphite lubricant for the cooler
To prepare graphite lubricant, you need to take a few drops of synthetic machine oil and add graphite powder to it. Mix thoroughly until smooth. The result should be a graphite lubricant with a thick consistency.
Graphite for preparing cooler lubricant can be obtained by grinding off the lead of a simple pencil or brushes from a commutator motor on fine sandpaper. Some brushes are made from a mixture of graphite and carbon. Therefore, if you are not sure that the brush is graphite, then it is better not to use such a brush. Of course, it is best to use industrial-made graphite for lubricant.
The cause of capacitor failure can be sudden surges in voltage in the electrical network. In this case, repairing the fan, as usual, begins with disassembling it. For most models, the condenser is located immediately behind the central flange. To get it, you must first remove the engine and disassemble the power supply. In some fan models, removal of the condenser may be prevented by the presence of a crank, in which the owner will have to remove the flange as well.
In this case, repair of the floor fan will be limited to checking the capacitance of the capacitor. To measure the resistance on the conductors, the home technician will have to use a special tester. If the readings of this device exceed 50 Ohms, then you should purchase a new capacitor.
How to check fan windings
Set the resistance on the multimeter to 2000 ohms. Next, in order not to bite the wires anywhere, at the place where the capacitor is connected, strip off the insulation a little.
Look for the common point of the circuit, as in the diagram below.
Having found it, you call up the resistance of the winding. To do this, touch the contacts on the switch with the second probe one by one.
Approximate fan winding resistance values can be as follows:
Of course, they may differ slightly for different models, but the most important thing is that there is no breakage or short circuit. Measurements can show either several hundred Ohms or a little more than 1 kOhm.
It all depends on the power of the fan and the cross-section of the wire.
The resistance between the terminals of the windings will be lower - 100-200 Ohms.
The capacitor winding and the total resistance of all windings combined are also checked.
Here is the most competent and complete video on checking the performance of fan windings with a multimeter.
If checking the integrity of the windings also does not reveal any deviations or defects, move on. To do this, you completely disassemble the fan, as they say, piece by piece.
Engine disassembly and malfunction
First, the engine must be freed of all plastic parts. Unscrew the 4 screws from the front side and remove the cover.
On new models, in addition to screws, there are also latches. They need to be bent with a screwdriver.
To disconnect the leg, you need to find another screw, which is usually hidden under the plug.
Loosen it and pull out the mounting shaft. To dismantle the wires that pass through the leg, you will need to bite them out or unsolder them from the terminal blocks on the speed buttons.
At the same time, write down or sketch where each one is initially connected.
As a result, you should have a bare fan motor in your hands without anything unnecessary.
Let's take it apart. Unscrew the screws holding the back cover together.
At the same time, before disassembling, be sure to put marks on all covers and hardware indicating how everything was originally assembled.
Otherwise, after incorrect docking, you will lose alignment. There will be problems with the shaft wedging and the rotation of the blades.
Cleaning, lubrication and repair of fans, coolers and engines.
Good afternoon. Today I want to briefly share my personal handicraft experience in the maintenance and repair (restoration) of coolers and low-current engines. In particular, eliminating the rattling of not new fans, which occurs due to uneven contamination of the blades and, less often, wear and tear of the bushing, creating a natural spontaneous imbalance in the rotation of the fan blades, leading to noise, hum and hindering quiet leisure time.