Often, users of printing equipment have to solve the following problem: why does a laser printer print with stripes? Of course, during long-term use, the quality of office equipment, in particular MFPs, gradually decreases, as a result of which streaks begin to appear when printing. But a similar problem plagues even brand new laser printers. So what's the reason?
Main causes and ways to eliminate them
So, if a stripe appears on the edge of the printout when printing on a laser printer, then one of the reasons for this problem is that the device is running low on toner. In general, a sign of such a problem is most often the appearance of a white stripe along the entire length of a sheet of paper. With each subsequent printout, the width of this stripe gradually increases. The solution to the problem is to refill the cartridge or buy new consumables.
But what should you do if streaks appear when printing on a laser printer even with a full cartridge? In such a situation, a stripe along the edge may appear due to problems with the laser. There may be dust, toner particles, or even insects on the optics. To avoid defects, it is necessary to constantly monitor the condition of office equipment and clean the scanner mirrors using a smooth, lint-free cloth.
If black stripes appear on the printout, this indicates the presence of the following problem: the contact on the photosensitive drum periodically disappears. The cause of this problem may be dirt that has stuck to the contacts. Therefore, the solution to the problem is to reassemble and clean the consumables.
In addition, a black stripe along the edge may appear due to damage to the photoconductor, which is a key part of the laser printer cartridge. Its photosensitive coating gradually wears off during the use of office equipment, which leads to a deterioration in print quality. But usually a sign of a photodrum defect is grayish-black stripes that have a wavy shape and are shifted to the edge of the sheet. The solution to the problem is to completely replace this part. In addition, the manifestation of a defect may be due to the fact that the conductive lubricant on the contacts of the photo shaft has dried out. This usually happens when the device is not used for quite a long time. To solve the problem, you need to disassemble the cartridge and replace the grease on the contacts.
If the printing printer is streaking and none of the above helped, then the cause may be damage to the magnetic shaft. A sign of this is usually the appearance of horizontal lines of a dark shade or excessive background. Elimination of the defect is a complete replacement of this part.
A stripe along the edge may also indicate a cartridge leak or squeegee wear. The reason for the deterioration in print quality in this case is spilled toner. If you notice traces of toner in the printer or consumable housing, check the condition of the seals and Mylar film of the waste bin. If you find any leaks, try to eliminate them or replace the cartridge.
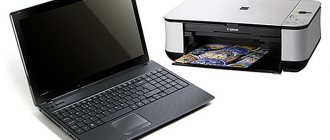
Inkjet printer prints in stripes
Possible causes of the problem:
- Ink is running out.
- The print head nozzles are clogged with dried ink.
- Air has entered the print head.
- A malfunction in the mechanics or electronics of the printer itself.
- If it's a wide white line along the sheet on Canon and the problem started in March 2021, this is the place for you.
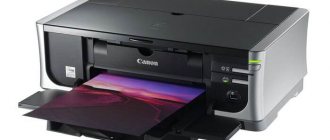
Color inkjet printer streaks
Problems with ink levels. What can be done:
You should be concerned about the ink level when the printer starts printing streaks on photos or documents unexpectedly. It's not the ink if: you recently changed or refilled the cartridge, there was a malfunction (for example, the paper got jammed and you pulled it out of the printer) or something happened to the printer itself (it was turned over, dropped, or was left in the cold for some time ).
Check the ink level programmatically and replace the cartridge. From the printer management menu, select Maintenance or Service. Run an ink level check. If there are few left or have run out, replace the cartridges.
Visually check the ink level in the SCP (if you use them) and refill. In refillable cartridges, the actual ink level may not coincide with the counter readings, so you should remove the cartridges and visually assess the ink level. If there are very few left, the cartridges should be refilled.
Check the functionality of the CISS (for those who have it installed) Make sure that there is enough ink in the donor containers. Check if anything is blocking the flow of ink through the cables, and also at what height the donor containers are located (sometimes it makes sense to raise them). If air gets into the loops, it should be removed from there. For more details, see the instructions for removing air from CISS loops for Epson. Or instructions for some HP and Canon models. If the cable is clogged with dried ink, it should be cleaned or replaced.
Change old ink (for owners of PZK and CISS) It is unlikely that streaks will “suddenly” appear during printing due to old ink, but you should still check the expiration date.
Problems with the print head. What can be done:
You should pay attention to this point first of all if printing streaks appeared after the printer was idle for a long time (it did not print for more than a week, and it was not preserved). The occurrence of problems with PGs can also be preceded by manipulations with the printer: moving from place to place, changing or refilling cartridges, attempts to “get inside” without appropriate preparation.
Run “Check Nozzles/Nozzles” In the printer control menu, select “Check Nozzles” or “Check Nozzles” (depending on the printer model). Printing a test page will help determine the cause of the problem and perhaps even fix it using software.
Run “Print Head Cleaning” In the printer control menu, select “Print Head Cleaning” or “Nozzle Cleaning”. You can run it several times, but always with pauses of 5-15 minutes. If several of these procedures do not help, proceed to cleaning with service fluid.
Wash the print head (PG is located in the cartridge) If you have a two-cartridge printer, then the PG is located on the cartridge. Try rinsing it according to the instructions (step 1); if this does not work, the cartridge will have to be replaced.
Clean the print head with service liquid (PG is located in the printer). This method is relevant if there is severe blockage or air gets into the print head. Use a syringe, cleaning fluid, and lint-free wipes to thoroughly clean the nozzles. Step-by-step instructions can be found in the detailed instructions for cleaning the steam generator.
Other printer problems.
In the vast majority of cases, the problem of streaking during printing is associated with the ink and the print head, but sometimes it is due to failures in the mechanics of the printer. In this case, we recommend contacting service specialists, since an attempt to “get inside” without special knowledge can lead to permanent breakdown of the device.
Problem reading encoder tape. Encoder (raster) tape is a strip stretched inside the printer with strokes, with the help of which the device determines the position of the printing carriage in space. By accident, ink or dirt may get on the tape, causing the printer to stop “seeing” some of the strokes and begin to “skip” part of the sheet when printing. As a result, one or more longitudinal (vertical) stripes will appear on the page. The problem, in this case, is solved by cleaning the tape from dirt. To do this, wipe it with a dry cloth. If it doesn’t help, wipe it slightly damp and then dry. The cloth should be moistened with water, not cleaning liquid, because an aggressive liquid can damage the strokes on the encoder and it will have to be replaced with a new one.
Problems reading the encoder disk. The encoder disk is a wheel on the side of the printer connected by a gear transmission to the paper feed motor.
It also has marks by which the printer determines the position of the sheet when printing. If ink or dirt gets on it, it will lead to reading failures and the appearance of transverse stripes on the prints. The stripes will appear at an equal distance between each other, corresponding to a full revolution of the disk. As with the tape, the problem is solved by carefully cleaning the encoder disk of contaminants.
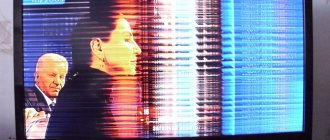
Does your laser printer print with streaks and third-party artifacts? Solving the most popular problems!
Sometimes it happens that laser printers begin to produce stripes, blots, dots or other third-party artifacts on sheets during printing.
The causes of such problems can be caused by both low-quality toner and problems with the cartridge:
- incorrect assembly of the consumable after refueling;
- photodrum wear;
- depressurization of the paint bin, etc.
Also, many inexperienced users who prefer to do everything with their own hands often refill the cartridge “to the bitter end.” And this, in turn, leads to the failure of its individual components and parts, which negatively affects not only the quality of printing, but also the performance of office equipment as a whole.
Therefore, today we will tell you why you experience streaks when printing on a laser printer, and we will also share recommendations on how to get rid of it.
Laser printer
If a black line appears when printing on a laser printer, then there may be several reasons for the defect.
- The toner has run out of ink. When the ink runs out, the device most often prints documents with white spaces or spots. When printing, the printer leaves black stripes in different places on the sheet only when there is a malfunction. To complete urgent printing jobs, you can carefully remove the cartridge and shake it slightly so that the remaining powder is evenly distributed over the entire inner surface. This will help restore the device's functionality for a short time. In this way, print approximately 30-50 pages. You can replace the toner yourself, or take the cartridge to a specialized center;
- Wear of the photo roll. If there is enough ink, but the device leaves horizontal streaks or streaks on the side of the paper, the problem may be due to wear on the supporting elements. This malfunction is detected by visual inspection of the cartridge. If there are stains, scratches or other mechanical damage on the surface of the photo roller, it will need to be replaced. If there are no visible changes in the surface of the shaft, try to correct the operation of the printer using a special printer management utility. Enter the maintenance section (service) and select print head cleaning with nozzle check;
Printer photo roll
- Worn image fixing unit. Elimination of such a malfunction is possible only in a service center by replacing failed parts;
- Dirt gets on the photosensitive drum. This problem can be solved by completely reassembling the part and removing adhering dirt from the photosensitive coatings. If the conductive grease on the contacts of the photo shaft has dried up, you will have to completely replace it;
- Wear of the dosing blade. In this case, the entire cartridge must be replaced.
Laser printer
TOP No. 2. Dots with stripes in a chaotic order? Check the dosing blade!
Small dots throughout the sheet, accompanied by vertical streaks, can indicate three potential printing problems, which are caused by:
- incorrectly installed dosing blade (needs to be corrected);
- an overfilled waste toner bin (it should be cleaned);
- low-quality toner, or when refilling the cartridge with new ink powder, the remains of the old one were not disposed of (the toner needs to be replaced).
Dots with stripes in a chaotic order
Reasons for the appearance of streaks when printing.
- First , the toner is running low. If you have been refilling a cartridge for a long time, and you print often and a lot, then other options are most likely out of the question.
- The second case in which white stripes appear, and you have recently refilled the cartridge, is that dirt, dust, or toner have gotten on the optics of the photodrum.
- The third reason is damage to the photodrum (aluminum shaft with photosensitive coating). Over time, the photosensitive coating wears out and printing defects appear.
- The fourth option for problems is the photoreceptor grease drying out if the printer has not been used for a long time.
- The fifth common cause of poor quality printing is damage to the magnetic shaft.
- Sixth - malfunction or damage to the dosing blade.
TOP No. 5. Chaotic stripes and artifacts? Eliminate cartridge depressurization!
If the seal of the cartridge is broken, fix the problem by checking the integrity of the sealing rubber bands, without which, apparently, the toner will spill out.
Chaotic streaks and artifacts
Have you done all the necessary steps, but the printer still prints in stripes? Contact the MosToner service center for help – 24/7!
Often, users of printing equipment have to solve the following problem: why does a laser printer print with stripes? Of course, during long-term use, the quality of office equipment, in particular MFPs, gradually decreases, as a result of which streaks begin to appear when printing. But a similar problem plagues even brand new laser printers. So what's the reason?