4.8 / 5 ( 44 voices)
If you have problems or doubts about the correct operation of the microphone on your headphones, then this article is especially for you. In this material we will look in detail at how to check your headphone microphone:
- on PC with Windows 7, 8 and 10;
- on phones with Android and iOS;
- through special applications;
- using online services.
Let's also consider why the sound is not recorded and what to do about it?
Checking on computers, laptops with Windows 7, 8, 10
There are several ways to test a headset on Windows. The simplest life hack on how to check the microphone on headphones:
- Connect your device to your computer.
- Take a look at the system tray - at the bottom right of the display you will notice a speaker icon.
- Right-click on the icon and select the connected headset from the drop-down list.
- The working microphone from the headphones is marked as the default device, as indicated by a daw in a light green circle.
- On the right side of the name you will see a sensitivity scale.
- How to check the microphone on Windows headphones? Put on your headphones and say a couple of phrases into the microphone.
- If the scale bars begin to vibrate and fill with green, it means the microphone is working.
- You can further adjust the quality and volume of the recorded audio by going to the Properties submenu, going down to Levels, and adjusting the sliders.
Checking the microphone through the settings of Windows 7 or Windows 10
The most accessible way to check the microphone on headphones is to check through the microphone settings in the Windows operating system. To do this, right-click on the speaker icon on the taskbar and in the menu that opens, go to the “Recording devices” section. The screenshot below shows how this is done in Windows 10.
After going to “Recording Devices”, the “Sound” window will appear in front of you, open on the “Recording” tab. This window will display all recording devices. In particular, the microphone from the headphones should be displayed here if it is connected to the computer. If there is no microphone, then most likely it is not connected, or the drivers for the sound card are not installed. If the microphone is present in the Sound window, then you can check its operation. To do this, just say something into the microphone and watch the bar on the right side of the window. This bar should start blinking green, indicating the current signal level from the microphone.
If the signal does not appear or it is very weak, then you can try to strengthen it. To do this, select the microphone with the mouse and go to “Properties”.
Here, on the “Levels” tab, you need to increase the microphone volume and its gain. After this, you need to save the settings and check the signal level again.
Checking the headphone microphone on smartphones
If you don’t have a computer or beech computer at hand, you can check the headphone microphone using a tablet or phone. The main thing is that the audio ports and audio plugs are compatible.
Let's now consider how to check the headphone microphone on your phone. The procedure here is the simplest, the same for iPhones and Android devices:
- Through the built-in voice recorder . Plug in your headset, go to the app, start recording and speak a few phrases. Save the file, listen, evaluate the quality.
- Via online service . Many people are interested in how to test a headphone microphone online. Refer to the built-in or installed browser (the application must be granted access to the headset used), find the webcammictest service. Click on "Test Microphone".
- Through special programs . If your phone doesn't have a built-in voice recorder or you can't find one, look for audio recording apps in the App Store or Google Play. Microphone speaker is suitable for iPhones, and Mic Test is suitable for Androids. By the way, “Mic Test” is a very advanced software that will allow you to test both built-in and plug-in microphones on both wired and wireless headsets.
Verification methods
There are some ways to check not through a special website, but using the operating system and other software already installed on the computer:
- using the “Windows Sound Settings” section;
- in the “record” option;
- via Skype.
All these methods allow you to verify the functionality of the device, as well as determine how well it perceives and registers air vibrations. Because when you use the “record” option, you can listen to the sound recorded by the system.
In Windows OS sound settings
One way to diagnose performance in Windows 7 is to go through the control panel to the section called “Sound”.
Next you need to follow these steps in strict order:
- open the standard “Record” program;
- make sure that there is a green checkmark next to the connected equipment;
- select the required item and click the “Properties” button;
- make sure that:
- o the required controller is selected;
- o in the “Device Use” section, the “Use this device” option is selected;
- o in the “Listen” tab, check the “Listen to this device” checkbox.
If all operations can be completed successfully and the recording quality is completely satisfactory, then the device is configured and connected correctly. This method also allows you to verify the functionality of the headphones or speaker system through which sounds are reproduced.
Record option
Another reliable way to check the microphone in headphones on a computer is to use the option that allows you to save received sounds from a connected device. This application is quite easy to find.
To do this you need to do the following:
- press the “Start” button;
- go to the “All programs” section;
- open the “Standard” tab;
- Click on the “Sound Recording” item (for Windows 7).
After completing all of the above steps, a window will open containing a button called “Start sound recording.” By clicking on it, you can record the sounds perceived by the computer. After finishing recording, a window will appear allowing you to save the recorded data.
Skype
Also, if necessary, you can easily check the audio recording through a communication program called “Skype”.
To do this you need:
- Having entered the application, you should find the item “Tools” -> “Settings”;
- in the left half of the window that opens, you should find the “Sound Settings” section;
- in the “Microphone” section, exactly the equipment that needs to be checked must be selected.
After all of the above steps have been completed, you should make a follow-up call on Skype.
You can do this as follows:
- Signing in to Skype;
- you should find Echo in the contact list (this contact can also be called SkypeTestCall, SoundTestService);
- Next, you need to click the “Call” button - it is located on the call panel
If the test proceeds normally, and all instructions from the automatic service can be followed without difficulty, then the microphone is fully operational.
Checking the headphone microphone using special programs
The easiest way to test the functionality of your headset is to use the free Audacity program, a powerful audio editor that will be useful for other purposes. This application is similar to the built-in voice recorder, but in a more advanced version. How to check if the microphone on headphones works using it? Record a short audio file by speaking a few phrases into the headset, and then listen to it to check the sound recording.
The second free and useful program that can also be used for testing is the Skype IP telephony application. You can check the microphone in your headphones online using the following instructions:
- Install Skype on your computer or laptop.
- Refer to "Sound Settings".
- In the Microphone section, select the required device.
- Decide on a comfortable volume.
- ABOUT
- Make a follow-up call to a friend or acquaintance.
- If this is not possible, you can test using the Echo/Sound Test Service, which you will find in the main menu. The service will allow you to make a test call - follow the operator’s commands, and then listen to the recorded file to evaluate the sound.
How to check the microphone on headphones?
Good afternoon.
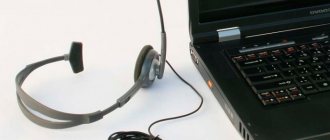
There is no doubt that for many users the Internet nowadays replaces the telephone... Moreover, via the Internet you can call any country and talk to anyone who has a computer. True, one computer is not enough - for a comfortable conversation you need headphones with a microphone.
In this article I would like to look at how you can check the microphone on your headphones, change its sensitivity, and generally customize it for yourself.
Connecting to a computer.
This, I think, is the first thing I would like to start with. Your computer must have a sound card installed. 99.99% of modern computers (those intended for home use) already have it. You only need to connect your headphones and microphone to it correctly.
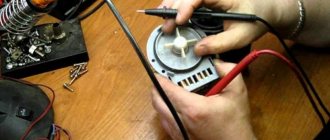
Typically, headphones with a microphone have two outputs: one green (these are the headphones) and one pink (the microphone).
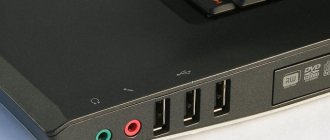
The computer case has special connectors for connection; by the way, they are also multi-colored. On laptops, the panel is usually located on the left so that the wires do not interfere with your work with the mouse. An example is just below in the picture.
The most important thing is that when connecting to a computer, you do not confuse the connectors, but they are very similar, by the way. Pay attention to the colors!
How to check the microphone on headphones in Windows OS?
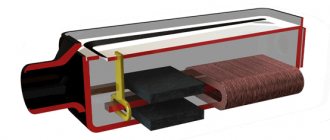
Before you start setting up and testing, pay attention to this: headphones usually have an additional switch that is made to turn off the microphone.
Well, that is. for example, you are talking on Skype, you were distracted so as not to interrupt the connection - they turned off the microphone, expressed everything that the person next to them needed, and then turned on the microphone again and began to continue talking on Skype. Comfortable!
We go to the computer control panel (by the way, the screenshots will be from Windows 8, everything is the same in Windows 7). We are interested in the “equipment and sounds” tab.
Next, click on the “sound” icon.
In the window that opens there will be several tabs: I recommend looking at the “record”. Our device will be here - a microphone. You can see in real time how the bar moves up and down, depending on changes in the noise level near the microphone. To configure and test it yourself, select the microphone and click properties (there is this tab at the bottom of the window).
In the properties there is a “listen” tab, go to it and enable the “listen from this device” option. This will allow us to hear in headphones or speakers what the microphone will transmit to them.
Don't forget to click on the apply button and turn down the volume in the speakers, sometimes there may be strong noises, grinding noises, etc.
Thanks to this procedure, you can adjust the microphone, adjust its sensitivity, position it correctly so that it is convenient for you to talk through it.
By the way, I also recommend going to the “communication” tab. There is one good, in my opinion, feature of Windows - when you are listening to music on your computer and you unexpectedly receive a call, when you start talking - Windows itself will reduce the volume of all sounds by 80%!
Checking the microphone and adjusting the volume in Skype.
You can check the microphone and make additional adjustments in Skype itself. To do this, go to the program settings in the “sound settings” tab.
Next, you will see several charts showing the real-time performance of the connected speakers and microphone. Uncheck automatic adjustment and adjust the volume manually. I recommend asking someone (comrades, acquaintances) to adjust the volume during a conversation with them - this way you can achieve the best result. At least that's what I did.
That's all. I hope you can adjust the sound to the “cleanest sound” and will have no problems talking on the Internet.
All the best.
Checking the microphone on headphones using online services
How can I check headphones with a microphone on a computer differently? Another high-quality and free testing is done through numerous online services:
- mictest.ru;
- itguides.ru;
- it-doc.info;
- mictests.com and others.
Right in the browser you can record a file and listen to it. Some services allow you to analyze the sound and display its brief characteristics, monitor the recording volume level and the sensitivity of the headset. But for this to be possible, do not forget to give the browser you are using access to use the microphone.
How to find out if the microphone is working on Windows 10
In “Ten” the process is slightly different:
- Find the speaker icon in the system tray (most often in the lower right corner of the screen);
- Right-click on it and go to “Open Sound Settings”, and from there on the right side of the window “Sound Control Panel”;
- Activate the "Record" tab.
Then everything is exactly the same as described above - the scale opposite the headset model name should respond to the noise level that you will emit during the test.
Checking the microphone on headphones in Windows 7
First you need to connect your headphones to your computer. Most models use two Jack 3.5 outputs, separately for microphone and headphones; they are connected to the corresponding connectors on the sound card. One USB output is used less often; therefore, it is connected to any free USB connector.
Before checking, it is necessary to configure the microphone, since the lack of sound is often accompanied by incorrectly set parameters. This procedure is very simple, you just need to use one of the methods and perform a few simple steps.
After connecting and preliminary settings, you can proceed to checking the microphone on the headphones; this is done using several simple methods.
Method 1: Skype
Many people use Skype to make calls, so it will be easier for users to set up a connected device directly in this program. You always have Echo/Sound Test Service in your contact lists, which is where you need to call to check the quality of the microphone. The announcer will announce the instructions, and after they are announced, the check will begin.
After checking, you can go straight to conversations or adjust unsatisfactory settings through system tools or directly through Skype settings.
Method 2: Online services
There are many free online services on the Internet that allow you to record audio from a microphone and listen to it, or check it in real time. Usually, you just need to go to the website and click the “Test Microphone” button, after which you will immediately begin recording or transmitting sound from the device to speakers or headphones.
You can learn more about the best microphone testing services in our article.
Method 3: Programs for recording audio from a microphone
Windows 7 has a built-in Sound Recording utility, but it does not have any settings or additional functionality. Therefore, this program is not the best solution for recording sound.
In this case, it is better to install one of the special programs and perform testing. Let's look at the whole process using Free Audio Recorder as an example:
- Launch the program and select the file format in which the recording will be saved. There are three of them available in total.
In the “Recording” tab, set the required format parameters, number of channels and frequency of future recording.
Go to the “Device” tab, where you can adjust the overall volume of the device and channel balance. There are also buttons for calling up system settings.
All that remains is to press the record button, say what you need to say into the microphone and stop it. The file will be automatically saved and will be available for viewing and listening in the “File” tab.
If this program does not suit you, we recommend that you familiarize yourself with the list of other similar software that can be used to record sound from a microphone on headphones.
Checking the microphone in headphones
Typically, headphones now have a built-in microphone, but it is rather weak, so it is better to purchase everything separately. Also often a microphone is built into the equipment, but it is also of poor quality. In principle, questions about the sound card should not arise, because every modern computer has one.
The first stage of testing is preparation, directly connecting the headphones to the computer/laptop. The main thing is not to get confused in the connectors and plugs; there is absolutely nothing complicated in the connection process. Once you have successfully connected your audio equipment, you should see some notification on your screen indicating this. You can move on to the most important process - checking the sound quality, or at least its presence.
Checking the microphone in headphones is a very important part of working at a computer or other equipment. Without verification, it is not recommended to access a network for the purpose of communication that contains audio transmission. Initially, you should always make sure that all equipment is working.
How to check if the microphone is working on headphones
To check, you do not need to resort to the help of specialists or take the equipment to the service center. Everything can be safely tested at home using a computer, laptop, or even a tablet.
To check the performance of our microphone, you can consider several methods, the fastest of which is through the settings. By going to this section, you need to find the “sound” tab and test your microphone there. This will be described in a little more detail below.