By getting rid of wires, you can seriously optimize your workspace. Modern technologies allow you to use Wi-Fi to communicate with any device in your home. Today we’ll talk about how to connect a printer to a computer via Wi-Fi.
How to connect a printer to a laptop via Wi-Fi
Note! Further and everywhere we will use an HP printer, but for devices from other manufacturers the instructions will not be different.
Software installation methods
In order for the operating system to know how to properly work with the new equipment connected to it, a set of special instructions - drivers - is required. They are unique for each device. Sometimes developers can use one common driver for several devices.
Thus, a driver is a kind of adapter with which the system controls the device. Software refers to both drivers and additional software. Typically, it serves to facilitate the user's work, calibration, configuration and testing of the device. You can use the device without drivers (as a forced temporary measure) until a disk is found or the drivers are downloaded. Let's look at connection methods with and without drivers.
Installing drivers from disk or the Internet
In the first case, everything is simple - you need to load the disc into the CD tray and go through the suggested steps of the installation wizard. It is worth noting that modern models are recommended to be connected after installing the drivers. Although, in most cases, everything works like that. It’s more difficult when there is no disk with ready-made “firewood”. Then there is only one way left - the Internet.
You need to download drivers from the official website. Firstly, the most recent versions are always available there. And secondly, it will protect you from viruses. If the situation is hopeless and a driver is needed, then when downloading it from a third-party site, it is better to “go through” it with an antivirus.
Then there can be two ways: the driver has its own installer or not. In the first case, just run the installation file. But in the second, you will first need to go to the “Device Manager” program, which is located in the “Toolbar”. Among the list of equipment, we find the one that was not detected after connection, and right-click on it. Then select “Update drivers”. In the window that appears, you need to select installing drivers from this computer. Next, specify the path to the downloaded file. By the way, the system itself may offer to look for drivers after connecting.
How to connect a printer to a laptop without an installation disk
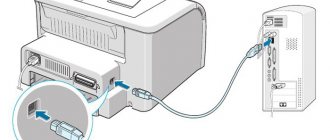
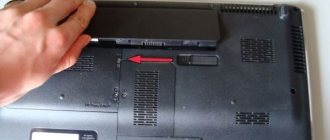
Sometimes installing drivers is impossible due to the loss of the disk or for some other reason. In principle, our device can “start up” without drivers, although not always. For this procedure, you will first need to connect it to your laptop using a cable. Then you need to get to the system control panel.
Control Panel in Windows 7
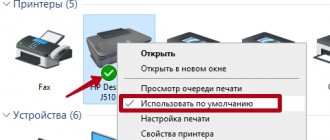
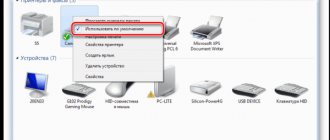
Here we are interested in the “Devices and Printers” item, in which you need to select an installation.
Installing a new device
At this stage, you can select the connection type - network, wireless, Bluetooth or local. We are considering a connection via a cable, that is, local, so next you need to specify the port, select the manufacturer and model name from the list. In the next step, you can specify the name by which it will be accessed. In theory, after clicking the “Finish” button, everything should work. If not, then you will have to look for the driver on the Internet and download it.
How to connect an MFP to a laptop
MFPs are multifunctional devices that can perform multiple functions - print, scan and copy. The system must know how to work with both a printer and a scanner, so the set of drivers is very different from standard devices.
How to connect an MFP to a computer via Wi-Fi
There are several ways to do this. Before connecting the MFP to your laptop via Wi-Fi, you can briefly familiarize yourself with them:
- direct connection using the control panel of the device itself. All you need to do is connect to a Wi-Fi network, install drivers on your computer and find it in the list of available network devices;
- connection using WPS. Very fast way. You just need to press the WPS buttons on the MFP and router, and everything will connect by itself.
MFPs usually come with their own stand-alone control unit, which can be used to configure many settings. These are the number of copies, their quality, canceling the current task and connecting to a wireless network. Developers try to keep new models relevant for the present time and equip them with the newfangled WPS.
If you know interesting ways to connect a printer to a laptop via Wi-Fi, USB or Bluetooth from your personal experience, then share them in the comments.
Instead of a preface
First, I’ll try to explain what the order of the story will be next, because... The topic is not an easy one. The main thing here is to understand that you can connect a printer via Wi-Fi in several ways:
- Connect it via USB to your Wi-Fi router. And now organize remote printing on all devices.
- Connect the printer to the Wi-Fi router via Wi-Fi. And allow all devices to print.
- Connect the printer directly to your laptop via Wi-Fi.
Which option is right for you? Don't know. Therefore, in this article we will try to look at the problem from all sides. I will skip many details on specific models. If you suddenly have questions, write them in the comments or look for a review for your model on our website.
Connecting a printer via Wi-Fi
Devices from popular manufacturers have a similar setup system. As a rule, parameters are set on the printer itself, without connecting to a computer. If there is no control interface on the case, system utilities available on the driver disk and on the manufacturer’s website are used.
Canon
Approximate connection plan:
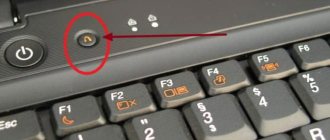
- Press the WPS button on the printer - the indicator on the printer should start blinking.
- Click WPS on the router.
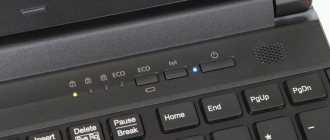
- The printer and router should connect. The indicator will stop flashing.
Some models with indicators may request the required networks and password - but for me, these are unnecessary gestures for the printer. So it's easier via WPS. A bright representative of the genre in this category is MG3540.
HP
The Hulets never left either. To connect, there is usually a whole menu of wireless networks. But it’s easier to use the same WPS button. HP Auto Wireless Connect technology is used for connection.
Connection and setup
Let's look at the main types of connecting a WiFi Printer to a PC via a WiFi network.
Manual connection on Windows 10
If all actions with drivers and utilities have been completed, but the printer is still not installed, then you need to proceed to manual installation.
To do this, you need to enter the section “system settings” - “devices” - “printers and scanners”. After making sure that the required device is not among the connected ones, you need to click the corresponding line “the required printer is not in the list.”
The installation wizard will launch. In the first window, you need to select the line “add a Bluetooth printer, wireless or network printer.” Clicking the “next” button starts the search for available devices. When you find the model you need, click on it and move on.
At the next stage, the system will independently search for drivers in the Microsoft database, or ask you to install a boot disk in the drive.
For reference! At the end of installation, the selected MFP will become the default printing device.
Installation features on Windows 7
In fact, Windows 7 does not require knowledge of special intricacies and does not differ much in its requirements for installing printers from Windows 10. However, there are still some differences. First of all, you must also enter the “control panel” - “hardware and sound” - “devices and printers”. At the top of the window you need to click the “Add a printer” line. In the installation wizard that opens, click on the line “Add a local printer” and proceed further.
Adding a new device
The device port must be left unchanged and then follow the installer’s instructions. In the last “use general settings” window, it is better to select “no sharing” for your home network, after which the installation will complete.
Attention! This option is only available when installing the printer on the Windows 7 operating system.
Differences in connection in different OS
There are three main directions in the operating system market: Linux distributions, the Windows series and the MacOS series. Each of them, in turn, is divided into different versions and releases, the installation of which on a laptop may differ. Let's figure out how this process occurs in different systems.
How to connect a printer to a laptop on Windows 7
Operating systems of the Windows family are very widespread among users. It was the ease of installation and handling of the system that greatly influenced this. The same goes for the printer. Very often, when you connect it, the drivers can “pick up” themselves and the device will be immediately ready for use.
Windows 7 desktop
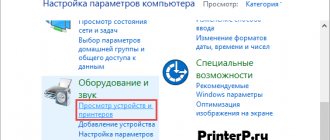
If the automatic installation fails, then insert the disk and install from it. If it’s not there, then you need to go to “Devices and Printers”. This item in Windows 7 can be located directly in the Start menu. At the top of the window that opens there should be an “Install” button. After clicking on it, a new dialog will appear that will ask you to select the connection type. If you need to do this using USB, then select local; if other methods, select the second option. Next, you need to either select a model known to the system from the list, or install from Windows Update. The second method helps extremely rarely, so we select a ready-made driver from the list. Then we write the device name, if necessary, select network access. At this point the installation can be considered complete.
How to connect a printer to a laptop on Windows 10
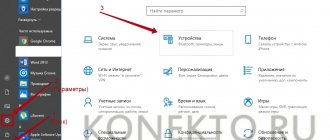
The Windows 10 operating system has made several changes to the interface. Therefore, the installation of devices in it is slightly different. In particular, adding a new device is done not through the “Control Panel”, but through “Settings” in the “Start” menu. Next you need to go to “Devices” and here find “Printers and scanners”. To add a new device you need to click “Add a printer or scanner”. Next, similar to Windows 7, the model, name, access are selected and all this is saved.
Appearance of Windows 10
Installation on MacOS
On almost all versions of MacOS this process is the same. First, physically connect both devices with a USB cable. You will also need drivers for proper operation. You can download them from the manufacturer’s official website or from the included disc. Although software for Mac on printer disks is quite rare.
MacOS
Then in the Dock you need to find “System Preferences”. Then go to “Printers and Scanners”. In the new window, click on the plus sign to add and select your device from the list.
How to Install on Ubuntu
This is probably the most interesting connection. You should start it long before purchasing a printer, since Ubuntu does not support all devices. You will need to check on the manufacturer’s website whether drivers for a specific device are available for Ubuntu. Then you need to additionally look for information about successful launches from other users.
Ubuntu
After you are convinced that everything you need is available, you need to find instructions on how to install a specific brand, since the methods and options are different. In one you will have to change the configuration files, in the other you just need to install a couple of applications from the repository. You can find general useful tips and instructions for the most famous brands here - https://help.ubuntu.ru/wiki/printers_scanners_mfp.