How to find out if your model supports digital TV
The development of the digital format has been carried out since 1990, the first televisions with its support began to appear in 2004. Mass production of models with a built-in digital tuner began only in 2010.
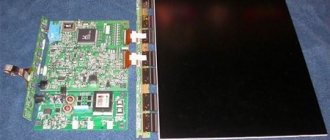
To transmit the picture in high definition, a special signal encoder is used in the DVB T2 format. New TV models are already built-in and access to watching programs in high quality is provided using one part - a cable. To connect, there must be a special connector on the back of the TV, which on Samsung TVs is usually called “Digital input”, which means “Digital input” in English.
You can find out whether your TV model supports digital broadcasting in the following ways:
- Visually inspect the TV. The rear panel should have corresponding letters above one of the connectors.
- After studying the instructions, section “Technical Specifications”. If there is a checkmark next to the value “DVB T2”, the purchase of additional equipment is not required.
- Having studied the features of the model on the official Samsung website.
- By contacting the manufacturer's support service. If the model is old and has been out of production for a long time, searching on the site may be difficult. In this case, consultants who can be contacted via the manufacturer’s hotline will be able to help.
If your TV does not have such a tuner, you will need to buy a special set-top box.
The tuner can receive several digital stream options:
- DVB-T, DVB-T2 – reception of terrestrial channels.
- DVB-C – cable television broadcasting.
- DVB-S, DVB-S2 – displaying programs using a signal from a satellite dish.
To view federal channels, it is important to have the DVB-T2 mark.
Tuners are also classified according to the following parameters:
- Signal standards that are capable of supporting;
- Type of connection to equipment;
- Operating system support.
Built-in tuners have almost the same capabilities as set-top boxes used as additional equipment, with the difference that there is no need to configure and connect individual modules.
How to set up digital channels on Samsung Smart TV
The latest receiver models receive and display the highest quality TV signal. Almost all the latest TV models have Smart features. However, many people still cannot figure out the Smart TV settings on their own. Setting up digital channels on a Samsung TV does not require serious skills - any user can do it.
Manual search
On older models of Samsung E-series TVs, TV channels can be configured this way. To get a channel pool on older receiver models, you need to know how to manually install channels on your Samsung TV. To do this, follow the algorithm given below:
- Press "Menu" on the remote control.
- Go to the "Channel" tab.
- Select the "Antenna" option and replace it with the "Cable" option.
- Go to the “Country” menu item, enter the password “0000”, select “Russia”. If the country is not on the list - “Eastern Europe”.
- Go to the Cable Connection Settings section. If there is no such item in the main menu, you can find it in automatic settings (some Samsung TVs have such settings).
- Going to the cable parameters, set the following parameters: starting frequency - 298000 KHz, ending frequency - 362000 KHz. There is no need to change any other settings.
- Open Autonetwork and select the type of TV channels received (digital, analogue, satellite).
- The search engine opens. Set the "Network" option, click "Search". Automatic channel tuning will start.
- All found channels will be saved in the general list, but the TV will only show the channels you have selected.
- Unnecessary elements can be removed by selecting the appropriate items in the drop-down menu.
Sources
- https://www.samsung.com/ru/support/tv-audio-video/where-can-i-find-free-channels-on-my-samsung-tv/
- https://televizore.ru/smart-tv/nastrojka-kanalov-na-samsung
- https://HonestTop.ru/nastrojka-televizora-samsung
- https://ProDigTV.ru/efirnoe/nastroyka/tsifrovye-kanaly-na-televizore-samsung
- https://teleinside.ru/nastroit-kanaly-na-televizore-samsung/
How to find and set up digital channels on Samsung TVs
Finding and tuning digital channels on a Samsung TV depends on the TV model. The easiest way to configure it is on new models equipped with a digital tuner and on Smart TV.
For TVs supporting DVB T2 and Smart TV
If your TV is equipped with a DVB T2 connector, for setup you will need:
- Connect the antenna;
- Turn on the TV;
- Depending on the remote control, press the “Home” or “Source” button, select “Source” and press “TV”.
- Enter the menu and select the “Settings” section.
- Select "Broadcasts".
- Click “Auto Configuration”.
- Select "Start".
This manual is suitable for all Samsung TVs of the R series and higher. The channel search will begin after pressing the button. After all channels available in digital format have been found, you need to exit the menu. The channels will be saved automatically.
Setting up digital TV for TVs with Smart TV function:
- Go to the menu and select the “Broadcast” tab (usually indicated by an antenna icon);
- Select “Auto Configuration”;
- A menu will open in which you also need to select the “Auto Configuration” item;
- Click the “Start” button;
- Set the search mode to “Full” and press the “Scanner” button;
- Wait until the program finishes searching for channels and press the close menu button.
For older TV models
Older TV models equipped with a tuner for receiving digital broadcasts can be configured using the following step-by-step scheme:
- Go to the menu, select the “Channel” section;
- Replace the value “Antenna” with “Cable”;
- Select "Country". The system will ask for a code; you can use four zeros, four ones, or a sequence of numbers from one to four. Specify Russia if it is in the drop-down list. If it is not there, select Eastern Europe or the “Other” value.
- Open the “Cable search parameters” item, where you will need to manually enter the frequency. The data can be taken from the website rtrs.ru or set to the standard value of 290,000 kHz. You can also change the transmission speed of 6875 KS/s, modulation of about 256 QAM.
- Check the boxes next to the “Full” and “Digital channels” values and start an automatic search.
After installing all the channels, you can close the menu or change the list of channels, creating a format that suits your needs.
How to connect a set-top box to an old TV
If your TV does not support the DVB-T2 data format, you must purchase a tuner (receiver) separately. There is a wide variety of models on the market that differ in their functionality, appearance and capabilities. All set-top boxes receive DVB-T2 format.
The receiver has USB ports on the back to which you can connect a flash drive, removable computer disk or other devices to view video files recorded on them. They are often equipped with their own capacious internal memory. The cost of the receiver directly depends on the number of ports. Some models have the ability to record TV shows from the screen to removable media. There are options for connecting via the Internet to YouTube channels. You can also choose a model that supports operating systems (Android), which can be used to broadcast channels using Smart-TV technology.
When choosing a receiver, you need to consider what requirements are placed on it. If you just want to watch free federal and local channels in digital quality, you can purchase the most inexpensive set. It can easily use data in MPEG-4 format. If you need HD video support, you should consider more expensive models.
TVs produced in the Soviet years may not support digital TV even if you buy a set-top box. Before buying, you need to inspect the TV for the presence of connectors and focus on them when buying a set-top box.
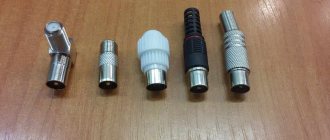
The following types of connectors can be located on receivers:
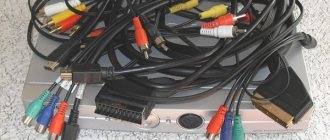
- RCA (tulip). Three plugs of different colors: yellow transmits the picture, red and white - sound. As a rule, it is suitable for all models of old TVs; new ones are not equipped with such a connector. The picture quality is average. Considering that such connectors are usually installed on panels with a small diagonal, you don’t need to attach much importance.
- HDMI. Similar to a USB port, it provides good transfer of picture and sound data to the TV. Audio is broadcast at a frequency of up to 192 kHz, video has a maximum resolution of up to 1080 pixels.
- SCART. An additional connector that allows you to connect a VCR or DVD player with the ability to record pictures from the screen.
- D-SUB or DVI. A blue trapezoidal connector transmits a picture; to transmit an audio signal, you will need to additionally connect tulips.
Instructions for connecting the set-top box:
- Turn off the TV.
- Connect the set-top box to the TV using the existing cables (tulips, HDMI or DVI).
- Connect the set-top box to a power source.
- Connect the antenna (satellite, UHF or via the provider’s cable) to the set-top box.
- Insert batteries into the remote control and turn on the console.
- Turn on the TV.
After this, you can proceed to setting up channels. All actions are similar to those on the TV, only when using a set-top box you need to use the remote control not for the TV, but for the set-top box.
Important! All actions to connect cables are carried out exclusively with the equipment turned off.
To access digital broadcasting, you will also need to replace the antenna. Equipment for receiving an analog signal - a meter antenna is not suitable in this case. All antennas are divided into three types:
- Indoor.
- Street.
- Satellite.
Indoor antennas are compact and relatively inexpensive. They do not require complicated installation; to watch programs, you just need to install them in a convenient place in the house. The disadvantage of this type is the poor quality of the signal and you can make a choice in its favor only if the distance to the repeater is at least 30 meters. Otherwise, constant freezing of the picture cannot be avoided. To improve the signal quality, you can use an amplifier.
Amplifiers come in two types: rod and frame. The first ones are equipped with antennae that fold or unfold depending on the signal level. Frame ones are a more modern type, capable of capturing decimeter frequencies. Despite this, amplifiers can only be used at a short distance from the transmission tower. The rest will require the purchase of external antennas.
Outdoor antennas are used at a significant distance from the repeater tower. You can’t do without them in remote settlements and suburbs. They are installed at the highest point, while trying to ensure that there are no obstacles around. Meter antennas pick up an analog signal, while decimeter antennas pick up a digital signal.
Satellite antennas are the most expensive type of antennas. They catch the signal not from the ground, but from a satellite, so to watch free channels, a receiver is used, which is used to decode the signal. Most often used for watching cable television.
When installing the antenna, it is important to follow the following rules:
- The choice in favor of an indoor antenna can be made only if the repeater tower is in sight;
- An external antenna is installed if the transmitter is located at a distance of up to 25 kilometers;
- At a distance of more than 25 kilometers, an active external antenna with a signal amplifier is required.
The easiest way for residents of apartment buildings is to connect to television through a telecom operator, who installs a common antenna on the roof at their own expense. The adjustment is also done by technicians.
Reference. The cost of a decimeter antenna, which is suitable for residents of rural settlements, varies between 800-1200 rubles.
Samsung setup
- Enter the menu and go to the “Channel” section;
- Go to "Country";
- If your TV starts asking for a PIN code, enter 1234, 0000 or 1111. These are classic passwords;
- In order to set up terrestrial or digital TV, go to “Other”;
- After this, you will need to go back and go to “Cable Search Options”;
- Here you will need to enter certain parameters. It is necessary to set the frequency to 290,000 kHz, the transmission speed to 6875 KS/s and the modulation to about 256 QAM;
- Now you again need to go back and go to “Auto Configuration”;
- Next, you need to click “Cable” as the signal source;
- Select "Digital". If you have not yet configured analog TV, then “Analog and digital”;
- Now, in search mode, go to “Network” and start the setup using the “Login” button.
Once everything is found, you will be able to watch the digital and terrestrial channels available in your region.
Manual way to search for channels
Important! To manually tune, you will need to enter the channel frequencies yourself. To do this, you can use the information on the RTRS website.
To set up digital television manually, you will need:
- Go to the menu using the remote control.
- Select the “Channels” section.
- Set the mode to “On Air”.
- Section "Manual configuration".
- Enter the desired frequency and start scanning.
- After the multiplex is found, click the “Save” button.
- Repeat with a different frequency.
Reference. Multiplex is a property of digital television that allows you to install several channels on the same frequency. This is why it happens that searching for channels for a long time does not produce any results, but after a minute several can be found at once.
Manual channel search
If the TV is not new, but rather an old model, then the TV may not tune in automatically. In this case, manual configuration will help. The procedure requires additional steps. You need to know the frequencies at which the closest repeaters located to you are broadcasting. The publicly available CETV map will help with this.
- Follow the link map.rtrs.rf.
- If the current location has not been determined, then enter your place of residence in the search bar.
- Find the desired house on the map, click on it with the mouse.
- The service will display information about the two closest towers. Broadcasting frequencies will be written for both multiplexes so that you can tune your TV to 20 TV channels. Rewrite each frequency. Almost always, towers will broadcast in the same range. If the values differ, then it is better to choose a repeater that is closer. The distance to the TV tower is also indicated. If there is a frequency discrepancy between both broadcasting towers, it is recommended to configure each separately. Then evaluate the quality of the reception and leave the most successful one.
Click on the image to enlarge.
As a result, you should have two numbers in your hands, corresponding to both multiplexes. The values will need to be entered during further configuration.
As with auto search, the function responsible for manual configuration is located in different places in the menu.
- For new Samsung models, you need to follow the path in the main menu: “Broadcast” - “Additional settings” - “Manual setup” - “Digital channel setup” - “Create”.
- For older TVs, the transition is made along the chain: “Broadcast” - “Channel settings” - “Manual settings” - “Create”
- On “E” series devices, the required item is located in the “Channel” subsection.
When you get to the required point and start creating a new channel, the TV will require data input - frequency, TV channel number.
The frequency on the digital terrestrial television card is indicated in MHz, but in the settings kHz is written, which is a thousand times less. Therefore, you must always add three zeros to the value. For example, if the first multiplex is broadcast at a frequency of 498 MHz, then you need to enter 498000 into the TV. You don’t have to fill in the frequency, but only enter the TVC number. In this case, the frequency will be adjusted on its own.
After filling in the data, press the “Search” button and the TV will find the channels within a few minutes.
The procedure is repeated for all multiplexes. That is, you need to search twice for each frequency. The result will be found two dozen TV channels.
Also pay attention to the signal quality line.
The higher the percentage you can achieve, the more stable the picture will be, without freezes and complete loss of the image with the inscription “No signal”.
What to do if you can’t find and save digital channels on your Samsung TV
If you can't find or save channels after setup, the problem may be:
- Antenna. Perhaps the signal is simply not being picked up; you should try turning the antenna in the other direction and checking the signal quality. You can also pay attention to how the antenna is installed in your neighbors, who do not experience difficulties finding and watching channels.
- Cabele. You need to check all cables and their connections. Although the design of the connectors does not allow the cables to be reversed, this is still possible when using tulips. It is also possible that one of the connectors has failed. You should reconnect everything again and restart the TV. If the problem is in the connectors, you will have to contact a specialist.
How to watch digital TV without an antenna. Setting up IPTV
An antenna is needed to receive a signal from the tower. However, you can do without it if you have high-speed Internet connection in your house. In this case, the broadcast will be carried out via an Internet connection. To do this, just connect to a package from your Internet provider to watch home TV (this is a worthy alternative to cable television).
For this it is enough:
- Select the appropriate tariff on the provider’s website;
- Leave a request for connection;
- Wait for the technician to arrive (often there is no need to buy your own set-top box for this; they provide the set-top box for rent or in installments).
As a rule, the connection is made through a router, then the channels are configured in the router’s personal account. Connection instructions:
- Log in to your router’s personal account.
- Open the “Advanced Settings” section, in the “Network” subsection, select IPTV.
- Activate the IGMP Proxy standard, enable IPTV by setting the “Bridge” mode.
- Select the desired LAN port and connect your TV or receiver to it.
- Turn on the TV. Channels are found automatically without user intervention, depending on the connected package.
Possible errors and their correction
Sometimes, even with seemingly correct installation of additional equipment, watching programs is still impossible due to poor quality or the complete absence of channels. Below is a list of standard possible errors when starting a search for digital channels:
- There is no picture on the TV. A possible reason is that the equipment is connected incorrectly, since even if there is no signal, the receiver menu should be displayed on the TV screen. To do this, you need to check that all parts of the equipment are connected correctly by completely disconnecting everything. Then try reconfiguring the channels again.
- Not enough channels found in automatic mode. First of all, you need to make sure that all the desired channels can be broadcast at your place of residence. This can be done on the official website or by asking your neighbors. Then check that the antenna is connected correctly - it should be in the connector for the set-top box, and not for the TV.
- Frequent freezing and disappearance of channels. The reason may be poor signal quality. To check it, you need to press the “Info” button twice on the channel with which the problem occurs, the signal check menu will open. If its level is below 50 percent, you need to correct the antenna.
How to move channels on TV
Sorting the found TV channels is an important component that allows you to make the operation of the device as comfortable as possible.
Before adjusting the order of channels on your TV, it is recommended to remove unnecessary and poor-quality programs. This will simplify the work and complete it in a short time.
Correct sequence of actions:
- Open the TV menu by pressing the corresponding button on the remote control.
- Select the “Broadcast” section.
- Using the navigation buttons, move to the right and look for the “Change channel number” item there.
- By default, this function can be disabled, so activate it by clicking the “OK” button.
- At the next stage of sorting, click on the “Home” key.
- Select the “Broadcast” section again and look for the “Change” item in it.
- Find the channel that needs to be moved and put a mark in front of it.
- After that, click on the button labeled “Change.” number".
- Enter a numeric value from 001 to 999.
- Confirm the completed actions and exit the menu.
To swap channels on a Samsung Smart TV HD 6 series, just open the sorting menu and move them to the desired place in the list.
Setting up channels on a Samsung TV is a simple task that every educated person can understand. With the help of several manipulations, you can not only find the necessary television programs, but also edit them, move them to one place or another on the list, restore them, or block them.
In order to avoid making mistakes, you must carefully perform all the steps provided and strictly follow the instructions from the operating instructions.
Modern television is constantly evolving, so new entertainment, educational, music or sports programs appear regularly.
To watch them, you need to know how to set up channels on a Samsung TV. If you learn how to carry out this operation, you can reprogram the device yourself and not miss a single interesting program.