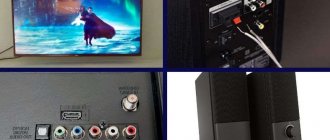
To watch a movie with sound or listen to your favorite music on your computer, you need to connect speakers or headphones to it. Let's figure out how to connect speakers to your computer. The connection method depends on the type of sound-producing devices - wired or wireless.
With wire
Wired speakers can be either very inexpensive or advanced music centers. Wires may get in the way on the desk, but such devices reproduce sound without any problems even on old PCs.
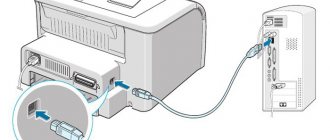
How to connect speakers to a home computer or laptop:
- Place the speakers on the table. For harmonious sound reproduction, place the right and left parts correctly - they are usually marked by the manufacturer with the letters R and L, respectively. If there are no markings on the right hand, place the speaker from which the power cable comes.
- Plug the power cable into a power outlet; if you have miniature USB speakers, connect them via a USB cable.
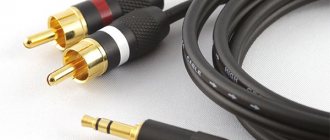
- To directly connect the speakers to your computer, start on the right side. Insert the cable tulips into the speaker connectors, matching the colors of the sockets - place white in the port with a white outline, red - with a red outline.
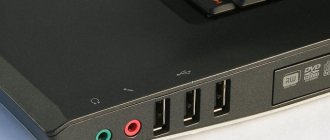
- Insert the third end of the wire into the computer audio jack located on the back or front panel. The corresponding slot is highlighted in green.
- Connect the right speaker to the left using a wire in two tulips.
- All that remains is to turn on the music to check the functionality of the devices.
Along with the speakers, you can also use a microphone, transmitting an audio signal from it. How to connect a microphone to a computer and at the same time output sound to speakers - insert the cord from the microphone into the correct jack on the computer. It is highlighted in pink and marked with an image of a microphone or the signature mic.
How to install and connect speakers with wires directly to a computer
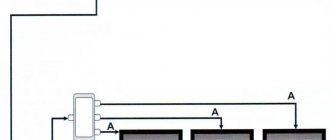
Modern speakers designed for connection to office equipment have two wires. One of them is network, and the other is for audio signal. Where should each of them be inserted to ensure a quality connection? The connection is made as follows:
- the power cord is plugged into the outlet;
- find on the body of the system unit (or laptop) a socket with a diameter of TRS 3.5 mm, corresponding to the plug of the second wire of the speakers;
- insert the audio cord into the hole;
IMPORTANT! On the back of the unit there may be two sockets of the same diameter for connecting audio equipment! In this case, you need to pay attention to the color of the hole or the designation next to the place where the signal exits. The connector should be green (see photo), and if not, then there is usually a picture of headphones next to it!
- after that, turn on the computer and speakers;
- if you have an installation disk, immediately after connecting the speakers, you need to launch it to adjust the drivers;
- after that, listen to the audio recording, thereby checking the performance of the speakers.
Modern small-size audio attributes may not have a 3.5mm TRS plug. They connect to the system unit using a USB connector or via Bluetooth.
ATTENTION! Regular older speaker models come with a multi-channel plug connection. Such acoustics are connected to the corresponding socket on the computer case or through a special adapter!
Problem solving
If there is no sound on the PC after connecting, this means one of the following problems:
- The sound is turned off in the settings - click on the speaker icon in the tray and look at the volume level. If set to 0 or muted, simply increase the volume.
- If the speakers themselves have a physical mute button, press it to activate the device.
- Check that the wires are connected correctly by checking the colors on the sockets and plugs.
- In Device Manager, check the drivers for your sound card, and if there are problems, reinstall them.
Music Center
If you have a music center at home, you can easily output sound from your computer to it without spending money on buying additional speakers. How to connect the music center to your computer:
- you will need a special wire, at one end of which there is a 3.5 minijack connector, at the other - a white and red tulip;
- insert tulips into the sockets of the music center of the corresponding color;
- place the other end into the PC audio output, marked in green;
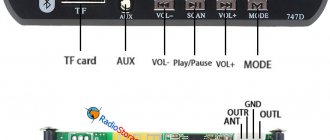
- turn on the center, select AUX mode - playback from an external source.
You can output sound to a 5.1 speaker system in the same way, observing the colors of the plugs. But the computer must have a discrete sound card installed, with an increased number of connectors. In addition to the usual outputs for a microphone and front speakers, it has inputs for additional speakers and a subwoofer, and digital S/PDIF.
Connecting speakers to a computer via S/PDIF (digital output)
When connecting 5.1 speakers via SPDIF, you will need an SPDIF cable (optical or coaxial).
The inputs and outputs of coaxial SPDIF are made on RCA type connectors. The digital signal is transmitted via a regular cable with appropriate connectors. In coaxial SPDIF, data is transmitted in the form of electrical pulses over ordinary wires, which are subject to all kinds of interference. In the receiving device, all these noises are filtered out, but the possibility of losing some data is still present.
Optical SPDIF uses an optical cable to transmit data. Its inputs and outputs are made on Toslink type connectors, which are closed with plugs, by which it is very easy to recognize this type of interface. Also in Creative and other sound cards there is an optical interface that uses a mini Toslink cable. An optical cable does not respond to magnetic fields at all, since data is transmitted in the form of light pulses. Therefore, it is believed that the optical digital data transmission interface is much better protected from external influences than the coaxial one. Satellite receivers use the optical type of the SPDIF interface.
The type of connection will depend on what type of interface for connecting external signal sources is available on the amplifier housing of your speaker system. You simply connect the cable to the digital output of your motherboard and connect it to the corresponding digital input connector on the speaker system (amplifier or subwoofer speaker system with built-in amplifier). It is necessary to change the signal output port in the audio card interface from analog to digital (unless, of course, the driver itself determines the connection to the digital output). The connection diagram for the speakers itself remains the same as described above. Games output sound directly without various compressions, so you still won’t be able to get more stereo sound from the game via S/PDIF. To correct this drawback, you must have a sound card that supports Dolby Digital Live or DTS Connect. These technologies allow multi-channel audio from a 5.1 or 7.1 game to be encoded on the fly into Dolby Digital or DTS and transmitted directly via S/PDIF. In practice, when one of these technologies is enabled, all audio played on the analog outputs will be re-encoded and sent to digital S/PDIF , however, often in order for the sound to be played on the analog output, you will have to set the analog outputs of the sound card as the default device in the Windows sound settings panel, and for many applications simply select analog outputs manually. For example, in normal mode, in the sound settings panel in Windows, selected S/PDIF as default device. The music player also lists S/PDIF. Now, to get 5.1 sound from any source you should:
- select one of the 5.1 audio encoding technologies Dolby Digital Live or DTS Connect in the sound card settings;
- in the Windows sound settings panel, select the analog outputs of the sound card as the main device;
Wireless
Wireless speakers are connected via Bluetooth. On laptops, the Bluetooth interface is usually built in by the manufacturer, but for a computer you will most likely need an adapter - a small device in the form of a flash drive that is inserted into a USB port. Here's how to connect Bluetooth speakers to your computer:
- activate the speakers;
- Press and hold the network connection button on the speaker;
- on a laptop, to turn on bluetooth, press the key combination Fn+F4 or Fn with another function button marked with a wireless connection icon;
- in Windows 10, click on the networks icon in the tray and turn on Bluetooth in the menu;
- In Windows 7, find and activate the connected speaker in the Devices and Printers section of the Start menu.
Also, in any version of Windows, you can launch “Device Manager” and click on the Bluetooth section. In the module properties, select "Enable". A wireless connection icon will appear in the tray, click on it and go to the “Add device” mode. The computer will find the audio source and offer to connect to the equipment.
Sound settings
After successfully connecting the acoustics, all you have to do is configure the sound parameters. How to set up speakers on a computer in Windows OS: right-click on the volume icon in the tray and go to “Sounds”. On the “Playback” tab, check that the correct device for transmitting audio is selected - your speakers. To ensure that music is always sent to the speakers, click on “Default” at the bottom.
In the same window, additional tools are available that will help in case of problems. Right-click on your speakers, select "Test" from the submenu to test the devices. You can also turn off the equipment from here.
Connecting and setting up speakers on your computer
There are many speaker models on the market from different manufacturers with varying numbers of elements and additional functions. The process of connecting and setting up all the necessary components depends on the complexity of the device. If you find it difficult to choose a suitable device, we recommend that you read our article on this topic, which you will find at the link below.
Step 1: Connection
First of all, you need to connect the speakers to the computer. The side panel of the motherboard contains all the necessary connectors for connection. Pay attention to the one that will be painted green. Sometimes there is also the inscription “Line OUT” next to it at the top. Take the cable from the speakers and insert it into this connector.
In addition, it should be noted that most computer cases also have a similar audio output on the front panel. You can make a connection through it, but sometimes it results in poor sound quality.
If the speakers are portable and are powered via a USB cable, then you should also insert it into a free port and turn on the device. Large speakers additionally need to be connected to an outlet.
Step 2: Installing Drivers and Codecs
Before setting up a newly connected device, you must make sure that all codecs and drivers are available for correct operation in the system, playing music and movies. First of all, we recommend checking the installed drivers, and this process is carried out as follows:
- Open Start and go to Control Panel.
Here select "Device Manager".
Scroll down to "Sound, Video and Game Devices" and expand it.
Here you should find a line with the audio driver. If it is missing, install it in any convenient way. You will find detailed instructions in our articles at the links below.
Sometimes music does not play on the computer. Most of this is due to missing codecs, but the reasons for this problem can be very diverse. Read about fixing the problem with playing music on your computer in our article at the link below.
Step 3: System Settings
Now that the connection is complete and all drivers are installed, you can proceed to system configuration of the newly connected speakers. This process is quite simple; you only need to perform a few steps:
Open Start and go to Control Panel.
Select the Sound option.
In the Playback tab, right-click on the speaker you are using and select Configure Speakers.
In the window that opens, you will need to configure the audio channels. You can change the parameters and perform the check immediately. Select the most suitable location option and click Next.
Users who have installed speakers with full-range or surround speakers will need to activate their operation by checking the appropriate icons in the setup window.
This setup wizard only takes a few steps to improve the sound, but you can achieve better results by manually editing the settings. You can do this using these instructions:
In the same “Playback” tab, select your speakers with the right mouse button and go to “Properties”.
In the “Level” tab you can only adjust the volume and balance of left and right. If you feel that one of the speakers is louder, adjust the balance in this window and go to the next tab.
In the "Enhancements" tab, you select sound effects for the current configuration. There are ambience effects, voice suppression, pitch shifting and an equalizer. Make the necessary settings and move on to the next tab.
All that remains is to look at “Advanced”. Here you configure the exclusive mode, set the bit depth and sampling frequency for use in the general mode.
After changing the parameters, before exiting, do not forget to click on “Apply” so that all the settings take effect.
Step 4: Realtek HD Setup
Most built-in sound cards use the HD Audio standard. The most common software package at the moment is Realtek HD Audio. Using this software, you can configure playback and recording. You can do it manually like this:
- First download the program from the official website and install it on your computer.
- Open Start and go to Control Panel.
Here, find "Realtek HD Manager".
A new window will open and you will immediately be taken to the “Speaker Configuration” tab. Here you can set the appropriate speaker settings and have the option to activate the full-range speakers.
In the “Sound Effect” tab, each user configures the parameters personally for himself. There is a ten-band equalizer, many different templates and blanks.
In the “Standard Format” tab, the same editing is carried out as in the system playback settings window, only Realtek HD also allows you to select the DVD and CD format.
Step 5: Using Third Party Software
If the built-in system settings and capabilities of Realtek HD are not enough for you, we recommend using third-party sound settings programs. Their functionality is focused specifically on this process, and they allow you to edit a wide variety of playback parameters. You can read more about them in our articles using the links below.
Troubleshooting
Sometimes the connection does not go smoothly and you notice that there is no sound on the computer. There are several main reasons that cause this problem, but first of all you should double-check the connection, the power button and the speakers' power connections. If this is not the problem, then you need to perform a system check. You will find all the instructions for solving the problem with missing sound in the articles linked below.
Today we examined in detail the process of how to set up speakers on a computer with Windows 7, 8, 10, looked at all the necessary steps step by step and talked about the possibilities of editing playback parameters. We hope that our article was useful to you and you were able to correctly connect and configure the speakers.
Source


