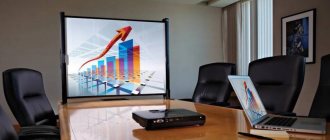
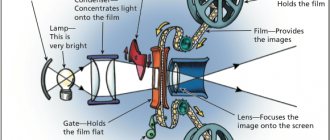
Despite the incredible popularity of modern television equipment, which amazes with its technical capabilities, display sizes and picture quality, traditional projectors remain a very useful tool.
Many business conferences, seminars, lectures and other important events cannot do without them. In order for the image to be transmitted accurately and efficiently, you need to pay due attention to finding a good screen, the cost of which is sometimes prohibitive. Fortunately, there are many ways and instructions on how to make a projection screen with your own hands, so anyone can save money and do without large financial expenses.
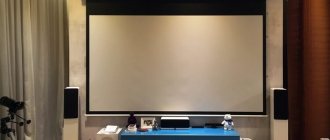
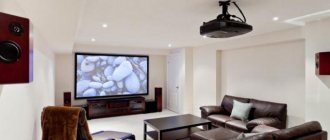
A projector screen is the main element of a home theater
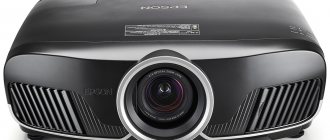
Projectors are often purchased for home theaters. They play videos with improved quality. The fan makes virtually no noise, and the ability to reproduce computer images makes them an indispensable device for everyday purposes and family movie watching.
If you have bought a projector for your home, then the next question that should concern you is purchasing a canvas . Its cost is very high, so you can try to make it yourself. It is important to understand that the main task of the canvas is to display the image in a high-quality manner.
Considering the interior properties of your room, you can use stretched or rolled fabrics . By the way, roll ones significantly save free space, so they are especially popular. They are also great for different interiors and display images with the most accurate color reproduction without distorting the picture. The presence of a special mechanism prevents damage to the fabric due to uniform tension and neat folding.
Tripod-mounted screens are not always effective and can be difficult to use in tight spaces. The screen on a tripod can easily be damaged during transportation. It can also be spread by a pet or child.
The importance of choosing the right screen surface
The main purpose of using a projection screen is to ensure that the projected image is projected towards the audience while maintaining or even increasing the brightness or contrast levels. When choosing a projection screen and projection surface, there are several factors to consider that affect the perceived image quality. All of these factors play a very important role and require some coordination to create optimal projection quality.
A projection screen is an essential part of any presentation or home theater system. No matter how good the projector itself is, the image must fall on a surface that will allow many viewers to comfortably perceive graphics and text. The technical characteristics of a projection screen are partly determined by the controllability and ease of installation, but the most important part of the screen is the projection surface. The choice of canvas type determines how the projected image appears on the screen.
When choosing a projection surface, three factors play an important role: the level of ambient light, the brightness of the projector (light output) and its location. To obtain an optimal image, these variables must be adjusted to each other.
The projector can be located in front of the projection screen or behind it. It can also be suspended from the ceiling or placed on a table. The projection surface has a special coating that interacts with the light falling on it, so it is necessary to choose the surface of the projection surface correctly.
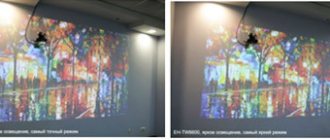
Ambient light is the amount of unwanted light in a room that can negatively affect projection. The source of external illumination can be windows or room lighting. External light on the projection screen makes the image appear dimmer. This can be counteracted either by using window shades to darken the room, by using a projector with a higher light output, or by using a projection surface with increased reflectance.
The perceived amount of light reflected by a projection screen is expressed in lux units. Optimal image quality and clarity is achieved when the projector's light output, projection screen size and screen surface gain are properly matched to each other. This is achieved when the lux ratio of the projected image to the wall behind is at least 5:1. As a general principle, we can say that with normal ambient light, the background luminous output is approximately 80 lux, which means the amount of light reflected by the projection screen should be 400 lux. With low ambient light, the background lux value is about 20, therefore the screen lux value should be more than 100.
Reflectance is measured by “gain”. “Reinforcement” is defined according to the generally accepted standard: Magnesium Carbonate (MgCO 3). MgCO 3 does not absorb the light projected onto the surface, but reflects it perfectly evenly. The matte white surface of the Matte White canvas provides standard reflection, its gain is set to 1.0.
The viewing angle of the projection surface shows the extent to which the projected image can be clearly seen.
The greater the viewing angle relative to the central axis of the screen, the lower the brightness of the image. The maximum viewing angle is determined by the value corresponding to a 50% reduction in perceived light intensity. This definition is considered a generally accepted standard when determining image quality. Characteristics of screen surfaces
| Characteristic | Standard Definition | A high resolution | |
| No tension | With tension | ||
| Neutral color | Matte White | Matte White | HD Progressive 1.1 |
| Contrast | High Contrast | High Contrast Cinema Vision | HD Progressive 0.6 HD Progressive 0.9 |
| With reflection effect | Datalux | Pearlescent | HD Progressive 1.3 |
| Rear projection | Retrotex | Da-Tex® | Dual Vision Ultra Wide Angle |
Our recommendations for choosing the type of screen surface
| Permission | Pixels | Recommended projection surfaces | |
| XGA | 1024 x 768 | Fiberglass | Standard Definition |
| HD 720p | 1280 x 720 | ||
| WXGA | 1280 x 800 | ||
| SXGA | 1280 x 1024 | Vinyl (tensioned) | Standard Definition |
| SXGA+ | 1400 x 1050 | ||
| UXGA | 1600 x 1200 | ||
| HD 1080p | 1920 x 1080 | Vinyl (tensioned) | Recommended High Resolution |
| WUXGA | 1920 x 1200 | ||
| QXGA (2K) | 2048 x 1536 | Vinyl (tensioned) | Required high resolution |
| WQXGA(2K) | 2560 x 1600 | ||
| QSXGA (2K) | 2560 x 2048 | ||
| 4K | 4096 x 2160 | ||
Benefits of using a tensioned projection screen:
Non-tensioned screens are only supported vertically, which can result in waves and ripples in the projected image. Tension screens are supported both vertically and horizontally, creating a uniform, flat surface for the projected image.
The tension system ensures that the projection screen surface is perfectly flat. Thanks to the canvas tension system, constant tension of the screen surface is ensured and, as a result, ideal image quality. The smooth surface of the canvas allows you to get the most out of the projector: not a single pixel will be lost or distorted. When details matter, a perfectly flat projection surface makes all the difference.
Non-tensioned fiberglass canvas has a visible rough texture that creates image noise and greatly reduces image quality. Vinyl projection surfaces used in tensioned screens have a smoother surface and retain much better image quality, making them ideal for high-definition projectors.
A tensioned projection surface can withstand changes in temperature and humidity much better than screens without a tension system. The elasticity of the tensioned material results in an even longer product life cycle.
For high definition images, only the tension screen should be used. It is on a tension screen that the quality of the projected image will be maximum. Fiberglass sheets are a rigid material and are used in electrically and mechanically driven roller screens; they cannot reproduce HD quality because the material is only stretched vertically, which can cause individual pixels in the projected image to elongate and warp.
Please note: When using short or ultra-short throw lenses, it is essential to use a tensioned projection surface. Using short throw or ultra short throw lenses reduces the distance between the projector and the projection screen. This results in a situation in which the projected light reaches the projection surface at an extreme angle. It is for this reason that it is recommended to use a tensioned projection surface to avoid image distortion.
Front projection canvases
| Non-tensioned Front Projection Screens - Standard Definition (up to HD 1080p) | |
| Matte White Matte White fiberglass canvas is designed for low-resolution (up to HD) projection in controlled lighting environments, delivering distortion-free color and black-and-white images. Seamless screen sizes vary depending on model | High Contrast High Contrast is a fiberglass surface with a gray base that gives deeper blacks and higher contrast. Projection screens with this surface are designed for projecting low resolution images (up to HD) and in moderate lighting conditions. The width of the canvas can be any with a height of up to 300 cm. |
| Datalux Datalux is a reflective fiberglass backing for use with low power output and low resolution (up to HD) projectors. Provides high brightness of the displayed projection signal at a reduced viewing angle. Suitable for environments with unregulated lighting levels. The width of the canvas can be any with a height of up to 240 cm. | Matte White Sound Especially for those who value the highest sound quality, the material of this canvas allows the speakers to be placed directly behind the screen. With virtually no loss of sound or damage to the image, the fabric of this canvas is perforated, allowing sound waves to pass through the screen. At the same time, the canvas has optical characteristics identical to Matte White. This is a vinyl based material. |
| Tensioned Front Projection Screens - Standard Definition (up to HD 1080p) | |
| Matte White (with tension) Matte White stretched sheets provide a smoother vinyl surface than non-tensioned Matte White sheets. Color images work well on white surfaces in rooms with controlled lighting levels. Seamless screen of any width with a height of up to 488 cm. | Pearlescent Pearlescent is highly reflective and is designed for use in environments where a moderate viewing angle is required. This canvas is ideal for projecting video from a low output projector or under bright lighting conditions. Seamless screen of any width with a height of up to 488 cm. |
| High Contrast Cinema Vision (HCCV) The gray base of the High Contrast Cinema Vision canvas produces blacks with greater depth, thereby enhancing contrast, while also increasing reflectivity and brightness in moderately lit environments. Ideal for projecting video images. Seamless screen of any width with a height of up to 488 cm. | |
| Tensioned canvases for high resolution image projection (HD 1080p and above) | |
| HD Progressive 0.6 Ideal for projectors with high lumen output or for applications where projector brightness and screen size require low gain, the gray base helps maintain good levels of image contrast in bright ambient lighting conditions. In low ambient light conditions, HD Progressive 0.6 provides deep contrast for richer images and is commonly used for projecting video images. Seamless screen of any width with a height of up to 488 cm. | HD Progressive 0.9 Ideal for medium to high lumen projectors, the light gray surface achieves the perfect balance between color reproduction and image contrast. Seamless screen of any width with a height of up to 488 cm. |
| HD Progressive 1.1 Ideal for applications where projector brightness and screen size require high gain, the white surface of the canvas maintains vibrant color reproduction and white field uniformity. Seamless screen of any width with a height of up to 488 cm. | HD Progressive 1.3 Ideal for applications where projector brightness and screen size require high gain, HD Progressive's pure white surface produces color-perfect images and greater flexibility in bright ambient light conditions. Even the smallest details will be visible in videos, graphs and diagrams. An excellent option for corporate use. Seamless screen of any width with a height of up to 488 cm. |
| HD Progressive 1.1 Perf Ideal for applications where projector brightness and screen size require high gain, while maintaining vibrant color and uniformity on the white surface of the canvas. The perforated vinyl sheet allows you to place the speaker system behind the screen. The width of the canvas can be any with a height of up to 240 cm. | |
Rear projection canvases
| Non-tensioned screens for front and rear projection - Standard Definition (up to HD 1080p) | Flexible Tensioned Rear Projection Fabrics - Standard Definition (up to HD 1080p) |
| Retrotex Neutral gray vinyl rear projection projection screen that provides increased contrast while maintaining uniformity and color rendition. As a versatile rear projection surface, Retrotex is a good choice for applications where ambient light is controlled and where a wide viewing angle is required. This is a vinyl based canvas. | Da-Tex® Da-Tex® is a rear-projection vinyl fabric with a gray base that is ideal for brightly lit environments with limited viewing angles. High transmission and low reflectance ensure optimal viewing. Excellent color rendition and image contrast. Seamless screen of any width with a height of up to 488 cm. |
| Flexible Tensioned Rear Projection Fabrics - High Definition (HD 1080p and above) | |
| Dual Vision The flexible vinyl surface of the Dual Vision canvas is ideal for rear projection but can also be used for front projection. The Dual Vision canvas has proven itself when projecting video images under controlled lighting conditions. Thanks to the fairly wide viewing cone and the light gray tint of the canvas, you can see a high-contrast image from anywhere in the room without color distortion. Seamless screen of any width with a height of up to 488 cm. | Ultra Wide Angle Ultra Wide Angle is a flexible vinyl rear projection surface designed for wide viewing angles in controlled lighting conditions. Ideal for stitched projection from multiple projectors or widescreen projection from multiple short throw projectors. When using Ultra Wide Angle, the likelihood of a “hot spot” effect is significantly reduced. Seamless screen of any width with a height of up to 488 cm. |
Other articles from the category "Projection screens and coverings"
- Choosing the right projector screen
- When is the canvas suitable for 4K and 8K projection?
- PRO-PROJECTOR official dealer of PROJECTA
Return to list
Choosing a quality fabric
As mentioned above, the quality of the canvas is the main characteristic of a projector screen. The implementation of two important points depends on it:
- High-quality picture transmission.
- Correct distribution of light towards the viewer.
When choosing, you need to take into account the characteristics of the room, viewing angle, and placement of the projector on the ceiling or table. Don’t forget to pay attention to the lighting in the room, as well as the brightness of the projector.
It's all about the size
If you intend to build a projector screen with your own hands from a banner or special fabric, do not forget to carry out a series of calculations to select the appropriate dimensions and correctly determine other characteristics, such as the placement of seats and room design. The canvas is placed directly in front of the audience, but not in front of the projector itself. In this case, the event will be accompanied by a high-quality computer presentation, which will be available to every viewer.
If you have to use a wall-mounted screen for the projector, its height should be 1/6 of the distance between the canvas and the last row of spectators .
In this case, the text will be readable and clear. Ideally, the feature is provided that the first row of spectators is placed at a distance of two canvas heights. Such a gap is considered the minimum from which it is comfortable to read the information offered. The lower area of the canvas is placed at a height of 1.2 meters from the floor. If you take this feature into account, viewers from the last row will be able to notice all the data and not miss anything important.
What to make a projector screen from?
To make projector screens yourself, the following materials are usually used (we list them along with their advantages and disadvantages):
- Raincoat fabric . A good option. Not afraid of moisture, hand touch, tobacco smoke.
- Thick canvas . Thick fabric is used, for example, new white sheets. To improve reflectivity, the fabric can be additionally painted with white paint. You can also make an opaque reflective backing, for example, from thick black polyethylene.
- Vinyl . One of the best options in terms of display quality, however, some problems are possible. The price of vinyl is quite high, you will have to look for a roll of a suitable width, and most importantly, when working with it you need to be extremely careful so as not to tear or stretch the material. In addition, the surface of the final product will also be very sensitive.
- Stretch ceiling . If you have the skill to install French ceilings, this may be your option. You just need to choose the right fabric. Stretch it onto a frame made from a branded profile - and a great screen is ready!
- Banner fabric . One of the most popular options. It is highly durable (after all, the material is intended for outdoor advertising, exposure to frost, direct sunlight and wind). Has a good reflectance. Banner rolls on the market have a wide range of sizes, which will allow you to easily select the fabric of the desired width.
Home craftsmen with experience in making screens recommend using fabric with an opaque inner layer (“blackout”).
- Fibreboard/cardboard . A good option at the very last limit of cheapness, on the verge of losing the properties of the screen. The final product will not be waterproof, durable or impressive, but will perform its function quite well.
- Drywall . Another popular option. The material is very easy to process, but fragile and relatively heavy. It is almost impossible to level out a deformed area if it appears. Simply cut out a rectangle of the desired size and paint it with matte white paint.
- Paint on a specially prepared area of the wall . One of the simplest options. Pros: making such a screen is simple, quick and cheap. In addition, such a screen will never fall. Cons - it cannot be moved if the need arises.
To summarize, we see that there are only two approaches: painting a section of wall/plasterboard or using some kind of sheet material, which is usually stretched over a removable frame.
Next, we will analyze both options, describing in detail each stage of creating a screen and a frame for it.
Installation Rules
The quality of the image will depend on how correctly the projection equipment is installed. There are only two important tasks that need to be solved :
- Choose the location of the canvas.
- Select image size.
When choosing the appropriate location for your projector and screen, be sure to consider the room size, layout, and personal preferences. Also, the choice may depend on the width and height of the canvas, the location of the outlet, the distance to the devices and other subtleties.
Projectors are installed in several positions:
- In front of the screen on the table.
- In front of the screen on the ceiling.
- Behind on the table.
- Behind on the ceiling.
To adjust the equipment, use a special remote control or push-button control of projectors . And if your homemade screen is made exactly to the established requirements, it will be as easy to operate as a shop canvas.
The second point of installation of the projector and the accompanying unit - the screen, depends on the size of the picture that will be shown on the homemade monitor. The width and height are determined by the distance between the screen and the projector, the video signal format and magnification. It is important to place the equipment on a flat horizontal surface so that the beam falls strictly perpendicular to the center of the canvas.
If these steps are completed correctly, you can begin connecting the projector. It's no secret that on its back there are a large number of different connectors. In most cases, users connect the computer to the device through the same input. True, if you need to show video rather than slides, you will most likely have to change the base connector to another. Typically this is HDMI capable of playing audio files.
Alternative solutions
If you can’t go to a hardware store to buy a PVC sheet, you can make do with alternative options. According to users, instead of a screen you can use:
- Clean apartment wall. It is important that the surface on top is not used. Perhaps there is a white door, cabinet or refrigerator in the house. They are also quite suitable.
- Often people project a picture onto a white ceiling. In this case, you will have to increase the number of pillows that will be laid on the floor. You will also have to fix the projector not in a horizontal position, but in a vertical one.
- Large flip calendars, which are turned to the audience with the white side, are often used as a screen. A good solution could be a white shelf from a closet or chest of drawers, which is placed on a stool and leans against the wall. The picture may not be accurate if projected onto a white Roman shade or light-colored curtain.
That's all, now you know what the features of projection equipment are and how to make a canvas for a projector with your own hands.
Originally posted 2017-12-21 06:22:24.
DIY projector screen
To quickly prepare a surface for displaying multimedia, you don’t have to run to the nearest electronics store. If you're smart enough, you can make a homemade projector screen from whatever you have on hand. There are at least five options for solving the problem. Let's look at them one by one.
Screen material
A homemade projector screen should have a smooth surface and a neutral color that will not distort the image. To do this, you can use finished fabric (or raw materials), linens, solid materials and even film.
Banner fabric
The first material suitable as a display covering is banner fabric. This is a composite material consisting of a durable base and elastic filler. Manufacturing technology allows us to achieve high strength, wear resistance and low light transmission. These criteria, among other things, also meet the characteristics of a high-quality screen. It can be mounted by tension or gluing to a hard surface. Such coatings are suitable for outdoor projectors.
PVC film
A homemade projector screen can be made into anything you want, even transparent. Cheap PVC film will help with this. The material is delicate, so it requires careful installation and careful handling. If you get tired of the transparent screen, you can put a regular opaque film of black or white underneath it.
Raincoat and vinyl fabric
Relatively inexpensive options for using fabric covering. As for raincoat fabric, it will not tear even from rough tension, so it can be used many times. But vinyl is used for stationary screens, since its tensile strength is low.
Thick linen fabric
Linen fabric has a good glow effect. It can be used anywhere, and the availability of the material contributes to this. Even a white sheet, stretched on a frame or in some other way, can serve as a screen. If such a home-made projector screen will be stationary, the fabric can be additionally painted white.
Drywall
Among hard surfaces, the leader is plasterboard and walls or partitions made from it. The HA sheet in its original form is capable of providing an image of average quality. But a plasterboard partition covered with high-quality paint will not be inferior to many options from our list.
